|
Brian Jackson’s (300G) Reef Aquarium
Introduction and Background
I have been fascinated with marine life since I was a young boy and always dreamed of a saltwater tank. That dream, and now obsession, started five years ago when a very good friend of mine had to downgrade tanks and gave me a deal on his 100-gallon saltwater setup up that I could not refuse. I bought numerous saltwater how-to books and discovered Reef Central which aided me in my quest for knowledge. When I told my wife that I wanted to spend over $500 on live rock, she smiled and said “okay” but had that twinkle in her eye which I knew meant I would be paying for it later. My 100-gallon started off as a ‘softies’ tank filled with ricordea and zoanthids with the usual first-timer horrible equipment. My wife got hooked just as fast as I did and soon she had a 37 gallon predator tank and a one gallon reef in addition to my 20-gallon reef, 10 gallon frag tank and 100-gallon reef in a 700sqft apartment. When we finally moved into a house in 2005, we upgraded and combined our tanks into my 150-gallon and eventually her 75-gallon tank. In 2006 we finished college, bought a house, moved cities and by Christmas of 2006, we started building the 300-gallon reef.
 |
The Setup and Move
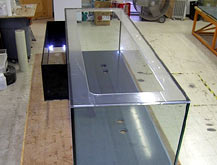
We moved from San Antonio Texas to Pflugerville Texas, which is an hour and a half north of San Antonio. I overlapped the lease of the San Antonio house with the purchase of our home in Pflugerville so that I could get a new tank up and running to make the transfer easier. I never want move a full tank and re-set it up. It is way easier to do a transfer from one tank to another but is still no easy feat. I contacted Kingfish Aquariums out of Austin Texas to find me a tank supplier that could get me a super quality tank in a short time frame. I had one month to setup the new tank and transfer both tanks into it before my lease was up. Kingfish got me in touch with A.G.E. (Acrylic and Glass Exhibits) who built my dream tank.
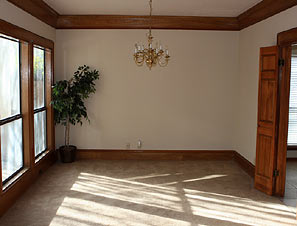
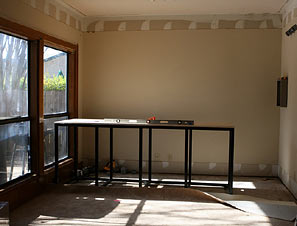
I bought all the supplies - or least I thought I did - before the tank arrived so that when it showed up I could quickly get it plumbed and running. I called in a favor to a friend who does acrylic sumps as a side job and gave him my sketches of the sump and he got to work. The tank and fishroom were setup in what was supposed to be the formal dining room…but not any longer. Again, I saw the same twinkle in my wife’s eye so I knew I would be paying for this decision as well. We started deconstructing the dining room in preparations for the incoming tank by pulling out the carpet and taking down the crown molding. On December 22rd, 2006, the tank showed up four hours early, and with no way to unload that crate from the semi-truck. I jumped on the phone, calling in favors from across Texas, to find help getting the tank moved in. All the normal-size forklifts were rented out so we had to rent a huge fork lift at the local equipment rental place. It was very scary there for a bit but we were able to get the tank off the truck. With my friends, family, and the help of six professional glass carrying suction cups, we moved the beast into the house and onto the metal stand A.G.E. made.
Now that the tank was on the stand, we adjusted the feet to match the slope of the dining room floor. The tank has a ¾” PVC bottom which was CNC cut to use Hayward hex-shape bulkheads. Remember my thinking I had all the equipment...well I opened the box that should have been the hex-shaped bulkheads to find regular old round ones. This put a serious kink in my plumbing schedule. To top it off, it was the holiday weekend and no one had them in stock or were not open for business. Note to anyone who starts a new tank: when you buy new equipment take it out of the box before you need to plumb it in just to make sure you have the right thing. Kingfish Aquariums helped me get started with the plumbing by installing the closed loop and Ocean Motions four-way.
By December 31st I had the tank plumbed, saltwater and sand added, and was gearing up for the transfer; I had one week left to get the transfer done. Mind you I was driving every other day for a month to make sure both tanks in San Antonio were topped off, fed and healthy. Each trip took about five hours.
Bright and early on January 3rd 2007 we arrived in San Antonio at 7am and rented a U-Haul truck. We had eight large plastic containers, two 100gallon trash cans and over 350 plastic bags of all different sizes for the livestock and rock to ride home in. I didn't think it would take as long as it did, and I thought we would be back in Pflugerville in the late afternoon but I was very wrong. We started bagging coral, first from both the 150- and 75-gallon and put them into their own plastic containers. Once the coral was out of the way, we moved as much of the rock into the trash cans so that we could catch the fish. All of this took hours and hours; we finally caught the fish and put them into their own plastic containers, then I put tank water into the large containers to help ease the pressure on the bags. We started loading the U-Haul, filling the heated cab area with coral and fish due to the cold weather, and put the rock in the rear section of the truck. When we finally finished loading everything, we looked down at the clock and it read 10:37 p.m.
Two hours later we arrived in Pflugerville and started unloading all the livestock and rock into the house. We floated the bags of coral and fish in the tank for about 20 minutes while I laid out a large plastic tarp on the floor and started to lay the rock out on it so we could see all the pieces we had to work with. I personally am horrible at aquascaping, but I am fortunate to have a wife who is amazing at it. So for the next few hours she would ask for rock by calling out its shape and I would try to find the correct rock. I didn't always get it right on the first try but it all worked out. By 3:30 a.m. the rockwork was finished and it was my turn to get wet. I took the corals out of their bags and placed them into the tank. I tried my best to find spots to lay the colonies and frags so that they would not get covered by sand. By 5:30 a.m. I finished putting the last coral in the tank, and was about to fall over from exhaustion. After that super long day we only lost three fish. All the corals, except for a couple of small frags, made it just fine.
 |
Display and System Information
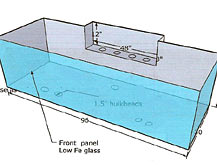
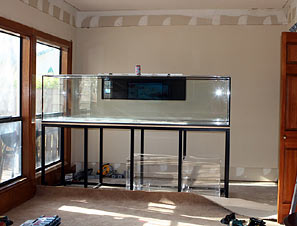
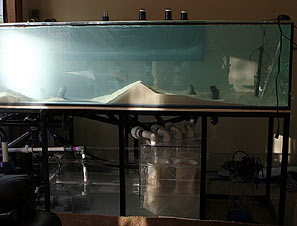
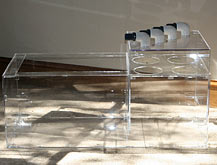
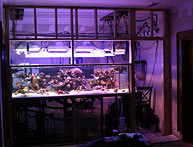
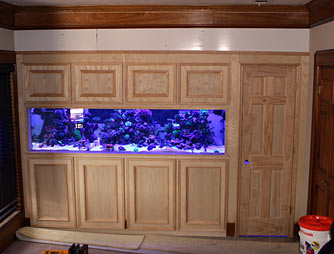
My tank measures 96” long x 30” wide x 25” tall with Starphire® glass on front panel, ¾” PVC bottom, ¾” acrylic Eurobrace around top of tank and an external overflow. The tank sits on steel stand which is powdercoated with adjustable leveling feet. A one to two inch sand bed was added for aesthetics and as a bed for our wrasses.
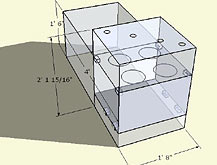
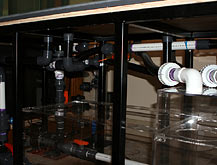
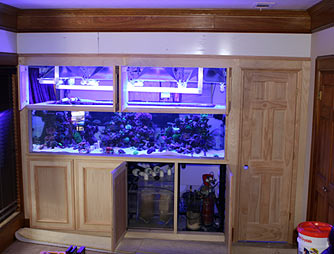
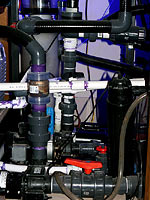
The external overflow is made of acrylic and has four 1.5” bulkheads for drains. The overflow was cut with a high pressure water cutter and acrylic teeth were inset. I designed the sump to have four seven inch diameter holes in the main chamber to hold four filter socks. A Sequence Dart (return pump), an Ehiem 1262 (skimmer feed pump), and an Eheim 1250 (calcium reactor feed pump) all pull from the sump and return to their respective equipment. The return pump feeds directly into a WavySea Plus, which is attached to the eurobracing.
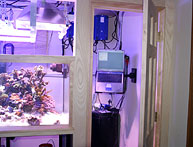
Our new house used both natural gas and a 100 Amp breaker box, which had to be upgraded to support 200 Amps total. The tank now has its own 100 Amp service with a dedicated breaker box. A faux wall was installed by a neighbor who matched the wood work and trim found throughout the rest of the house. We then stained and applied a clear-coat which took my wife and I about nine hours.
Filtration and Water Quality
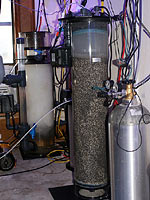
All water used comes from a 300GPD RO/DI unit which has three Reverse Osmosis membranes, (1) one micron pre-filter, (2) chlorine & chloramine-removal canisters, (2) de-ionized resin canisters and includes an inline TDS meter. I also run a 36-watt Coralife Turbo Twist and a 40-watt Pentair Aquatics UV sterilizer connected to the sump. A canister filter filled with carbon helps maintain water quality and is changed every three weeks. I use a Deltec AP902 protein skimmer which is very efficient in removing organics. The four drains from the overflow each drain into one of four 100 micron filter socks.
Water Parameters
- Calcium: ~ 380 ppm
- Alkalinity: 9-10 dKH
- Nitrite: undetectable
- Nitrate: undetectable
- Phosphate: 0.04 ppm
- Magnesium: 1450 ppm
- Specific Gravity: ~ 1.025
- Temperature: 77-78° F
- pH: 7.9-8.0
|
Alkalinity and calcium are tested weekly even though they hardly ever change because my tank is pretty dialed in. Magnesium is checked monthly as well as salinity and phosphate.
Calcium, Alkalinity, and Magnesium Maintenance
I ran a Deltec PF601S calcium reactor up until recently when I upgraded to a Deltec PF1001. The main reason for upgrading is that I went through six full chambers of reactor media this year and I wanted a larger volume of media so I would not have to take the reactor apart so often. Dolomite was added to the reactor to maintain magnesium above 1350 ppm without my having to manually dose liquid magnesium. All top off water is run through a MRC Kalk reactor to help buffer pH and help with the calcium demand.
Temperature
I maintain the tank temperature around 77 degrees Fahrenheit with the help of a one horsepower chiller which is plumbed through the outside wall and fed by a Panworld 250ps pump. The chiller is controlled, for now, by a Johnson temperature controller. The tank fluctuates between 77 and 78 degrees. In the tank room behind the tank, I also run two greenhouse fans which blow across the surface of the water, reducing the heat coming from the metal halide fixtures. To help control the heat and humidity I utilize a Fantech RVF 4XL external exhaust fan hooked up to an Air 2 Temp & Humidity controller as well as a window air conditioning unit.
Controller
My tank is controlled by an Aquacontroller 2 which regulates lights, return pump, protein skimmer, closed loop pump, chiller pump, and Tunze Stream pumps. I am going to upgrade to the BioMatix Controller so it can control the equipment & lighting, monitor the tank, and even contact me in the case of a power failure when I am away.
Circulation
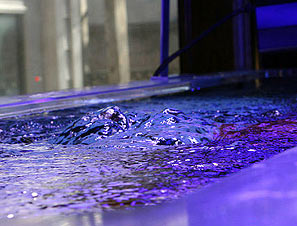
The main circulation is supplied by a closed loop using a Sequence Hammerhead pump that flows into an Ocean Motions four-way device. There are four nozzles located on the bottom of the tank, with two on the right side and two on the left side. The four way device switches the flow so that one nozzle on each side is on at the same time, and upon switching, the other two nozzles provide alternate flow. The nozzles are faced slightly up and across so it makes the surface of the tank look like a jacuzzi. Two Tunze 6100s using a 7095 Multicontroller help add random flow. The Sequence Dart return pump flows into the WavySea Plus, a unit that rotates or sweeps the return water continuously back and forth. I have always believed in super high flow in my SPS-dominated tanks and I think I have finally got the flow right in this tank.
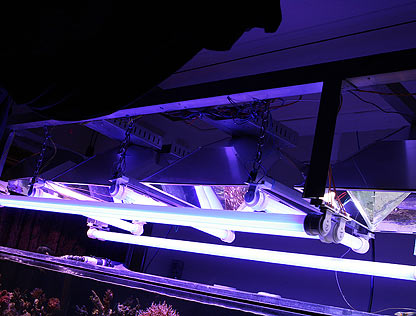
Lighting
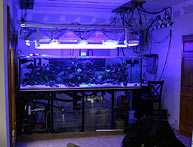
I built the light rack out of aluminum and used rivets to attach the parts together as well as the Lumenarc reflectors and IceCap VHO ballasts. The light rack is secured to the ceiling with bicycle lifts. When I need to work in my tank, I can pull the light rack up and out of the way. Without the use of the Lumenarc reflectors I would have added two more metal halide bulbs to cover the eight foot span of the tank. These reflectors, in combination with the VHO lighting, make for a really bright tank which we enjoy.
|
Photo Period
 Metal Halides turn on at 1 p.m. and turn off at 6:30 p.m. Metal Halides turn on at 1 p.m. and turn off at 6:30 p.m.
-- Lights come on one at a time in 20 minute intervals
VHOs turn on at 8:30 a.m. and turn off at 9:30 p.m. |
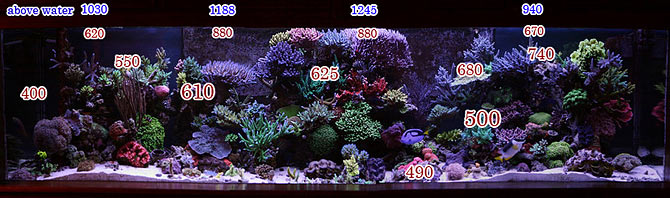
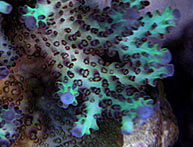
Mike Josephs (Dudester) was kind enough to bring over his PAR meter. We took readings at various levels in the tank then notated the results on the reef image, seen below. The larger numbers (in font size) are measurements closer to the front of the tank while the smaller numbers (in font size; not numerical value) were taken towards the back. We did this to show depth and hopefully make it easier to understand the various values in different areas of the tank.
Husbandry
I perform a minimum of a 100-gallon water change once a month. I have a drain line hooked into my chiller feed line so that with the twist of a gate valve it empties the sump into our drain outside. This makes water changes much easier and less of a hassle. I also try to clean the filter socks every three to four days and have twelve of them in rotation. Once a month I vacuum the bottom of the sump with a shopvac. I stir the sand bed on each water change trying to keep it clean. Metal Halide bulbs are replaced at six to seven months, and VHO bulbs are replaced at nine to ten months. Using a cleaning magnet, I scrape the glass every few days as a light film will accumulate otherwise.
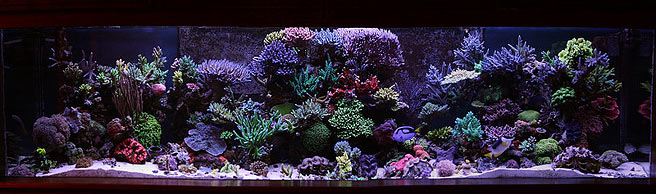
Inhabitants
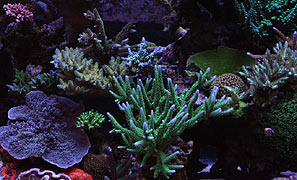
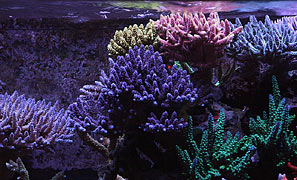
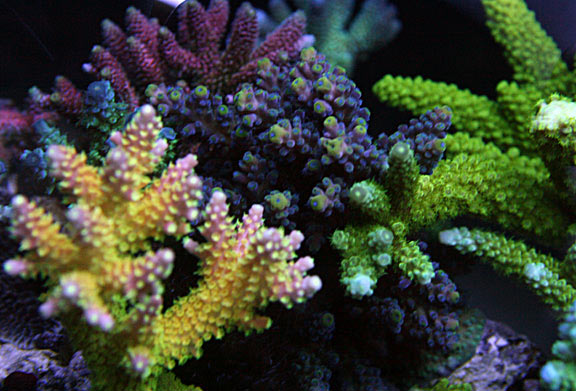
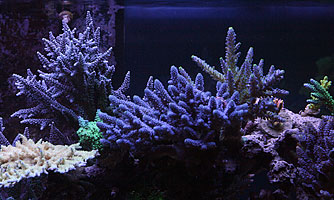
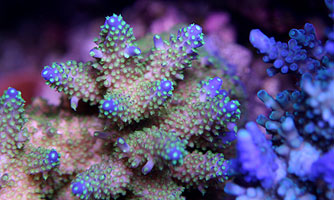
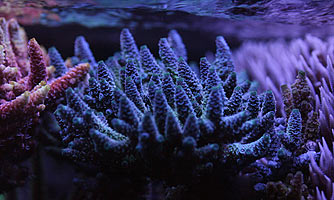
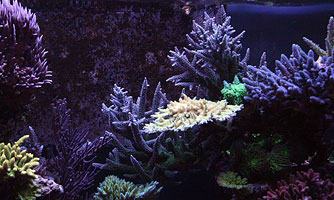
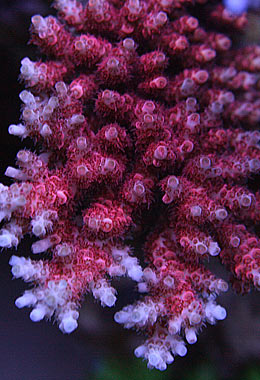
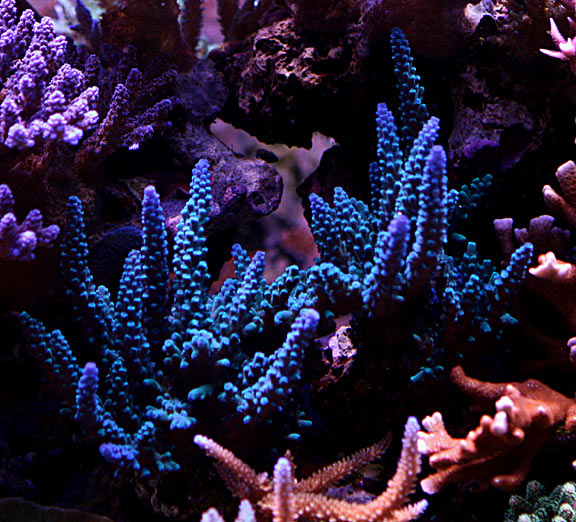
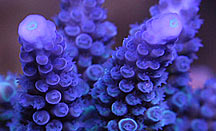
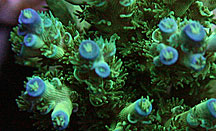
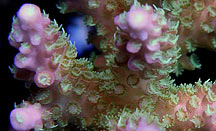
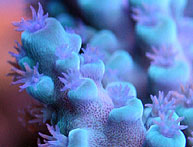
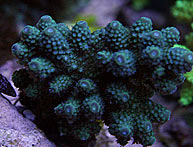
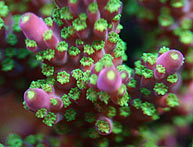
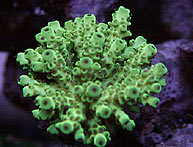
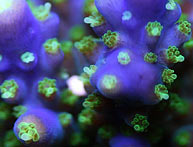
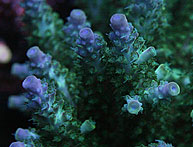
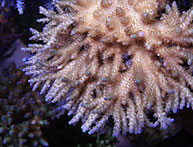
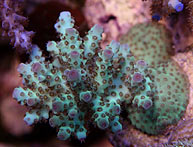
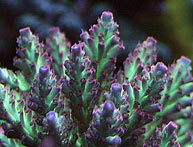
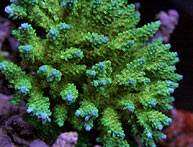
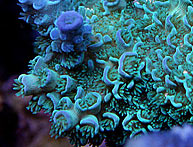
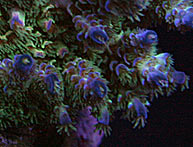
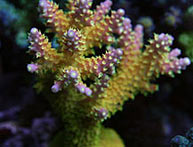
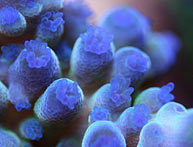
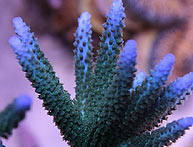
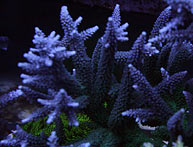
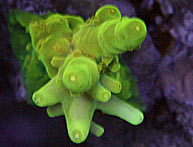
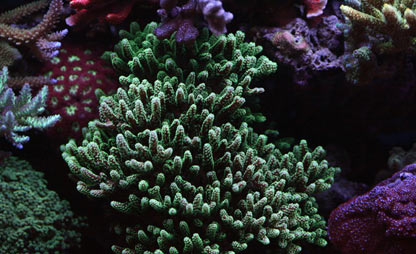
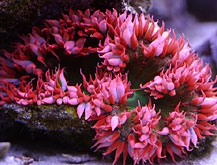
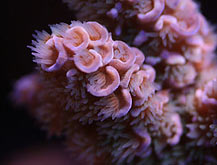
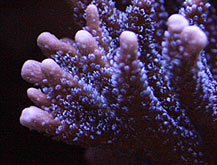
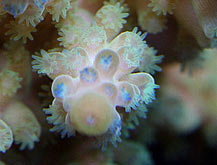
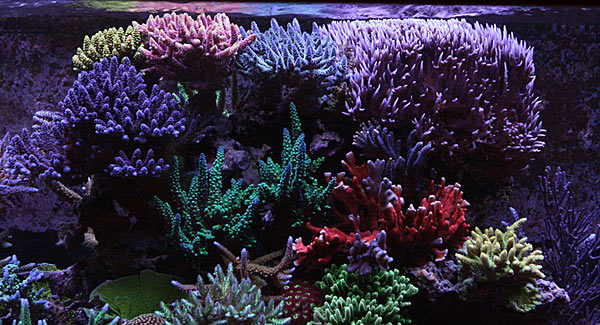
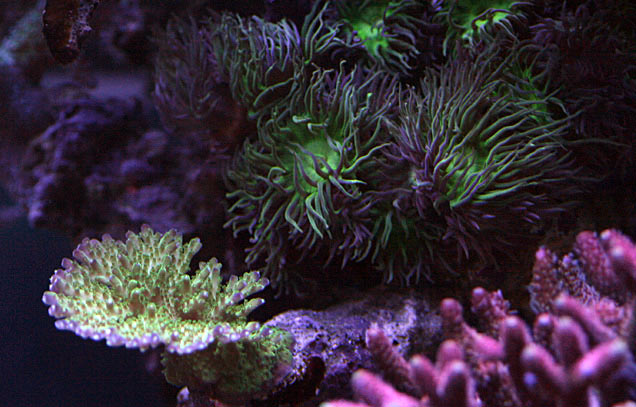
The tank is primarily SPS-dominated and I have way too many to list but I do have a few favorites which are listed below. LPS include green wall hammer, pink and green frogspawn, pink and green hammer, octospawn, galaxea, maze brain, pink chalice, bubble gum chalice, hybrid torch/hammer, Duncans, various micromussa and zoanthids. We also have two photosynthetic gorgonians which we have had for over 3 years now.
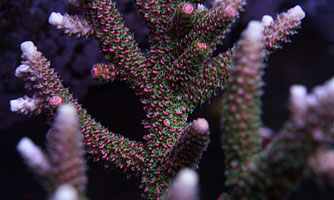
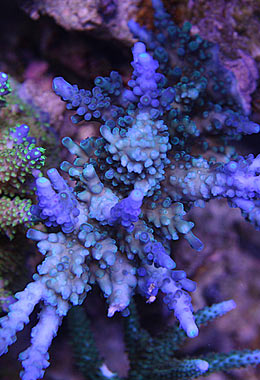
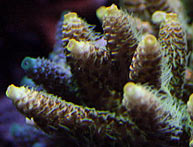
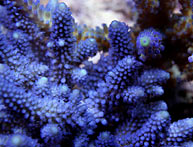
Some SPS Corals:
Acropora sp.
“Tub's Mystic blue”
Acropora efflorescens “Blue”
Acropora efflorescens “Green and Purple”
Acropora solitaryensis
Acropora lovelli "Mike Paletta Turquoise"
Acropora millepora “Bubble Gum Pink “
Acropora millepora “Cranberry Blue”
Acropora sp.
“Mike Paletta Pink and Green”
Acropora sp.
“Pink Lemonade”
Acropora sp.
“Greg Hiller Aqua Delight”
Acropora sp.
“Tubs Pink Jade”
Acropora sp.
“Ultimate’s Pink Stag”
Acropora sp.
“Ultimate’s Blue Stag”
Acropora tenius “Crayola tenius” |
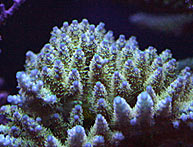
Acropora tortuosa “Oregon Tort”
Acropora tortuosa “Cali Tort”
Acropora tortuosa “Oregon Tort”
Acropora tortuosa “Texas Tort”
Acropora yongei “Super Blue Slimer”
Acropora yongei “Mike Paletta Baby Blue Slimer”
Acropora sp. “Blue Turaki”
Acropora sp. “ Starry Night”
Acropora Carolina “Maximus’ Yellow”
Acropora hyacinthus “Rose Red”
Montipora digitata “The Original Superman”
Montipora sp. “Sunset Montipora”
Montipora sp. “Tyree Flower Petal”
|
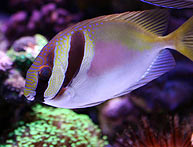
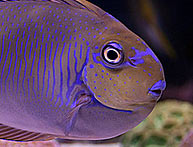
Fish
Mystery Wrasse (3”)
Blue Star Leopard Wrasse (3”)
Green Coris Wrasse (2”)
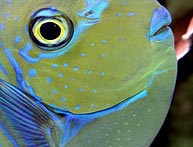
Purple Tang (4”)
Vlamingii Tang (10”+)
Blue Hippo Tang (5”)
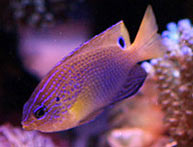
Princess Damsel (2”)
Lawnmower Blenny (5”)
|
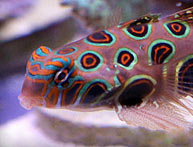
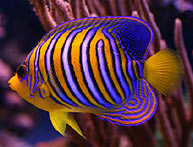
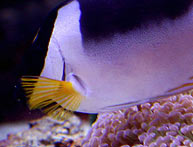
Lantern Basslet (2”)
True Percula (1.5”)
Black Ocellaris (2”)
Copperband Butterfly (5”)
Regal Angel (5”)
Magnificent Foxface (5”)
Rabbitfish (6”)
Green Mandarin (2”) |
Invertebrates
Purple lobster
12 Sand Sifting Cucumbers
200 Super Tongan Nassarius Snails
350 Cerith Snails
75 Turbo Snails
300 Blue Leg Hermits
3 Multiflora Linkia
Sand Sifting Starfish
3 Red Brittle Stars
3 Sally Light Foot Crabs |
Porcelain Crab
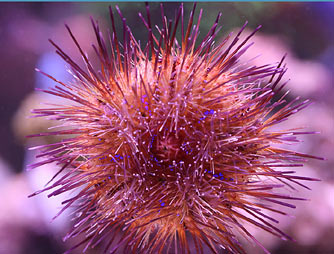
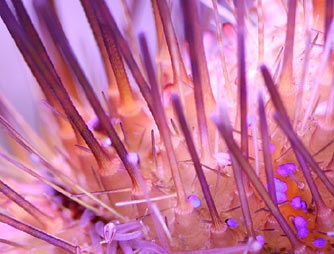
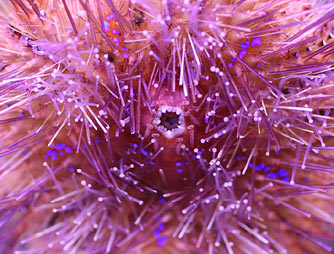
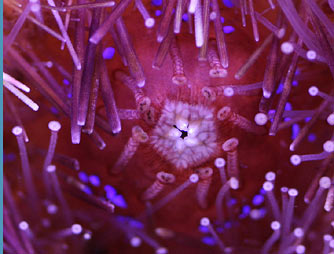
Radiata Urchin
6 Emerald Crabs
Orange Flower Anemone
Purple Tube Anemone
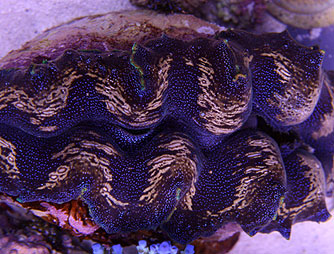
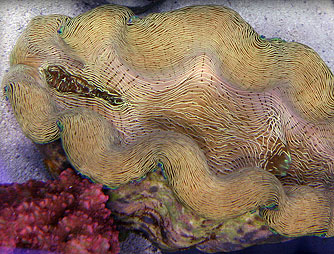
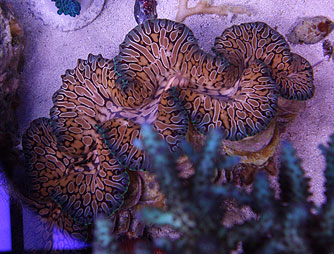
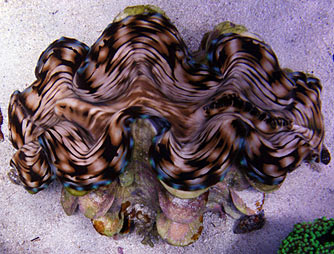
Blue Teardrop Maxima Clam
Gold Teardrop Maxima Clam
2 Blue Crocea Clams
Squamosa Clam
Derasa Clam |
Feeding
The tank is fed once a day with a variety of frozen food all mixed together such as: P.E. Mysis, brine shrimp, Cyclop-Eeze, blood worms, and coral food. I feed the LPS after the lights go off to make sure the fish don’t steal the food from them. Two to three sheets of nori are supplied for the tangs, but usually all the fish jump in and eat it.
Thanks
Receiving Tank Of The Month is an extremely great honor. My wife is my pillar of strength and if it was not for her continued support and willingness to help and put up with my fishy stuff, this tank would not be. Thanks to all of those who have supported me and kept me company in my thread. I still can not believe it happened to me, so thanks once again! I want to also thank John and Brian at Kingfish Aquariums for helping me throughout this adventure and their continued support and friendship. This hobby has brought me so much joy in addition to meeting so many great people. Now I look forward to watching my tank grow and prosper.
Feel free to comment
or ask questions about my tank in the Tank of the Month thread on Reef Central.
|
If you'd like
to nominate a tank for Tank of the Month, click here
or use the button to the right. |
 |
|