|
Stanley Genadek's (Energy) Reef Aquarium
Introduction
What an honor it is to be chosen as Tank of the Month! Reef Central has always been one of my main sources for reefkeeping information. I am a firm believer in sharing information and ideas whenever possible. How appropriate it is that as this article is published, I am currently working on a new book with Mike Paletta that will cover, in detail, the installation and maintenance of large reef systems. We will use established systems that are installed, not by professionals, but by typical hobbyists like you and I. We want to show how to plan and build these systems and reduce some of the mystery that has been associated with large tanks. We will highlight various successes and document the failures of established systems so others can learn and build upon these ideas. It’s a new era in reefkeeping that has seen a breakthrough in technology and an advancement of knowledge (thanks to sites like Reef Central), and this is what makes large systems possible.
Because I am not a millionaire, and I receive no public grants or funding, my system had to be economical to run. Furthermore, I wanted it to be fairly easy to maintain and somewhat self-sufficient. This meant that much of the system had to be automated. I wanted to be able to leave the whole works for weeks at a time without undue worry. Additionally, and perhaps most importantly, I did not want to spend time away from my family just to clean an aquarium!
Concept
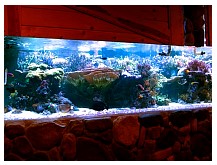
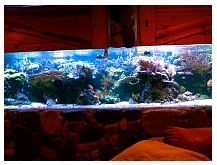
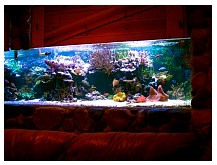
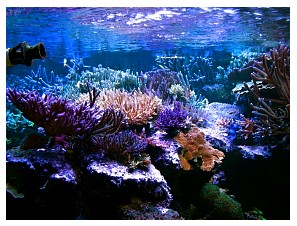
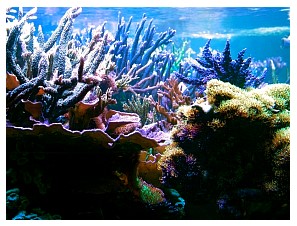
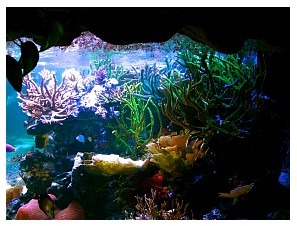
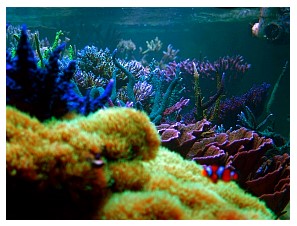
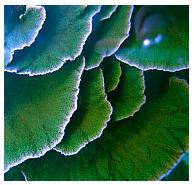
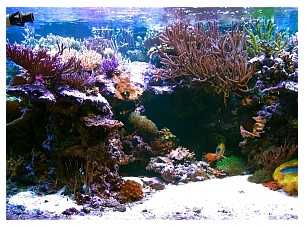
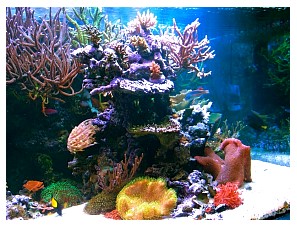
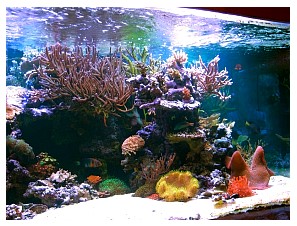
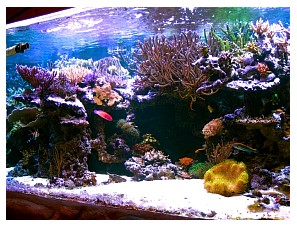
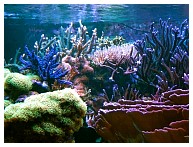
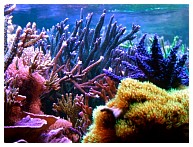
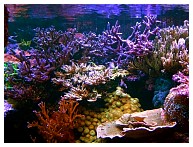
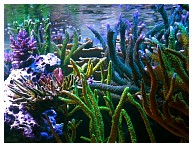
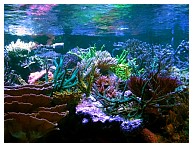
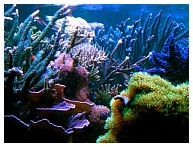
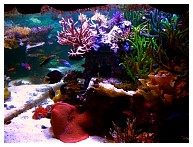
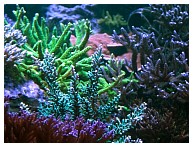
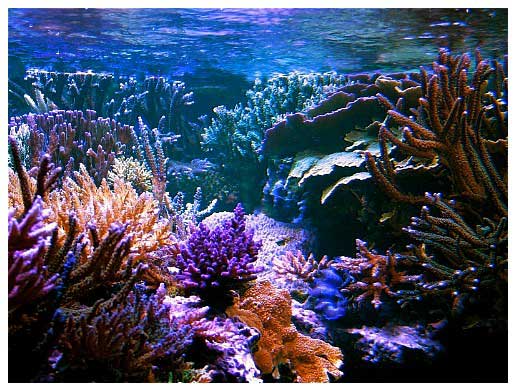
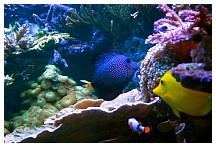
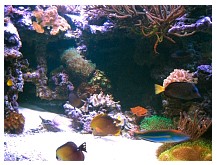
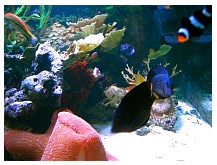
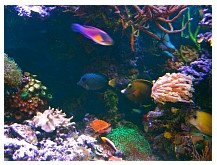
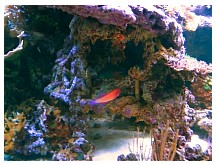
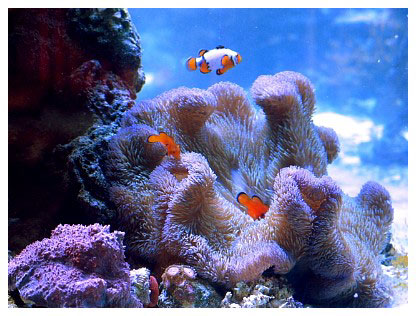
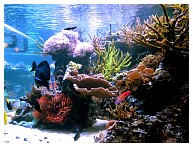
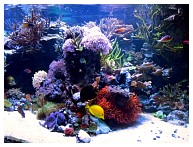
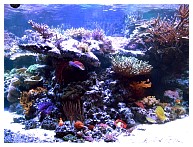
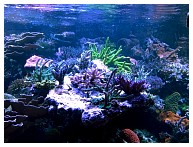
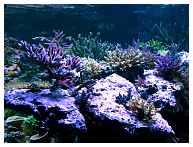
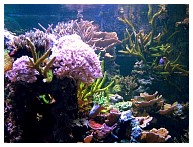
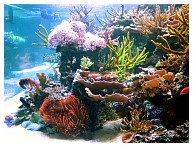
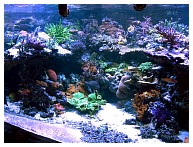
When I designed this tank I was looking to get away from a typical “reef wall” aquascape. I wanted to focus more on open areas, but with plenty of hiding spaces for the tank’s inhabitants away from the viewing area. I also wanted to replicate coral islands or “bommies” as are seen in real reef settings. To create this open rockwork I started with a PVC frame, and I used eggcrate to make shelves for the live rock. To hide the PVC framework I sprayed it with Great Stuff™ foam in a can. I let this foam cure for 24 hours and then I applied an epoxy resin that contained no mold inhibitors. I brushed on the epoxy resin and mixed in a fine aragonite sand. While this mixture was slowly drying, I brushed on more aragonite. The final product is an inert PVC framework that looks exactly like live rock. I then placed real live rock onto the shelves to create a natural reef structure appearance. Coralline algae have now covered all the exposed surfaces, and are completely indistinguishable from the real live rock. Even when I show visitors the real live rock and my PVC pipe framework, they can’t tell the difference. The PVC framework has now been colonized by various small-polyped stony corals and countless other organisms. There is almost as much open swimming space for the livestock behind the rockwork as there is in the main viewing area. Visitors usually are amazed at how many fish seem to disappear in the tank, only to reappear from another area.
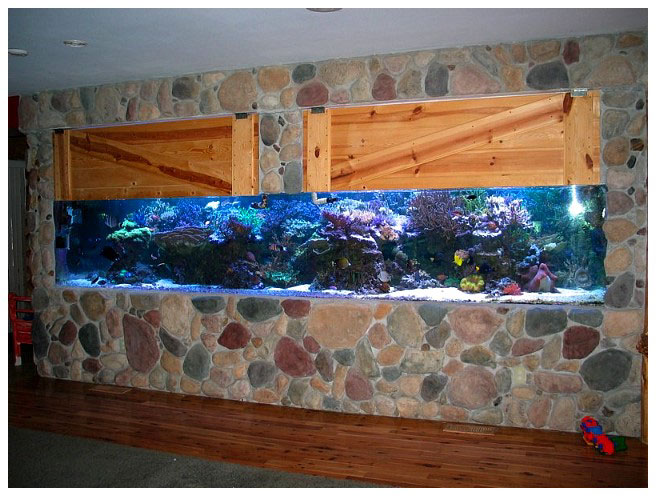
The Tank
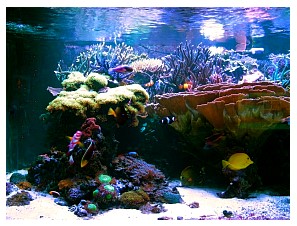
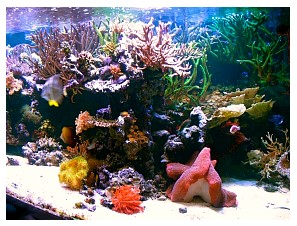
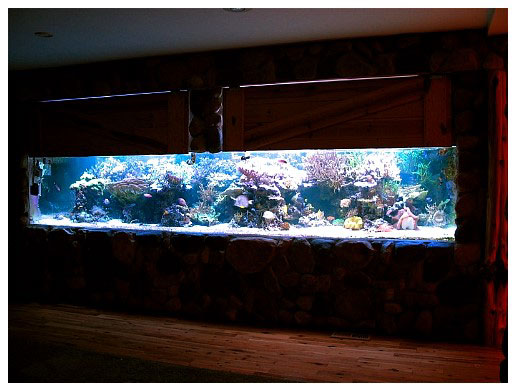
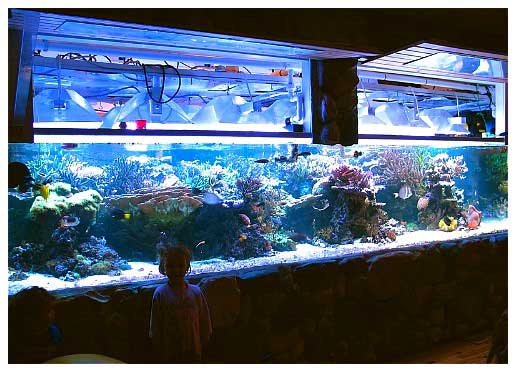
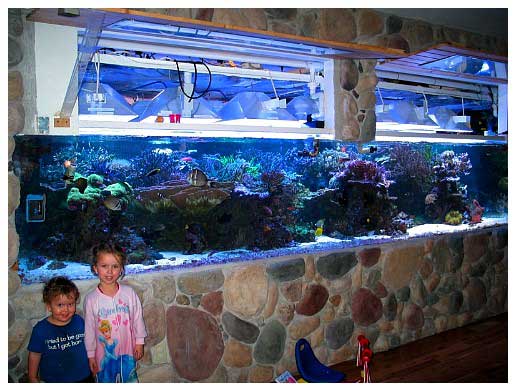
The system’s total water volume is around 2100 gallons: the main tank holds approximately 1600 gallons, the refugium holds 140 gallons, the sump’s capacity is 327 gallons and the skimmer holds over 100 gallons (more on this incredible skimmer below). The tank’s dimensions are 15’6” long, 5’ from the face to the back wall and 33” tall. It was manufactured and assembled onsite by Chris from Midwest Custom Aquarium, who did an incredible job. The tank is viewable from three sides and is aquascaped to maximize each line of sight and create unique perspectives. The main viewing panels are seamless and are constructed of 1.5” thick acrylic. The tank’s top and bottom are 0.75” thick acrylic.
Filtration
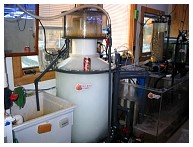
This system's heart and soul is a revolutionary skimmer called the “Volcano.” It’s approximately 67” tall, the body has a 24” diameter, the riser tube is 10” high and the collection cup is 18” tall. Over the years I have used many different skimmers and this is by far the most efficient and productive. It draws a mere 190 watts and creates a milk-like froth with over a 100-gallon body capacity. Similar skimmers often draw 10 times that amount of power!
I would like to share a quick story about this skimmer. Spazz from Aquatic Acrylics set up this skimmer for me a day before I was to leave on an out of town business trip. My ORP was a measly 330 at that time. I had a blue carpet anemone that wasn’t looking healthy and a stony coral donated from a friend, which was dirt brown at the time. I asked my wife to keep an eye on the anemone in case it died while I was out of town so she could remove it. When I came back seven days later the blue carpet was gone. I asked my wife if she had removed it and she admitted that she had forgotten to even look at it! Fearing the worst, I quickly went back to check my ORP level, which had climbed to a healthy 440. I looked over the tank and my dirt brown Acropora sp. coral was glowing purple, and all the other small-polyped stony corals’ colors had impressively improved. The skimmer was full of a thick sludge that could not be drained. I ended up having to literally scrape the collection cup because the sludge was so thick! I could not believe that the skimmer could remove a large, decomposing blue carpet anemone, increase my ORP and improve my water quality, all while I was out of town! It is by far the most outstanding piece of reefkeeping equipment I have ever owned.
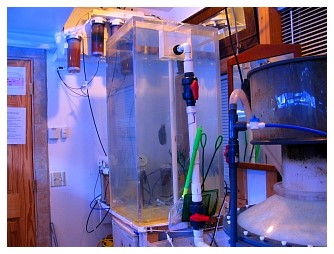
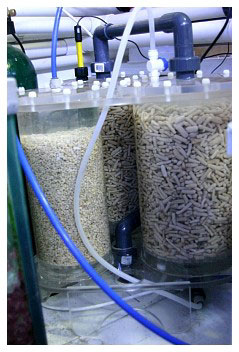
Furthermore, I have a 140-gallon Chaetomorpha/sponge refugium that is attached via a remote tank. It holds over 300 pounds of live rock and performs some supplemental filtration, but its main purpose is to generate and replenish the copepods and other live foods. The main return sump has a capacity of 327 gallons and was constructed by Spazz of Aquatic Acrylics. I run an average of 70 gallons through it, and leave the rest in reserve for power outages.
Heating and Cooling
The lights provide most of the heat for the system. The dedicated fish/filtration room has in-floor radiant heat on a separate thermostat from the rest of the house. If additional heat is needed, the thermostat turns on the home’s furnace and warms that room only. Cooling is the real trick with this system. An inline heat exchanger is only a quarter of the cooling package, but really does most of the work. Basically, when the temperature controller calls for cooling, it turns on a solenoid that allows cold Minnesota tap water to flow into a titanium heat exchanger. The heat exchanger isolates the tap water from the aquarium water, but allows the cold tap water to cool the hot aquarium water. Then, the heated tap water goes into my RO/DI unit. This doubles my water purification system's productivity.
I have a 400-gallon RO/DI water storage tank in the basement that I use for water changes. The average ambient temperature there is 68°F, but to bring this up to 78°F I run an additional sealed line from the aquarium through the storage tank in 100 feet of ½” tubing. The second phase of the cooling strategy is to heat the storage tank water while cooling my aquarium's water. When my aquarium's water gets too hot, I use the same temperature controller to pump it through the tubing in the storage tank. This warms the water in the storage tank to 78°F and cools the aquarium's water at the same time. The third phase of temperature control is provided by convection cooling. Along the light banks I have placed several fans that turn on when my temperature controller calls for them. The fourth and final phase is central air conditioning. The main trunk line for the house runs through the filtration room. I use adjustable vents to control the flow into this room.
Ventilation
Humidity was one of my main concerns when setting up such a large system. I have had three other large aquarium rooms and found that having windows to open, as well as isolating the tanks from the rest of the house, is critical. The windows also help with cooling for eight months of the year. I also have two in-room ventilation systems to handle heat and humidity. If I want to reuse some of the heat generated by the lights and/or aquarium for the rest of the house, I can turn on a ventilation fan that pumps this hot and humid air into my home's main living room. If I want to purge the filtration room of excess heat or humidity, I can use another ventilation fan on a different switch to pump this air to the outside.
Lighting
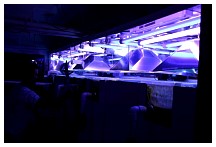
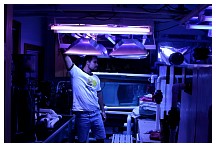
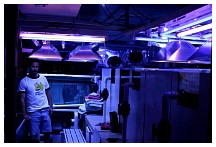
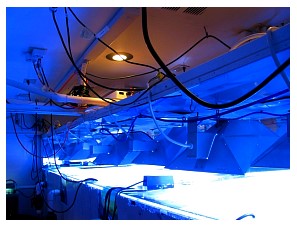
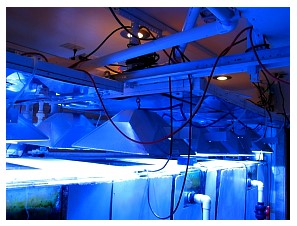
The tank runs off a variety of 250 and 400-watt metal halides mounted in Lumenarc reflectors. I have the 250-watt lights situated over the rock structures that are placed toward the tank’s top. To illuminate the deeper reef walls, I use the 400-watt halides. My preferred bulbs are 20K. The entire lighting system is installed on garage door rails, which makes it easy to slide out the light banks from over the aquarium to do maintenance on the tank or change a bulb. There are a total of 14 metal halides over the tank.
Inhabitants
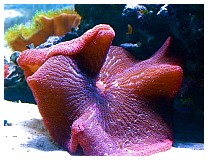
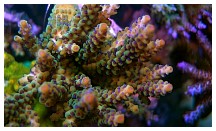
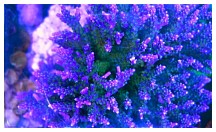
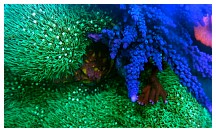
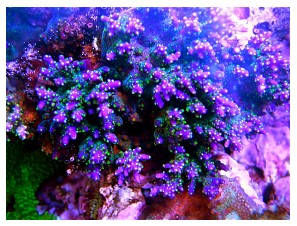
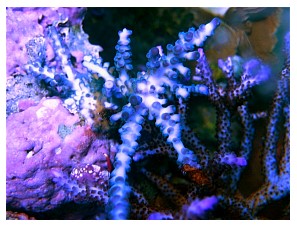
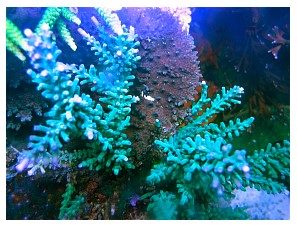
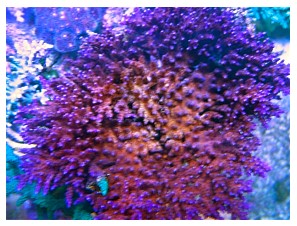
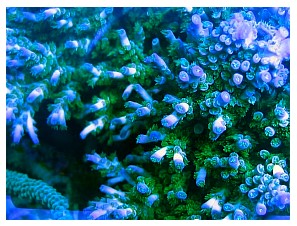
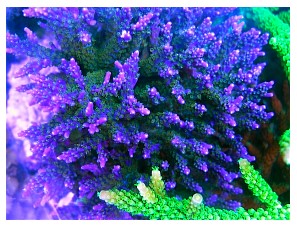
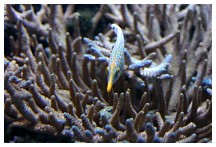
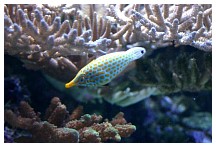
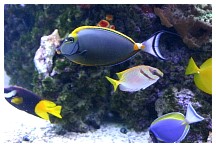
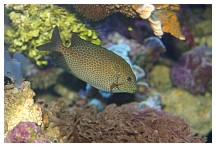
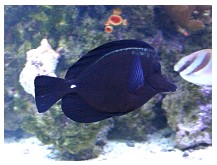
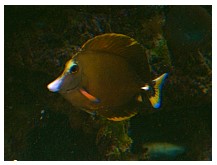
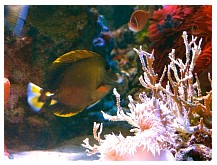
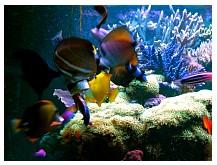
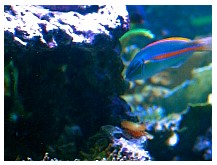
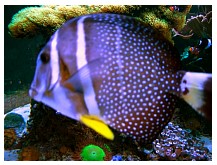
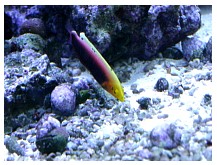
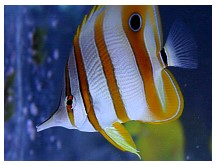
The tank is a mixed reef to replicate what actually might be found in nature. I attempted to optimize its overall appearance without focusing on just small- or large-polyped stony corals or soft corals. I look to balance colors in the aquascape and provide some movement throughout the tank, which I believe helps to maintain interest. I do this with soft corals and anemones, which I strategically place to maximize their impact on the aquascape and balance the colors. I try to collect rare and unusual fish when they become available. I have a few interesting specimens, such as a harem of Snowcap clownfish, a Gem tang, a mated pair of Naked clownfish, a harem of divided Leopard wrasses, Radiant wrasses, Mystery wrasses, a huge Black tang, a huge Mustard tang, and many others.
Planning
I spent well over a year planning this system's construction. I added 2400 ft2 onto the main house to highlight the tank and bring it onto the main living room floor. All of my prior systems were in the basement, and this isolated me from the rest of my family while I performed maintenance. Bringing the system onto the main floor and into the living room enables the whole family to interact with the tank. I estimate that the main tank weighs 14 tons. The filtration room sits on over 100 tons of compacted structural sand, and the floor is 6” thick rebar-reinforced concrete. The footings for the filtration room are over 10’ deep. This room also has a central floor drain and a work sink. Three dedicated electrical circuits service the aquarium; I had over 144 electrical outlets wired throughout the room.
Thanks
Many people have worked together to make this system possible. I first would like to thank my wife and family for their incredible patience with my obsession. A few people in general have been extremely helpful – Spazz from Aquatic Acrylics for his incredible Volcano skimmer, for helping me do some of the system’s design work, contributing some photos for this article and for installing the sump and all the associated plumbing! I’d like to thank Dirk Diggler for his supplies and livestock, and Bob and Greg from Reefmania for the calcium reactor. I would also like to thank the Twin City Marine Aquarium Society in general; they are a great bunch of people. Finally, I’d like to thank Reef Central for honoring my system as Tank of the Month.
Feel free to comment
or ask questions about my tank in the Tank of the Month thread on Reef Central.
|
If you'd like
to nominate a tank for Tank of the Month, click here
or use the button to the right. |
 |
|