![]()
|
|
 |
My name is Sanjay Joshi and I live in beautiful Happy Valley, home of Penn State and the Nittany lions. It seems I have been a reef hobbiest for a very long time by this hobby’s standards – 20 years and counting. There are only 2 other things I can think of that I have done for longer, work in the same job for 23 years and be married to the same wife for 24 years, and counting! If it wasn’t for a very loving and tolerant wife (my friends think she is a saint for putting up with me and my aquariums), none of this would have been possible. Living in a place that is far from any major concentration of reef aquarists, I have lived, learned and shared reef keeping knowledge through the internet. It has become my de facto reefing community, leading to long term friendships that started off with people without faces, just user names. I have always enjoyed looking at other people’s tanks both online and in the real world, and this is my opportunity to share and show my reef aquarium.
Ever since I was a kid growing up in India, I had a fascination with fish and kept and raised several tropical freshwater fish. Marine fish were always a dream, but in the early 70’s they were not easy to get, hard to keep, and expensive. Husbandry knowledge and skill to keep coral reef fish was quite lacking and the marine fish industry in India was barely developed. The dream lingered and stayed a dream through the 80’s as I went through college and graduate school. After getting my first job and buying our first house, I decided to get back into keeping fish. Surely with time, new knowledge, technology and being in the US, would offer me an opportunity to fulfill the dream of keeping coral reef fish. As I started reading books and researching, visiting local stores and ogling the pretty fish, the urge to set up a marine fish tank grew considerably. Along with this came the realization, that not only would it be possible to keep marine fish, it was also possible to create mini coral reef aquariums to house them. A local store had a small 30G reef aquarium, that was just captivating – I was completely hooked and fascinated that this could all be done in a small aquarium. After reading several books, especially Marin Moe’s The Marine Aquarium Reference: Systems and Invertebrates, I was confident that I could do this with a limited budget and DIY and manage to make a long dream into reality. I decided to convert the 29G freshwater aquarium into a reef. This was the start of a journey that is still ongoing, and still as captivating and fascinating as it was in the beginning.
It did not take long before I out grew the 29G reef, lit with 4x20W fluorescent lighting, equipped with an overflow box and trickle filter. Technology was rapidly changing, knowledge was increasing rapidly and soon the 29G evolved into a 55G lit with metal halides, using protein skimmers, and moving onto more challenging stoney corals. With a move to a new house in 1994, came the opportunity to go even bigger and the basement was the perfect place to set up a 180G SPS dominated coral reef. This 180G SPS coral aquarium was operational for 10 years and was featured in several books and online magazines.
Eventually, even this tank was not big enough - the corals were growing right out of the water, colonies growing into the glass, large colonies were shading and outcompeting others. I was becoming a victim of my own success. In 1999, I had the opportunity to help design and develop a 500G aquarium for the Penn State Class Gift and it satisfied the craving for a bigger aquarium. After 5 years of seeing the success of the 500G reef at Penn State, the NEED to update at home just became too irresistible. After 10 years of running the 180G the decision was made to replace it with the largest aquarium I could fit in pretty much the same location as the 180G. The180G was finally laid to rest in 2005, and the planning and build for the new aquarium began.
 |
As with any project of this size and magnitude, careful planning and design is a necessity. Creating a mental image of its final form, putting the design on paper, evaluating the constraints and work arounds are all part of the detailed planning necessary. Learning from past experiences in setting up the 180G and the 500G at Penn State proved invaluable.
One major constraint was that the tank had to fit in the space that I was currently occupying with the 180G tank. After evaluating some of the options, the largest tank I could fit into the space and still be within some budget constraints would measure 84 inches long, 48 inches wide and 30” inches in height, with an approximate volume of 500G. The tank is built into a wall, and publically viewable only from the front, with large enough area in the back to serve as the “fishroom” to house all the equipment needed to run the tank. I also decided to go with glass as the tank material, given the issues of dealing with acrylic – ability to scratch easily being one of my primary concerns. Going with glass has its own set of issues – the weight of the empty tank would be around 900 lbs, coupled with the weight of the 500G of water would require dealing with almost 5000lbs of weight. The basement provided a concrete floor and no additional modifications to the flooring were necessary.
Extra electrical wiring was run to the fishroom to make sure that there were enough outlets available on different circuits. This allows the equipment to be placed so as to ensure partial functionality of the tank in case of a single circuit failure. The fish room was lined with fiberglass panels to ensure that water would not damage the drywall (a common problem with my previous 180G). The front paneling was done in wood, with wide open access provided by removable panels and hinged access through the top front panel.
The tank was built by Aquarium Obsessed and delivered in June 2006. A key feature of the tank design was the external overflow box. This design was a slight modification of the external overflow box (designed by my friend Jack Chernega) that I had used on my 180G when it was first set up in 1994. I do not like to give up real estate in my tank, and an external overflow box with large surface skimming provided the best option. This time around I decided to have it run the full length of the tank, and have it plumbed with 2- 2” returns to the sump. I use this “extra” space to also house fish as they are being introduced to the tank – it helps keeps them isolated from the other fish while they get used to eating, getting healthy and adjusting to my system. This space also serves to temporarily hold corals.
A second major design consideration was that the equipment used to run the tank had to be easily accessible. I was tired to having to deal with equipment that was not easy to access and hence becoming a chore to service and maintain. This necessitated the design of a stand that would be open and allow for easy access. 4” steel H beams and 4” square steel pipe was used to construct the stand with no center vertical supports allowing full unencumbered access to the area below the tank.
The plumbing was designed to take into account the water flow considerations, and the tank was predrilled for 2 1.5” closed loops driven by Reef Flo Dart pumps, that would be returned to the tank via 3 Sea Swirls. Water through the sump is returned via another Dart pump that has the return split to feed the water filtration system for carbon and phosphate removers, and feeding the calcium reactor. All plumbing is done using Asahi true union ball valves to ensure that the system components can be easily shut off, and removed for maintenance. The sump was built and designed by John Haddock (aka Naga on RC) to provide enough water volume to hold any back flow from the aquarium, and provide ample room to allow the bubbles to escape.
After years of lugging buckets for water changes, I decided that the new system would have to make water changes as easy as possible. A water change system that required at most turning ON/OFF of a few valves was the goal. 2 75G water tanks form the core of the water change and replenishment system. A RO system is used to automatically fill and maintain a 75G with RO water that is then gravity fed into another 75G tank that is used to mix salt and bring it to tank temperature. The mixing pump is basically an external closed loop that is also used to feed water to the sump for water changes. The RO water storage tank along with a Reef Filler dosing pump and Reef Fanatic top off controller is used to automatically top off the evaporated water.
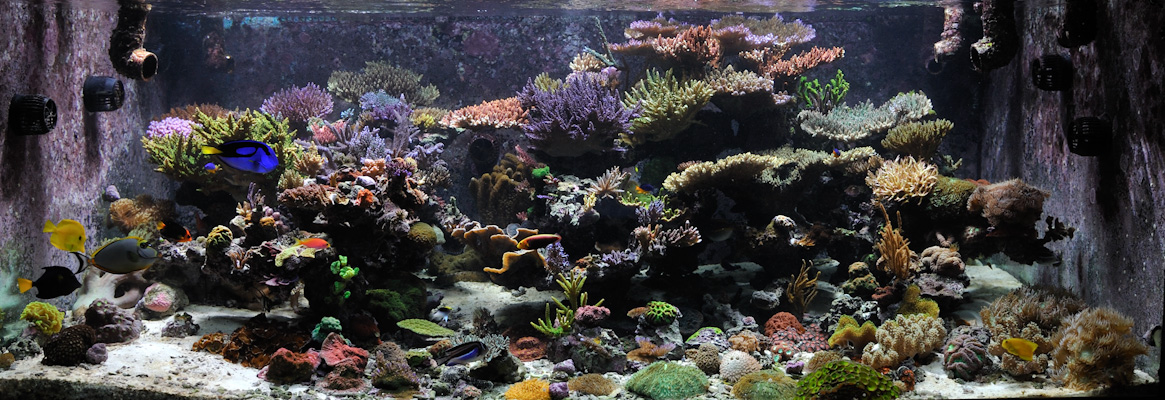
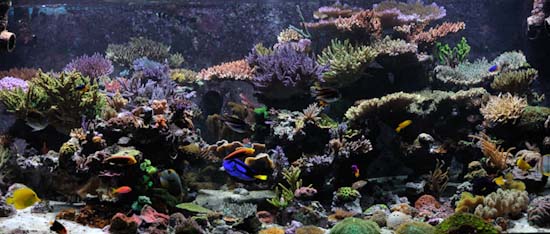
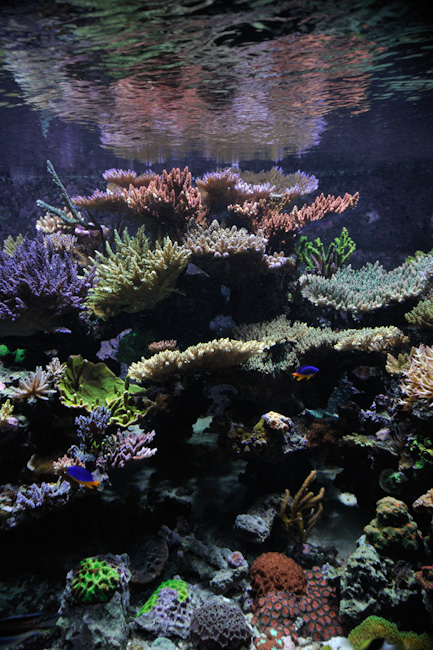
For my new reef I wanted to achieve a more open look and move away from the traditional reef wall and mounds of rock concept. In addition to creating a visually flat look, past experiences had convinced me that this was not good for water flow and also led to many a rock slide when re-aquascaping was involved. Inspired by Ivan’s beautiful tank in a thread on RC, I decided to go with a pillar based approach to aquascaping. A flat paver stone as the base, drilled to accept a fiberglass rod cemented to it provided the basic building block for the pillars. Live rock, was drilled and stacked using the fiberglass rod as a skewer to hold the structure in place. This allowed for the creation of a more 3-D arrangement, while eliminating the 2 biggest issues with my previous systems, namely water flow and stability. Since the pillar structures used a lot less rock (just 250 lbs of rock was used) and mounds of rock pile were not created to reach high into the tank there was more room for water flow and for fish to swim. Additionally, since each pillar was basically independent and stability provided by the fiber glass rod skewer, there was no chance of rock collapse and parts of the reef could easily be dismantled without affecting the rest. 300 lbs of Bahamas Oolite Arag-Alive sand from Caribsea was used as the bottom substrate. It served well to hide the paver stones, and was distributed unevenly over the bottom to provide areas of 3” deep sand bed to areas of ½” deep. I have always liked the look of a sand bed as opposed to bare bottom. Even though its not very deep, it provides a large area for additional bacteria to colonize and areas for biodiversity to potentially grow. Additionally, I knew I was going to be adding fish such as wrasses (some of which bury into the sand to sleep) and bottom dwelling gobies that also prefer a sandy bottom. While the sand is fine grained, it does tend to blow around a bit when disturbed but quickly settles. Initially, when the pumps were turned on, the sand got moved around by the water flow and created several areas of bare bottom. These areas were covered with coarse sand and coral rubble which has the added benefit of creating a rubble zone in the tank further adding to the potential for bio diversity and placement of bottom dwelling corals that prefer rubble zones to sand.
A design philosophy for this system was to keep things as simple as possible, easy to maintain, keep costs low, and spend more time in front of the tank rather than behind and under it. WIth this in mind, the only other filtration besides the live rock and sand is my 5ft ETS DIY skimmer retrofitted with a Becket, and chemical filtration using Carbon and GFO based phosphate removers. The carbon and phosphate removers are housed in Deltec FR509 fluidized reactors, and plumbed to feed off the main circulation pump. I use about 3 cups of ROX 0.8 carbon and 2 cups of GFO phosphate remover (typically use any of the following – Phosban, Rowaphos, PHOSaR, Bulk Reef Supply Granules), and change these approximately every 2 weeks. A DIY calcium reactor is used to help maintain the alkalinity and Ca levels, occasionally adjusted using Randy’s 2 part mix using chemicals purchased through Bulk Reef Supply.
The lighting is once again kept as simple as possible. I am using the same amount of lighting for this 500G tank that I was using for my earlier 180G tank. I guess all those lighting tests paid off! 3X400W metal halide lamps in Pacific Garden Supply’s Lumen Arc III reflectors were my initial choice. I use the tank frequently as a test bed for long term metal halide studies and have been using either the Giesmann Coral or Ushio 14000K lamps with Icecap electronic ballasts, since the inception of this tank. The lamps are typically replaced somewhere between 12-15 months. No additional supplemental lighting is used. The lights are ON for 9 hours each, but the ON/OFF times are staggered by ½ hr intervals. This provides a 10 hr lighting period, but only 8 hrs when all lights are ON. The gradual turning OFF of the lights is an important cue in getting fish to spawn. The lights are mounted on a light rail from Sunlight Supply using just the un motorized trolley, with quick disconnects from the ballast to allow moving the lights out of the way if needed. More recent changes made to the lighting involve changing the reflectors to Sunlight Supply Lumen Max III reflectors. I felt I needed larger reflectors to get some more light out towards the front of the tank. I have also added a 3ft blue LED strip from Icecap to provide ½ hour of additional low light to encourage spawning of the scooter blennies that were being harassed while spawning when the metal halide was on. Since they addition of this “moonlight” the scooter blennies have shifted their spawning time to after the MH turning off. This light is only ON for about 45 min, with a 15 min overlap with the last MH lamp.
Strong random water flow is a crucial part of the building large reef aquariums that are dominated by SPS corals. 2 closed loops were designed into the system, and are each operated by Reef Flo Dart pumps rated at 3600 gph. The returns from the closed loops are fed into the tank via 3X1” Sea Swirls to create some randomness to the flow. The main water return through the sump is also with a Reef Flo Dart that is also used to feed the Calcium Reactor, and Carbon and Phosphate reactors. Initially 3 Vortech MP40W were used to generate more internal flow, but have since been increased to 6 Vortech MP40W. As the corals grow water flow tends to degrade rapidly and additional Vortech’s were added gradually over time bringing the current total to 6. The return from the 1-HP chiller, fed by an Iwaki 70RT from the sump, is returned to the main tank.
An APEX controller from Neptune is a more recent add on to the system. I use the system primarily as a monitoring and alarm system and absolutely love the ability to access the system parameters via the internet and iphone. A few non critical control functions are also performed by the controller. A new toy just acquired for the controller is the WXM module to wirelessly control the Vortech pumps. This has provided the ability to change the pump operation via software programming and has added more flexibility to the water flow characteristics.
In keeping with the design philosophy of simplicity, I prefer to keep the routine maintenance activities to simple tasks. Skimmer is typically cleaned weekly, water changes of about 10% once a month, carbon and phosphate removers are changed every 2-3 weeks, clean glass as needed, are typical routine activities. I am not a fan of dosing an array of chemicals, and would prefer to find long term fixes and remedies rather than quick fixes with magic potions. However, I do occasionally experiment with new fads primarily to satisfy my own curiosity and building my own knowledge base of reefkeeping. I have learnt over the years that there are many ways to keep a successful reef, and one needs to find a way that fits with your philosophy, life style and personality. Nothing works as well as advertised, there are no easy fix solutions and magic potions to solve problems, but good fundamentals and understanding of how things work in a reef tank are paramount to keeping a successful reef in the long term.
• Display tank: (approximately) 500 gallon - 84”Long x 48”Wide x 30” High, 15mm glass with low iron front, with 4” Euro bracing and external overflow 84” long X 8” Wide X 12” High.
• Skimmer: DIY beckett modified ETS skimmer driven with a Iwaki 55 pump
• Controller: Neptune Apex Controller – used primarily for monitoring
• Chiller: 1 HP custom built chiller
• Chemical Filters: 2 Deltec FR 509 one with ROX Carbon and other with GFO
• RO/DI: Spectrapure 100G/day system
• Reservoirs: 75 gallon (RO water) 75 gallon (saltwater)
• Auto Top Off: Reef Fanatic top off controller with Reef Filler Dosing pump
•Calcium Reactors: DIY Calcium Reactor
• Lighting: 3X 400W Metal Halide in Sunlight Supply Lumen Max III reflectors
• Bulbs: 400W Ushio 14000K – replaced every 15 months or so.
• Water circulation: Reeflow Dart (return), 2 X Reeflow Dart (closed loop) returned through 3 X Sea Swirls, 6 X Vortech MP40W.
 |
|
Water Parameters:
|
 |
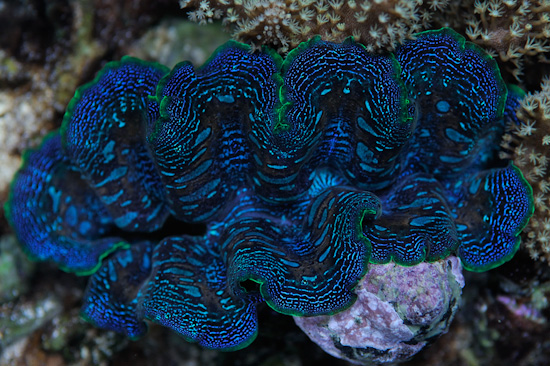
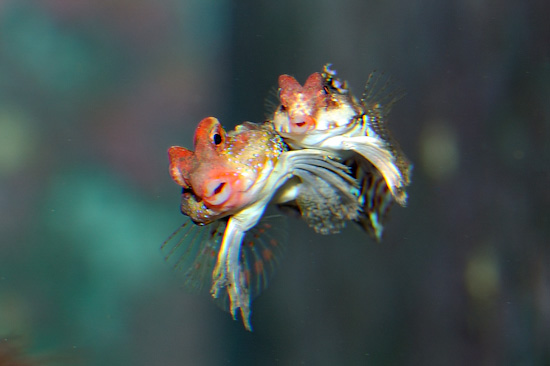
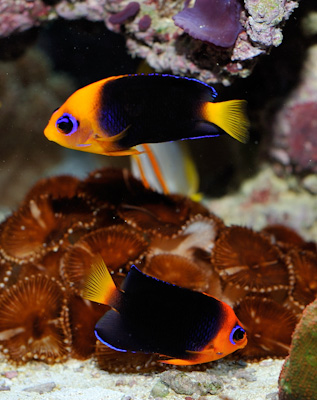
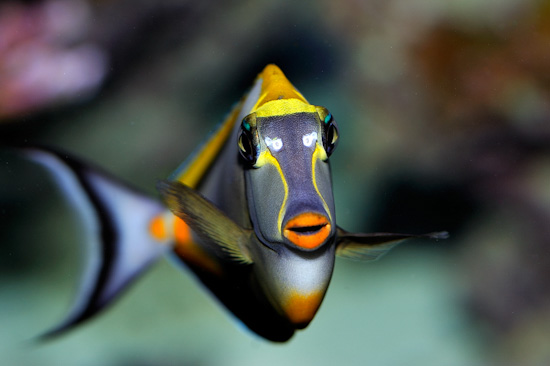
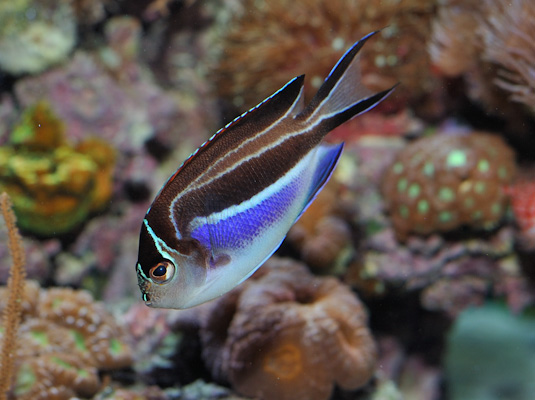
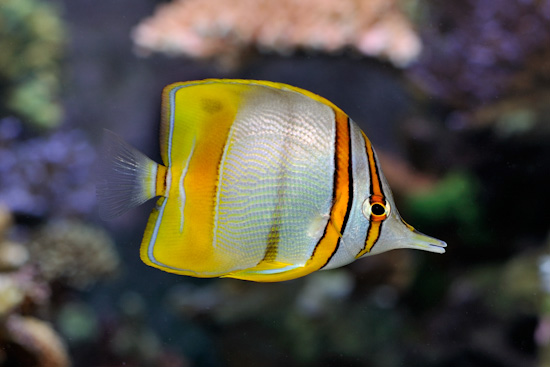
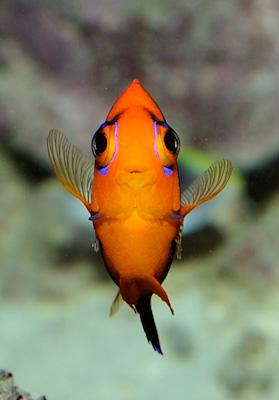
My fish keeping approach with this tank was to try and keep many pairs and harems, and stay away from the traditional advice of one of each kind of fish. Getting and creating pairs is often a challenge, but thanks to places on the web such as Diver’s Den of Live Aquaria that are willing to provide well conditioned healthy pairs of fish, this became less of a challenge. The current fish population in the tank is listed below. There has been some change in the fish population over the years due to attrition, removal of certain fish, accidental jumping out of tank, etc. There are several mated pairs that spawn regularly – Bellus Angels, Joculator Angels, Damsels, Clownfish, Anthias, Scooter Blennies are some that I have witnessed spawning.
 |
|
Common Name:
|
Scientific name
|
|
|
 |
 |
 |
 |
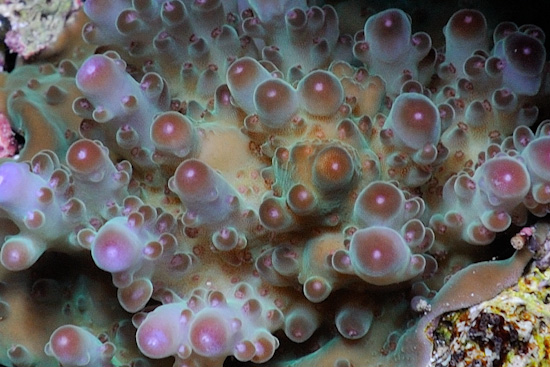
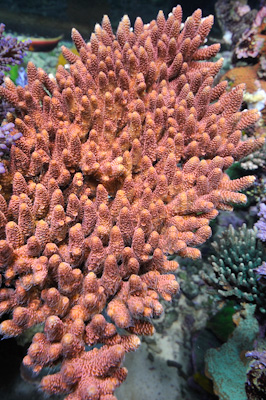
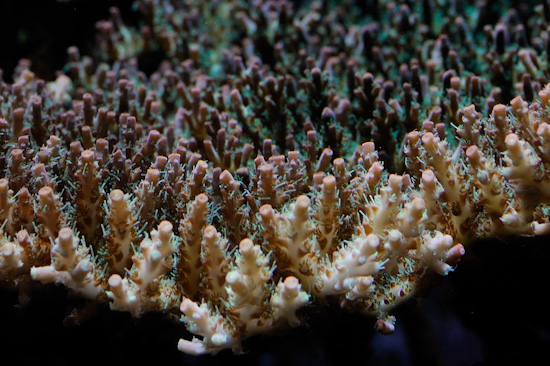
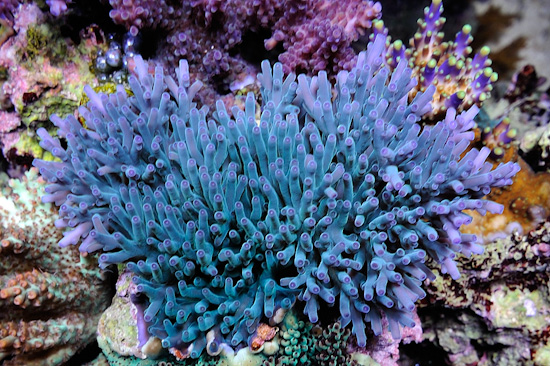
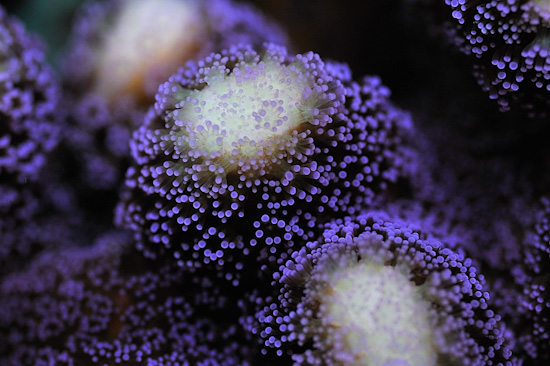
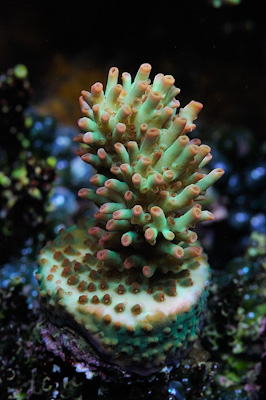
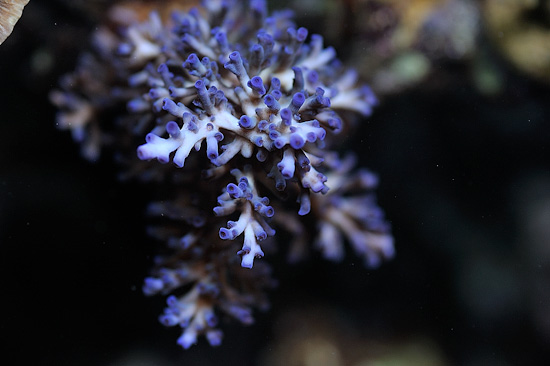
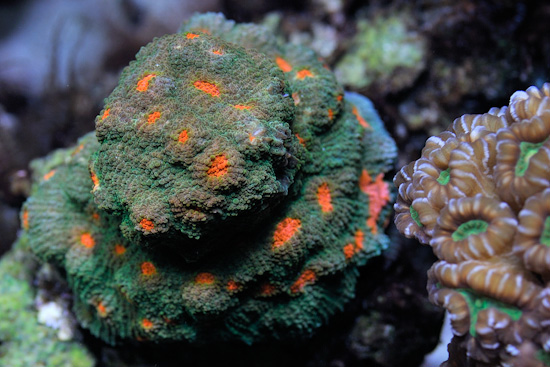
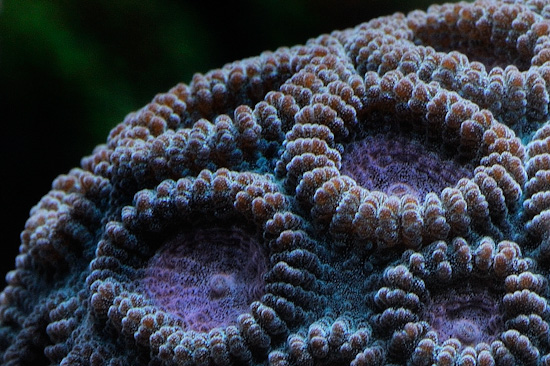
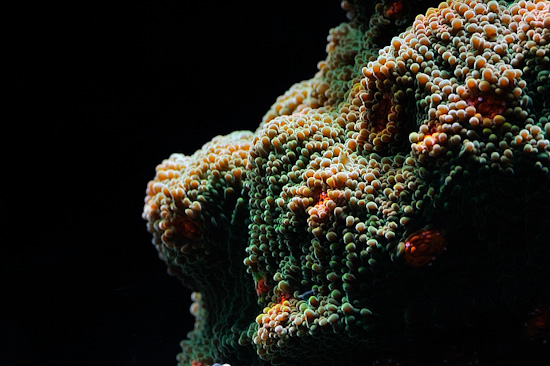
The tank is dominated by SPS corals - majority of SPS corals I have in my collection were started as fragments and over the years the tank has undergone several changes as the corals grow. I am terrible at IDing corals beyond the general species names. Given the difficulty that even expert scientists have in identifying captive specimens with pictures in the wild I won’t even try to attempt it. Identifying them with the ridiculous common marketing names would be difficult too since I don’t remember or care for some of the marketing names. The majority of the coral in my tank have a story and a connection to people, places and friends I got them from and serve as repository of memories. While the tank is dominated by SPS corals, there are several LPS and soft corals scattered throughout the tank. The quest to learn about keeping all these different corals often overwhelms my desire for tank aesthetics.
 |
 |
 |
 |
 |
 |
 |
 |
 |
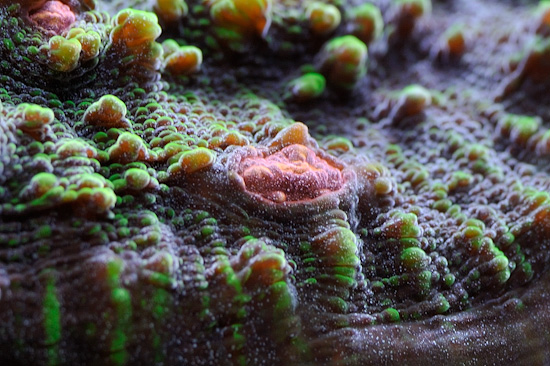 |
Even the best reef tanks have problems and issues that are encountered over the life span of the aquarium. Sharing the trial, tribulations and solutions is an important aspect of improving reefkeeping. While this reef system was designed to provide a more robust mechanical and electrical systems and it has held up well with this aspect of the design, problems related to biology and chemistry still arise occasionally. One significant problem that was encountered was Acropora Eating Flat Worms (AEFW). Despite my utmost care when introducing new corals, AEFW were discovered in the aquarium through the unexplained loss of a few colonies. Treating each new addition with flatworm dips was clearly not enough to keep the flatworms out the tank. Not setting up a quarantine system and following rigid protocols of treatment was a mistake that should be avoided if one seeks to set up a pest free system. I could not bear ripping apart the tank to remove the corals that had grown to large colonies and move them to quarantine and treatment system. After recovering from the initial shock and disbelief, talking to several friends who had already gone through this, I was convinced it is not the death blow that I expected. To deal with this I resorted to the “Blast it with a baster” approach. Using a turkey baster the corals are blasted with sudden high velocity jets of water to dislodge the AEFW which are then readily eaten by most fish. This has now become a weekly to biweekly part of the maintenance. Interestingly, the flatworms only appear on few colonies of coral, not on all the corals, and healthy corals can usually handle them in small numbers. I have been using this approach now for well over 2 years and as you can see the corals are thriving, growing well and maintaining good colors in spite of the AEFW.
Another major problem that was encountered last summer was that the nitrate levels in the aquarium had crept up to 50 ppm. I do not regularly check Nitrate levels and was quite surprised to see that they had reached such high levels. There was little outward sign of this, other than several corals darkening in color. There were several reasons for this rise. I was away most of the summer and neglect and overfeeding eventually manifested itself in the high nitrate levels. This gave me an opportunity to experiment with some nitrate reduction strategies. After having read and heard of great reviews of the Zeovit method and treating it like a skeptic, I decided that it might be worth my while to at least experiment with it to see if it would bring down the nitrate levels. In Aug, 2009, I set up the Zeovit systems with the minimum recommended components (Zeo Reactor, Zeo Stones, ZeoStart2, and ZeoBac), primarily with the intent to see if it would bring down the nitrate levels. Starting with half the recommended dosage I gradually ramped it up to full dose over 4 months, and am still using it. The nitrates have dropped to around 2 ppm (as tested with the Salifert Test Kit). Clearly, these carbon dosing methods are able to provide a nutrient transport mechanism for nitrate and phosphate.
Reef keeping is an incredible hobby, one that kept me fascinated for over 20 years and I hope for at least another 20 years of enjoyment. It has provided me with additional pleasure of meeting and making friends with people all over the world, through the sharing of the common thread of reef keeping.
 |
Feel free to comment or ask questions about my tank in the Tank of the Month thread on Reef Central.
![]()


.jpg)