


January 2012 Tank of the Month (Reefsmac)
|
|
Steve MacArthur (Reefsmac) Reef Aquarium
 |


Introduction
My name is Steve MacArthur and I live in Salinas, California. It is known colloquially as “The Salad Bowl of the World”. First off, I would like to say thank you to Reef Central for bestowing upon me this great honor, and allowing me to share my obsession with the world’s reefing community. Reef Central’s Tank of the Month has been a huge inspiration to me personally for many years.
Background
My reef keeping background is probably a little different than most hobbyists. During my current career as a pipefitter, I have spent more than 18 years plumbing aquariums and related equipment of all types and sizes. Most of that time I have been employed by a mechanical piping contractor named Frank M. Booth, and have been working with him at the Monterey Bay Aquarium. One of the best benefits of working at a public aquarium is being around so many knowledgeable aquarium professionals. Although I have gained a lot of insight into the mechanics of anything aquarium related, I have not had nearly as much hands on experience of how to actually keep the animals alive.
It was not until about eight years ago that I finally decided to try keeping some animals of my own. I started with the basics, a Beta and some goldfish, although my first goldfish tank had a back washable sand filter. I soon graduated to a backyard Koi pond.
One day my wife Sandra and I were shopping at a Koi dealer in San Jose that also happened to have some beautiful reef tank displays. While admiring one of those reef displays she asked me, “Why don’t you have one of these”? So I decided to run with that. I started with a 25-gallon aquarium full of softies and LPS, which was lit with power compact lighting. Less than a year later I piped it together with a 50-gallon aquarium lit with T5s. A friend gave me some SPS frags to try out and they turned out to be a lot easier to keep alive than I had once thought. Then one day in early 2006, while on another shopping spree to the bay area in search of even more SPS, I made my first visit to a shop called Atlantis Aquarium. Ming’s display tank blew me away. Before this day, I had never actually seen a full blown, megawatt, SPS display tank. I remember staring at his tank for over an hour that day, thinking to myself, “I have got to have one of these”.
 |


Current Tank
I knew when I went about planning my current tank, that not only was I going to go bigger, but this time I was going to set this tank up in my living room instead of a spare bedroom. I wanted it to be a peninsula, I wanted it quiet, and to be contained inside of a nice furniture looking cabinet. Probably because of working around so many public exhibit people, I also wanted all the piping and equipment hidden from view as much as possible.
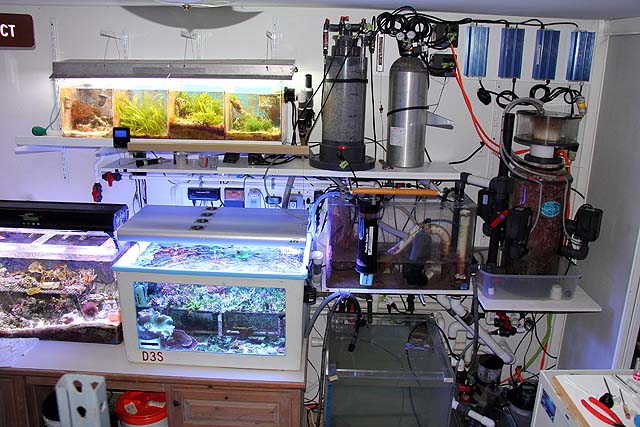
I searched for quite a while and then finally in March of 2007, it all began when I was able to acquire a used 72” x 36” x 34” acrylic aquarium. I built my display stand out of welded 3” x 3” x 1/4” stainless steel angle. Inside my tank stand I placed a 55-gallon acrylic and an 85-gallon acrylic tank connected together as my sump, a heater, an Ocean Motion 4 way, and a return pump. I never attempted to fit the rest of the equipment for this aquarium into the cabinet.
California does not have too many basements. Since the spare bedroom is directly above my new display tank I decided to make it the mechanical room for my new display. I am very much a do it yourself guy and piping the equipment to another room was something I was already very familiar with. To hide all the supply and return piping inside my display tank, I camouflaged it all to look like rockwork.
I encased all the piping in spray foam to give it general shape that I wanted and then I covered the hardened foam with a 0.25” layer of Polygem, an off white colored sculpturing epoxy putty. While the epoxy was still soft, I used a rubber mold to imprint a “rock-like” texture into it. When it was done, it looked similar to live rock. After being in my tank for a short duration the coralline grew all over it making it hard to tell the fake from the real rock. I also covered the piping on the outside of my tank with matching fake rock to make it look like the rock is passing through my tank window.
System Profile
• Display tank: Acrylic 340 US gallons (72” x 36” x 34”)
• Sump: Acrylic 85 gallon and 55 gallon connected together
• Skimmer: Euro-Reef RC 750
• Lighting: 4x SE 400w MH in Lumen Bright Mini reflectors running on IceCap electronic ballasts & 4x Seashine plasma units
• Bulbs: 12k Reeflux x2, 20k Radiums x2
• Controller: Neptune Systems APEX
• Return Pump: Reeflo Hammerhead
• Circulation: Display is supplied through an Ocean Motion 4-way, Vortech MP40 x2, MP60 x 2, and a Tunze 6305
• Carlson Surge Device: Acrylic 29-gallon tank with 25-gallon turnover every three minutes
• Cooling: Koi pond water circulating through coils of PEX tubing in my sump
• Heating: Finnex 800w titanium with an Aqua Logic controller
• Refugium: 25 gallon (48” x 12” x 10”) lit with 65w PC x2, filled with Caulerpa and Chaetomorpha
• Frag Tank: 70 gallon (36”x24”x 20”) lit with an ATI Powermodule 8x39w T5s
• System Reactors: Deltec KM500S kalk stirrer, GFO in a TLF 550, Do-It-Yourself sulfur denitrato
 |


Water Movement & Chemistry
I’m a big fan of a high turnover rate. To help with this the water from my sump is supplied back to my display by a Reeflo Hammerhead. The return line is split where one line feeds through an Ocean Motion 4-way into the display. The other line supplies my skimmer located in my upstairs tank room. The water exiting my skimmer gravity feeds a 75-gallon frag tank, 25-gallon refugium, 60-gallon water change sump, calcium reactor, GFO reactor, and a sulfur denitrator.
I took advantage of pumping the water upstairs to my skimmer by having all that water drain to my display tank by a Carlson Surge Device (CSD). It fills in less than 30 seconds at 25-gallons per fill and empties through a 1.5” pipe. When the CSD is open the falling water from eight feet up sends a really good blast of water flow across the entire length of my display aquarium. It is phenomenal water movement and looks like a wave breaking through my tank. When I first set up my CSD I did not like the large entrained air bubbles resulting in a lot of water splashing at the beginning of each surge. To help alleviate this problem, I decided to build an air separator using a hot air welder and PVC pipe. This solved the problem better than I had imagined. This air separator now takes out all of the large bubbles. Only very fine micro bubbles make it into my display tank as of now.
With my main pump running my display tank water level rises just over an inch and when my surge hits my water level goes up another inch. I used two pieces of 6” diameter clear PVC pipe for my overflows. Both overflows are connected to a 3” pipe to handle the amount of flow returning back to my sump. I hung a 7” x 30” 200-micron filter sock on the end of that 3” pipe where it enters my sump. This filter sock really seems to pull out a lot of detritus and helps polish my water. I have to change it out about every four to five days and just wash them inside-out in the washing machine using only bleach.
When I first started this tank a Vortech MP40 and my CSD seemed, at the time, to be all the flow I would ever need. I have found as my corals have grown in that I have also had to steadily increasing my flow. Today, along with the CSD, I am running 2x Vortech MP40, 2x Vortech MP60, and a Tunze 6305.
Using a hot air welder, I built my calcium reactor out of 8” clear PVC pipe. It holds just over four gallons of coarse media. I added a second chamber made from three inch clear PVC and it holds just over two gallons of coarse media. I go through a gallon of coarse media every two months. My system has about three to five gallons of evaporation a day. One hundred percent of my auto top off water is kalk saturated from a Deltec KM500S stirrer. This combination has worked well to keep up with my Alk and Ca demand while keeping my pH fairly stable.
I use my APEX controller to restrict top off water additions to times when my pH is below 8.15 and shuts off when it reaches 8.3. With this setting it results in kalk additions to occur mostly at night. My pH rarely goes below 8.15 at night because of this and runs near 8.4 when the lights are on.
The only other supplements I add are Randy’s two-part magnesium recipe once a week and occasionally strontium.
One disadvantage of living in the “Salad Bowl of the World” is that my city water supply is high in phosphate and nitrate content. My RODI system is actually eight stages to get my TDS from 700 down to zero, where I like it. Unfortunately I have to go through a lot of RO membranes and DI resin to keep it there. I perform ten percent water changes once a week and like to use all kinds of different brands of salt. I have always thought that if one salt brand (or batch) has too little or too much of anything, that I will average it out by mixing different ones together. I have a 60-gallon acrylic cube piped into my system that I use for a water change sump. Normally a small amount of water flows through this sump. By closing one valve, I can divert the flow around it. Then using a Mag 5 and connected hose I pump out the water into a drain. I then refill the water change sump with RO water, add salt, disconnect the hose, and let it mix with that same Mag 5. After 24 hours, I check the salinity and reopen the valve. Overall it only takes me about 20 minutes to do a 60 gallon water change and I don’t have to carry any buckets.
|
Water Parameters:
|
Lighting
Lighting for me has been all over the map. I am a believer that it is pretty much impossible to have too much light over an SPS tank. I knew from my previous experience with T5s that they were not going to work with a 34” deep tank. I jumped into the LED lighting early on and had bought one of the first PFO Solaris LED fixtures. I had been running it for over a year when I set up my current aquarium and was getting good results with it. At that time PFO had just come out with the new Solaris I-IV model while I was building this tank. So I bought two of the 36” Solaris I-IV fixtures and hung them side by side next to four 400w metal halides. The Solaris I-IVs were amazing! Side by side with the 400w metal halides they were every bit as good. They had dimming on and off features, consumed less power, produced less heat, incorporated moon lighting, and best of all the coral coloration was great! I was really tempted to buy two more to replace my metal halides.
Unfortunately, shortly after two years of using these once great LEDs they went downhill pretty fast. Besides constantly having to replace dead LEDs and power sources, I began noticing that the corals directly under these LEDs were no longer doing as well as they once were. By the time they were two and a half years old their decline was really becoming painfully obvious. All the while, the corals that were directly under the metal halides were still doing just fine.
I for some reason always like to try out the new stuff. I was able to see a demo of plasma lighting at the MBA a few years ago and thought they were pretty impressive. When I found out they were finally available to the public, I bought four of the Seashine plasma units to replace my LEDs. They don’t run cool like LEDs, but they still dim on and off and so far my corals seem to love them! I will have to get back to you and let you all know how well they are doing when they become two and a half years old.
I built my canopy framework and light racks out of 3” x 3” fiberglass angle and fiberglass Unistrut. Its lightweight and does not rust. I can position my lights any direction I want, simply by adjusting where they hang from the Unistrut. I mounted my light racks onto ball bearing drawer guides. By mounting two drawer guides back-to-back onto each side of the light racks I am able to move my light racks 24” in either direction. For access to work in my tank, I can simply roll the light rack away from me, to the opposite side of where I am working.
 |


Feeding
Although I do love my corals, I would also definitely consider myself a fish guy. The thought of having a reef tank without lots of fish does not appeal to me at all! I currently have just over 60 reef fish swirling around in my tank, over half of which are Anthias. I believe one of the best ways to help them get along and not kill each other, is to keep them well fed. My fish are fat. I’m definitely not an under feeder.
I use an auto feeder filled with all types of different dry flakes, pellets, and Cyclop-Eez. It is timed to go off three times a day. My auto feeder is mounted over a long funnel that reaches down into the water and ends three inches above one of my powerheads. When the food drops down the funnel into the water it eventually sinks and gets sucked through the powerhead. Then the food gets blasted across my tank and eaten, instead of just floating over into my overflows. My fish have somehow memorized the times and they will all start gathering in front of this powerhead minutes before the auto feeder goes off.
I also feed various mixtures of frozen foods once a day, along with half a sheet of Nori for the tangs. I believe the amount of food I put in my tank daily is the reason I have to run a sulphur denitrator and GFO constantly to keep my phosphate and nitrate under control.
 |


Cooling
With the amount of heat my lighting creates I was going to need some form of cooling, especially if I was ever going to enclose my system into any kind of cabinet. I have a large, quiet, squirrel cage blower controlled by a thermostat that is mounted inside my tank stand. This blower pushes air in through the bottom of my cabinet, forcing hot air up and out through the top of the canopy.
I also use my backyard koi pond to cool my tank instead of adding the expense and noise of running a chiller. The coastal climate here is fairly mild year round. The 1800-gallon koi pond temperature normally ranges between 50 and 70 degrees Fahrenheit. I placed a Mag 12 pump in the filter sump of my koi pond and control it using my APEX controller. I ran two insulated 1” PVC pipes, a supply and a return through my living room wall to the sump of my display tank. The supply and return piping is connected to two parallel 12’ long coils of 5/8” diameter PEX tubing that are submerged in my display tank sump. PEX tubing is normally used for radiant floor heating. When my reef tank water temperature rises above 78.5 degrees, the koi pond water is then circulated through these PEX coils, cooling my reef tank water while heating my koi pond.
Livestock
|
Fish:
|
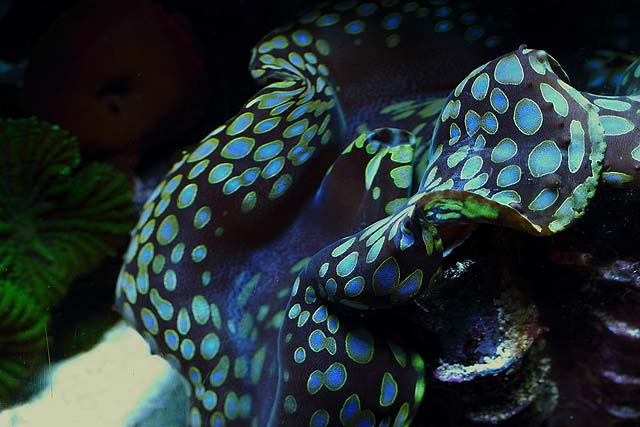 |


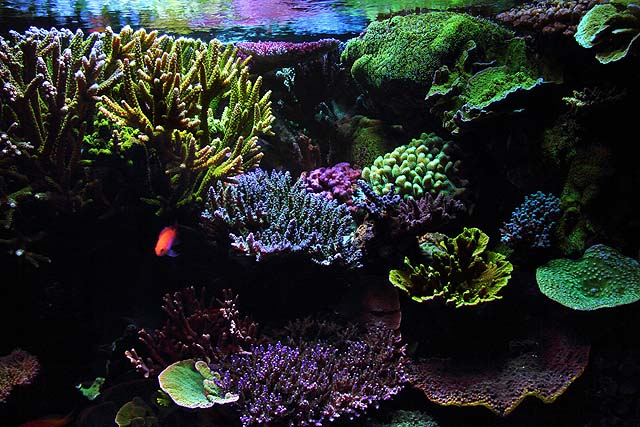
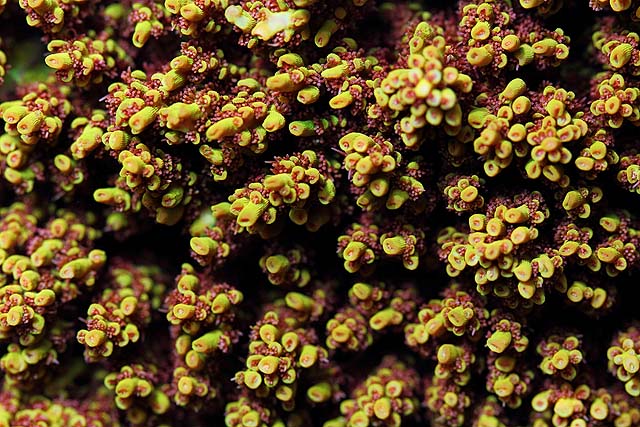
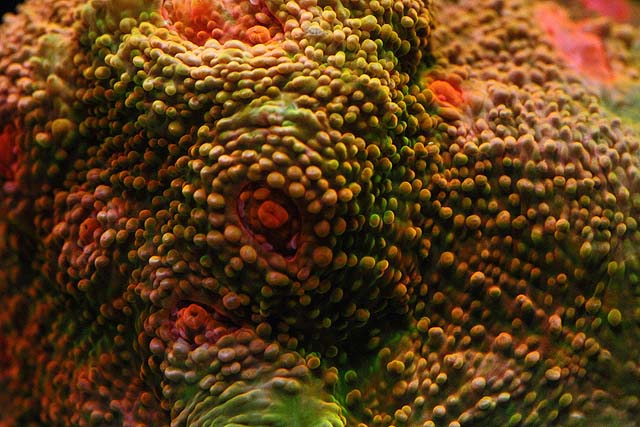
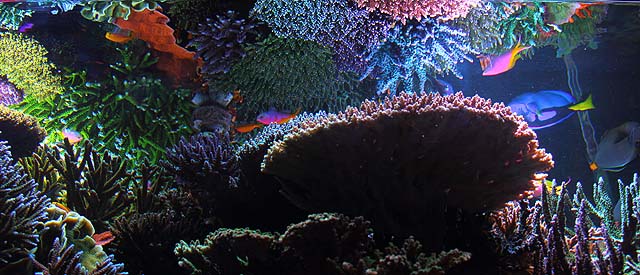
Coral:
Besides a few softies and LPS my tank is definitely dominated by SPS corals. I would not even begin to try to identify them all. My SPS all started as frags from various places. Many of them come with the trendy names but many of them are not. Some of the fast growers have been chopped back to a manageable size several times now. I’m not as diligent as I probably should be when it comes to trimming back corals that have grown into each other. A lot of the large colonies that I have today are ones that have outgrown and basically smothered their neighbors. A big part of my tank maintenance today is pruning back corals that are overgrown by shading out themselves or other corals.
Quarantine
With all the pests out there on both fish and corals, even with all the horror stories out there, it amazes me to hear how many hobbyists do not quarantine their animals. I would not even think about adding coral or fish to my system without at least three, usually four, weeks in my quarantine tank (QT). Personally, “dipping” is just not enough. I have tried many different manufacturers, different techniques, and still have not found one that I have total faith in. I still dip all my new corals, it does not hurt to try, but I have still found pests that have survived through my dipping attempts. Luckily, I have only had to deal with them in my QT. I spend a lot of time carefully looking over every new animal.
Alongside of any new coral, I’ll also place sacrificial SPS frags, which I purposely leave in my QT. The frags chosen are species I know from personal experience are pest magnets. I will later inspect these sacrificial frags for pests cautiously as well. One of my favorite tools for finding pests on corals is my Mesoscope. I think it has paid for itself many times over. I am still scared even after four weeks in QT, that I have somehow missed something.
Acknowledgements
I must first and above all thank my beloved wife, Sandra, who calls herself “the fish widow”, for being so accepting of my obsession, for going with me to countless LFSs, and for not driving away and leaving me there when I have taken way too long to come back out. I must say thank you to all my many friends at the Monterey Bay Aquarium who have generously taught me so much over the many years. In particular, I must thank Scott Greenwald of the MBA. Scotty’s passion for everything aquatic has been a huge inspiration for me and without his help and encouragement early on, I would not be where I am today in this hobby. Thanks to my trusted friend and tanksitter Rodger Jeska for keeping an eye on my all my animals, giving me piece of mind, when I can’t always be at home. Thanks to Kraylen for putting me on Reef Central with his videos, and to Klepto and Reffer831 for their great photos. Last and not least I want to thank everyone
 |
Feel free to comment or ask questions about my tank in the Tank of the Month thread on Reef Central.
![]()