|
Dave Jelley’s (250G) Reef Aquarium
Acknowledgements
First let me say how overjoyed I was to learn that my tank would be Tank of the Month, and how pleased I am to be given the opportunity to share my experiences and techniques with fellow hobbyists. Before getting into my system’s details, I would first like to pay homage to the staff at Reefkeeping.com and Reefcentral.com for their invaluable contributions to this great hobby. Without their hard work and dedication, hobbyists would have much less access to the information needed to enjoy success in this hobby.
Introduction and Background
Like many, I have been fascinated by aquatic life since I was a child. Consequently, I have had an aquarium of one form or another for more than 25 years. My journey into the saltwater realm started in 1997 with a 35-gallon tank and all the wrong equipment. Needless to say, I had my share of problems with nuisance algae until I decided to buy my first reverse osmosis unit for a whopping $800! It was only a matter of time until I upgraded to a 72-gallon bowfront aquarium to better house my fish and large-polyped stony coral collection.
 |
Living in Toronto, Ontario, Canada I am fortunate to have access to a great selection of saltwater stores providing both high quality equipment and livestock. This helped make my decision to incorporate a larger reef into my basement a reality in 2002. After having made this decision, however, I experienced two somewhat significant setbacks, both as a result of equipment failure. The first was in 2005 when a solenoid stuck open, flooding my 220-gallon tank with freshwater during a time when I was not available to address the problem, resulting in the loss of the majority of my SPS collection. After experiencing such a significant loss the only way I could motivate myself to get things up and running again was to purchase a new tank that incorporated a few new features, such as an external overflow and Starphire® low-iron glass.
 |
 |
 |
 |
After much planning I designed a 250-gallon tank with Starphire® glass on three sides (hence my 250G username), an efficiently designed closed-loop system, and a compact end-to-end external overflow. Regrettably, this tank was running for only 10 months before the back panel began to separate from the rest of the tank! Thankfully, I noticed this one week before I was to install my canopy; otherwise the entire panel could have released without warning. The tank was under warranty…but…I ultimately was given a similar replacement tank (new) not of my design. Had my local reef store not coordinated to get me this tank I would have taken a break from the hobby. Many local hobbyists were over to my home before the teardown of the 250 to preview corals I would have had available. My corals were stored in my coral fragment tank and sump at the time, and I was unsure whether the new tank would fit down the stairs of my home. The problem with the 250 was determined not to be its design (as my new tank is of the same glass thickness), but “other” reasons. I lost only a couple of SPS colonies during the transfer into this replacement tank in December 2006. And if you were counting, yes, I have moved three tanks all over 220 gallons down the stairs and into my basement since 2003!
The Display Tank and Canopy
My current tank measures 72” long, 36” wide and 24” high, making it hold approximately 270 gallons. It is viewable from three sides, and has Starphire® glass on all viewable sides. I would have loved to have the tank viewable from both 6’ sides but the layout of my basement could not accommodate it.
System Profile:
|
|
270-gallon (72” x 36” x 24”) three-sided Starphire® display tank |
|
|
120-gallon sump with seven baffles, 2’ x 2’ refugium |
|
|
40-gallon fragment tank plumbed into the main system |
|
|
Custom-built oak stand and canopy |
|
|
Three 400-watt 20K XM bulbs in Luminarc reflectors supplemented by four 160-watt VHO bulbs (3 actinic, 1 daylight) |
|
|
The tank has an external overflow and a ¼" piece of black acrylic laminated to the inside of the tank, which also incorporates the overflow's teeth. I would not have designed the overflow this way or used ¼" acrylic, but that is a discussion for another time. Six holes are drilled into the back panel for the closed-loop system (two 2” bulkheads and four 1.5” bulkheads), as well as six 1” holes drilled into the euro-brace that surrounds the tank’s perimeter. The holes in the euro-brace are not being used at this time.
I designed and constructed the stand and canopy by myself. The stand is built from concrete blocks mortared together so it is perfectly level in my basement (which naturally slopes towards the drain). On top of the concrete block is a layer of ¾” plywood and a layer of 3/8” thick high-density styrofoam insulation.
I framed the stand and canopy with 2" x 4"s, skirted it with a layer of 7/8” thick oak and then applied a dark walnut stain. The wood was planed and glued by my carpenter and I cut the panels to length, glued them together and completed the finish carpentry myself.
Of particular concern to me during the canopy’s design was maintaining access to all areas of my tank and not having any obstructions or unsightly hardware (I do not have a center brace, only euro-bracing). While this was not easy to accommodate, I wanted to be able to move my corals all the way around the tank without removing my hand! This was accomplished by the use of a stainless steel piano hinge and magnets to hold the panels open, thereby allowing unobstructed access to the tank. As illustrated below, I used a forester bit to recess the magnets into the panels, which were then covered with a hardwood dowel. All wood surfaces were sealed with three coats of oil-based polyurethane.
Sump and Refugium
The sump is 48” long, 24” wide and 24” high and has seven baffles. The Beckett skimmer is fed from the first baffle chamber where the water enters from the overflow. The sump houses a 24” x 24” refugium where three species of macroalgae grow. The refugium is lit on a reverse daylight schedule using two 24” 65-watt power compact fluorescent lights. Water flow through the sump is estimated at 2000GPH; dense macroalgae is always present from the top to the bottom of the refugium. A float valve connected directly to the RO/DI unit is used to maintain water levels.
Water Quality and Filtration
I am not one to check water parameters all that often. Honestly, I check my calcium and alkalinity once every four months or so. I find a large system such as mine to be very stable; I have it “dialed-in” and it tends to maintain itself. At the same time, I use only high quality source water. I use an eight stage water filter consisting of two pre-filters (5 and 1 micron), three carbon filters, a 100 GPD RO membrane and two DI canisters. Biological filtration is provided by approximately 250lbs. of live rock (in the tank and sump) and approximately 1-2” of aragonite in the display - just enough to facilitate aquascaping rather than provide any significant biological filtration.
Water Parameters
|
Water
Parameters:
|
|
Ca:
~ 400 ppm |
|
|
Alk: 8-10 dKH |
|
|
Nitrite: not tested |
|
|
Nitrate: not tested |
|
|
PO4: not tested |
|
|
Mg: not tested |
|
|
SG:~ 1.025 |
|
|
Temp:
77-78° F |
|
|
pH: 8.0-8.1 |
|
|
|
No chemical “supplements” are added to the water, only the use of a calcium reactor and a kalkwasser stirrer. Similarly, no carbon or other phosphate removal medium is used. I have tried ozone, carbon and phosphate removal media, but have removed them from the system after seeing no visible indicators of improvement. Having said this, as I have somewhat recently started maintaining a collection of zoanthids and Palythoas in my SPS dominated tank, I do run carbon from time to time, usually around the time I need to fragment some of the zoanthids and Palythoas. I cannot say for sure whether this has been useful, but I will continue to use it for the time being.
For mechanical filtration I utilize 100-micron filter bags on both 2” overflow drain pipes, the 1.5” coral fragment tank’s overflow drain pipe and the 1.5” skimmer output pipe. I have found these to be an excellent way to keep my Beckett skimmer free of particulates, and also to keep my sump free of detritus. I change the 100-micron filter bags every two days or so as required. The bags are placed into the washing machine and washed/rinsed in warm water; no detergent or bleach is used during washing.
A Marine Technical Concepts HSA-1000 protein skimmer, powered by a GenX PCX-100 pump, is used on the system to remove organics. This is one well-constructed skimmer and, despite being the old single Beckett style, it easily skims my estimated 350+ gallons of water. Standing 48” tall, I feel the extended water/bubble contact time helps with the removal of organics compared to the shorter Beckett style skimmers.
Lighting
Until about a year and a half ago I was never pleased with the lighting options for a wide tank (say, 30” or wider). At one time I had four 400-watt bulbs on my system and was still not pleased with the light coverage. After spending about six weeks reading various threads on Reef Central about people’s experience with the Luminarc reflectors, I picked up three for my tank, and all I can say is, “WOW!”
|
Photoperiod:
|
|
Halides: 12:00pm – 9:30pm (staggered 15 minutes apart) |
|
|
Actinics: 11:00am – 10:30pm |
|
|
Moonlight: continuously on |
|
|
|
I utilized square aluminum tubing to frame and mount the reflectors which house 400-watt 20K XM bulbs fired by MaXkor electronic ballasts. In addition, I use two Icecap 660 ballasts to fire four 160-watt URI actinic bulbs. Remarkably, the tank does not appear blue at all, as the ballasts fire the XMs to appear very white. Had I not purchased this combination of ballasts and bulbs, I would not have been able to use 20K lighting because I generally find it too blue for my liking. The tank is remarkably bright and both the corals and I love it. I also use an 8” (15-watt) black light as a moonlight. I find the LEDs provide too much of a spotlight effect, whereas the black light appears much more diffuse and natural.
Circulation
Circulation is provided by an Ampmaster 3000 return pump whose output is delivered back into the tank via two 1” Seaswirls. I estimate that about 2000GPH is delivered back to the tank from the return pump. Another Ampmaster 3000 is used for the closed-loop system. I estimate I get about 3000+ GPH from the closed-loop pump, for an estimated 25x turnover for the tank. I have the closed-loop pump elevated from the ground to minimize head pressure and use two 2” intakes and four 1.5” returns. Two 2” intakes are useful for maximizing intake, as their strainers can become restricted from time to time, reducing flow. No wavemaking devices are used on the closed-loop system at this time.
I have recently added two Tunze 6100 pumps on a multi-controller as the small polyped stony coral colonies have become more dense. The corals have generally responded well to the increased flow provided by these two units.
Calcium and Alkalinity
Calcium is maintained with a Marine Technical Concepts Pro-Cal calcium reactor and an Octopus kalkwasser reactor. I initially bought the kalkwasser reactor to assist with maintaining a higher pH, because running my calcium reactor so fast was reducing the pH. This has generally helped to raise the pH, and also has assisted with maintaining calcium and alkalinity as the tank’s requirements increase. My pH fluctuates between 8.1 and 7.9, day to night. The kalkwasser reactor is fed freshwater via a dosing pump which draws from a reservoir connected to a float valve.
I have been fiddling with the kalkwasser reactor's drip rate as I have noticed my dKH heading higher than usual. I may drip kalkwasser only in the evening in the near future.
Temperature
I maintain my temperature at 77.5°F using a Medusa temperature controller and four 250-watt heaters. Such a large tank in a basement (in Canada) does not require a chiller. I placed my sump directly on the concrete floor to help with cooling. A fan on the sump is used for cooling on warm days. The warmest I have ever seen the tank is about 80° F. Water temperature fluctuation is typically less than 2°F.
Maintenance and Husbandry
While I do not recommend this approach by any means, I do not do water changes on a regular basis. In fact, I have done only one water change in the past two years. Clearly, this method is not for everyone, and I do not recommend it to most hobbyists. I should mention that I do not feed heavily, and the system contains few fish. While many questions could be asked about the various elements that could be depleted in my reef, I have seen no ill effects and I am happy with both the color and growth of my SPS corals.
I clean the glass every day with a magnetic scraper whether it needs to be cleaned or not (my glass usually develops a very light film over a 24-hour period, detectable from the side when I clean the glass). This regime results in very little time spent using a scraper on the glass, which likely results in fewer scratches than if I scraped it more often. I also keep the back panel free of coralline algae because I feel that this keeps the tank looking sharp, provides contrast and reflects more light throughout the tank.
Coral Pegging System
To easily remove corals from the main display tank and, just as importantly, to get corals to stay securely in place where I want them, I utilize a coral pegging system. This system incorporates drilling small holes into both the display tank's live rock and the base of the subject coral. Rigid tubing is then inserted into the hole in the subject coral and is then placed into the desired hole in the live rock.
This system allows me to place corals essentially wherever I want in a secure fashion, while allowing me to remove the coral if it becomes unhappy, too big or unsightly, or requires fragmentation, without the headache associated with removing a coral encrusted onto the live rock. This system also allows easy mounting of corals on vertical slopes, which I feel adds nicely to the aquascape. I simply use small diameter rigid airline tubing from the local fish store for this application.
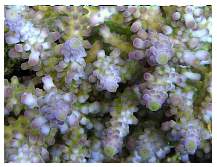
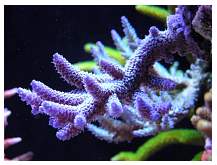
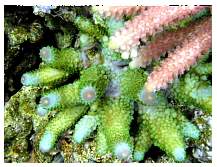
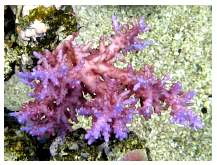
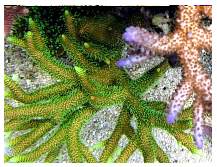
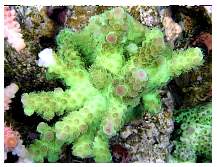
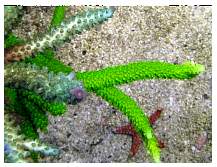
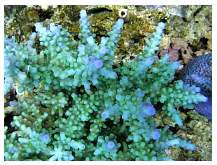
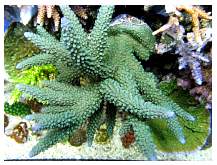
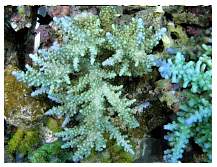
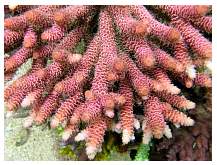
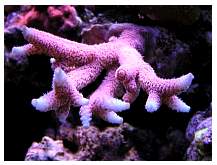
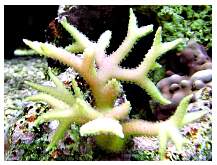
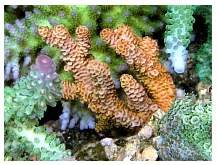
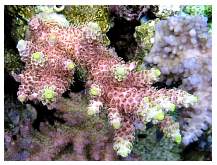
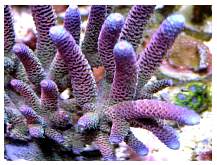
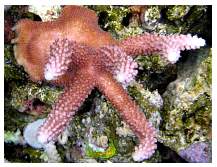
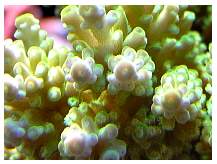
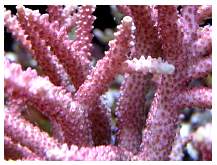
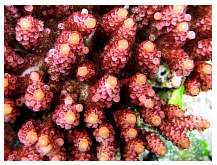
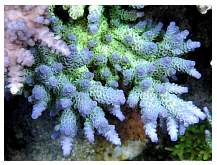
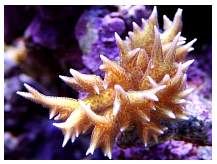
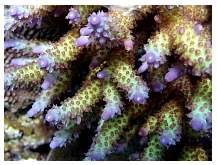
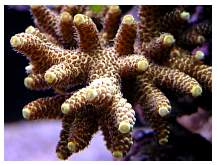
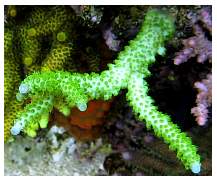
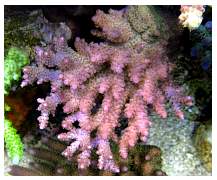
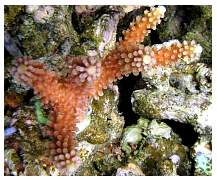
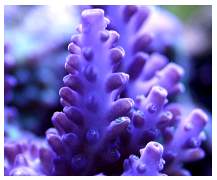
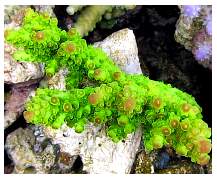
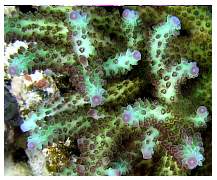
Inhabitants
I am no expert in identification, so I will not even try. You can take a look below, as I tried to get a picture of many of them from my system. Some common, others uncommon, most seem to be growing well and appear to be in good health. In addition to small polyped stony corals I have recently begun collecting quite a variety of zoanthids and Palythoas. As it becomes more difficult to find SPS corals that I do not already own, I seem to have developed a liking for zoanthids and Palythoas.
In terms of fish, well, I do not have many for a 270-gallon tank. My fish list includes:
- Black tang (3.5”)
- Blue tang (4”)
- Purple tang (3”)
- Tomini tang (2”)
- Mystery wrasse (3”)
- Labouti Fairy wrasse (3.5”)
- Peppermint hogfish (2”)
- Purple firefish (2”)
- Mandarin goby (2”)
- Copperband butterflyfish (2.5”)
Feeding
The tank is fed Omega One™ flake food daily, and Cyclop-eeze™ and/or Golden Pearls™ two to three times per week. In addition, Sera™ Spirulina stick-on tablets are used daily. These are a great way to feed and display your fish (especially your tangs) as they nibble on the pellet stuck to the glass. Just as importantly, the pellets do not make a mess in your tank. It takes no time at all for the fish to learn what to do. No frozen fish foods (brine, Mysis, etc.) are used in the tank.
Planned Improvements
Despite all the planning I did during the “initial” design phase, there are still a number of planned changes/improvements I would like to make. It seems there is always something to do, and never enough time or money to do it! Planned changes include:
Short-term:
- Wiring my main circulation pump and heaters to a separate circuit “just in case” something happens
- Covering the only accessible electrical outlet below a water source with a PVC cover (it is under my raised coral fragment tank away from splashing, but you never know)
Long-term:
- Installing a heat recovery ventilator (HRV) rather than venting the humid air out my basement window
- Eventually getting a power transfer switch wired into my electrical panel so my generator will start automatically if I am on vacation at the time of a power interruption
- Save enough money to finish the rest of the basement!
Photography
Dave Jelley
- hardware and selected livestock using a 6MP Canon Powershot S3IS
Jenson Millare, Reef Raft
- selected livestock using an 8MP Canon Rebel XT equipped with a Sigma DG 105mm macro lens
Feel free to comment
or ask questions about my tank in the Tank of the Month thread on Reef Central.
|
If you'd like
to nominate a tank for Tank of the Month, click here
or use the button to the right. |
 |
|