

|
| |||||

Do It Yourself – Sulfur ReactorBy Frank Aguilar (djfrankie)
It has been almost a year that I started the thread about DIY Sulfur reactors in Reefcentral with the intent of helping fellow hobbyists deal with the never ending fight against high concentrations of nitrate levels within their saltwater systems. I decided to write this article with as much information as I presently know regarding the use of sulfur reactors to combat nitrates in our saltwater systems. After countless hours of research and learning from others as well, I am pretty confident this article will serve as a general guide for hobbyists who decide to implement one of these reactors in their arsenals. Here’s a brief history of how these reactors made their way into the reefkeeping hobby. In 1991, Marc LANGOUET applied this method of removing nitrates to saltwater aquariums. After three years of observation with no apparent toxicity in several aquariums he found sulfur denitrification to be safe and harmless to aquarium species. He got the original idea from his ex-professor Guy Martin from Ecole Nationale Supérieure de Rennes, who had previously applied the system for public freshwater treatment. Others, for example Michel Hignette, Benoît Lamort and Sebastien Leroy, also had the idea that using these bacteria with a sulfur source will remove nitrates from water. Thiobacillus denitrificans are the bacteria responsible for nitrates when they are in a hypoxic place and a sulfur substrate is available. These type of bacteria prefer warmer temperatures in order to multiply and function as desired. Some users have reported the inability to cycle the units due to very cold temperatures. Keep this in mind if you are having issues cycling the unit. Most aquariums run between 76-82 degrees Fahrenheit and these temperatures seem to work just fine. Building the unitThe unit can be simply made out of PVC or as fancy as acrylic. It is up to your individual skills. Always be careful and use safety glasses at all times while building. You will not save much if you end up in the emergency room. This is how I built my unit. Most of the supplies can be bought from Home Depot or Lowes. Here’s a schematic of the unit. 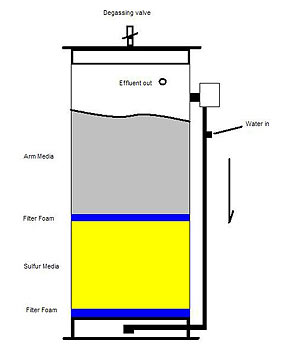
Tools used:
Supplies
Media -Midwest Aquatic sulfur media from www.midwestaquatic.com or www.premiumaquatics.com
I’m sure many other places carry it, but I leave that to each individual to research. I chose this media become it comes pre-seeded and it will cycle faster. Let's Get To WorkStart out by glueing the flange (which will be the base) to PVC tube: 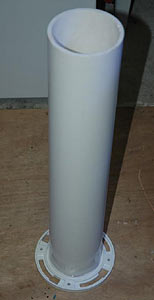
Next with 5/8" Forstner bit drill at the bottom making sure you go through the flange as well. 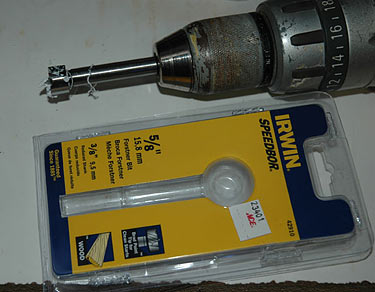
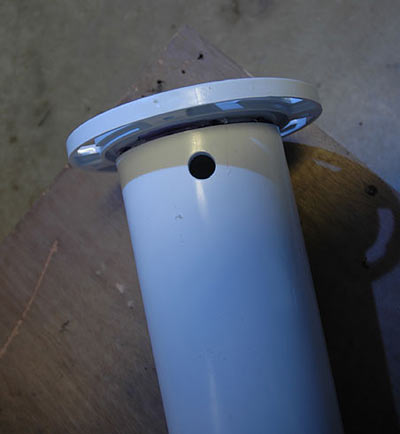
Next cut a 2.5" section of CPVC pipe and glue it to the elbow 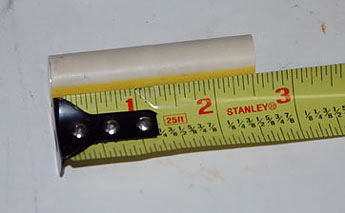
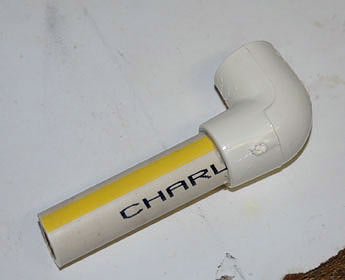
Insert this piece into the bottom hole you just drilled. Leave out about an inch and apply glue to this section. 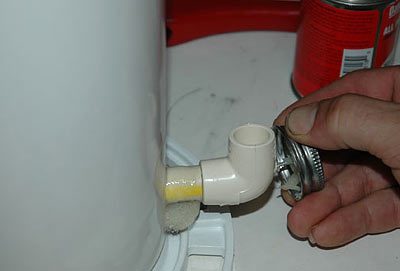
Now push it all the way in and make sure it is as lined up parallel to tube, and hold for at least 20 seconds. 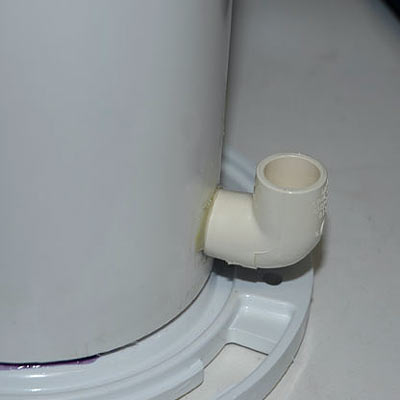
This is the way it would look after you glue the bottom pipe. 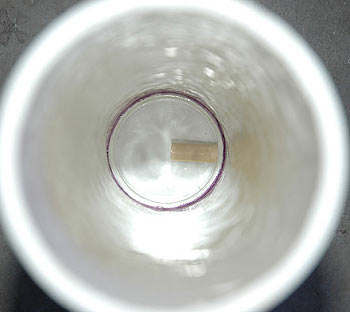
Here's the 3" shower drain that fits fine with minor modifications inside the bottom flange: 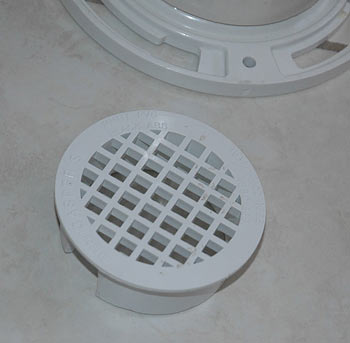
It has to be cut so it can sit over the pipe (in the base of the reactor): 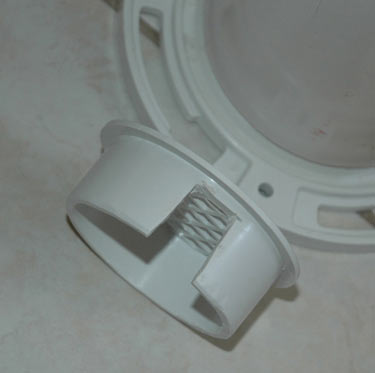
These are the filter pads I use on top of the shower drain grate: 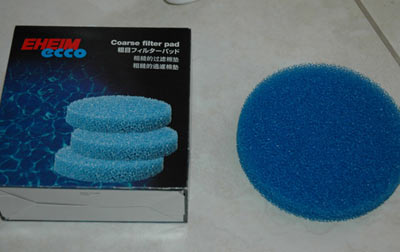
The shower drain will sit inside your pvc pipe with a filter pad on top of it. Later the media will be poured on top of it. Are We Having Fun Yet?Next drill two holes in the PVC body with the 5/8" forstner bit. One hole must be aligned with the bottom elbow you glued earlier. Use a ruler for that. Drill the other hole slightly higher, perhaps off to the side a bit. This will be your effluent out. Tap (create threads within) the effluent hole. 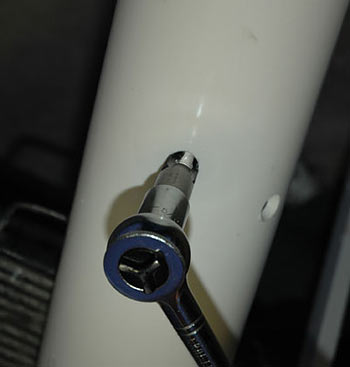
Building the circulation sectionTap the 1/2" Tee fitting. Only one opening is threaded, pictured below. The two other openings remain slip, as they will be glued. 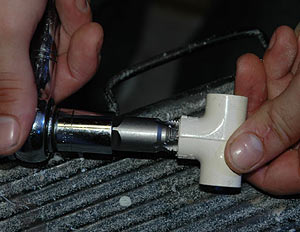
Cut a 1" piece of CPVC. 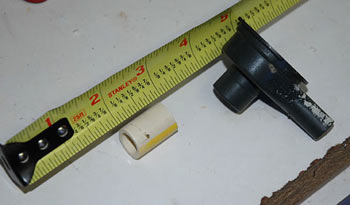
Using the 1/2" drill bit, drill into another piece of pipe to bore it out. This will fit onto the Maxijet nozzle. The pipe could be any length; you'll cut it to length later. 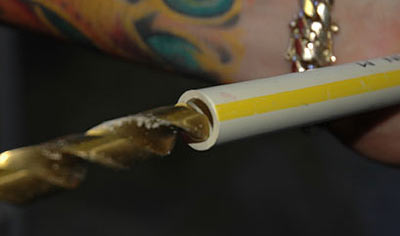
Glue both pieces to the maxijet. 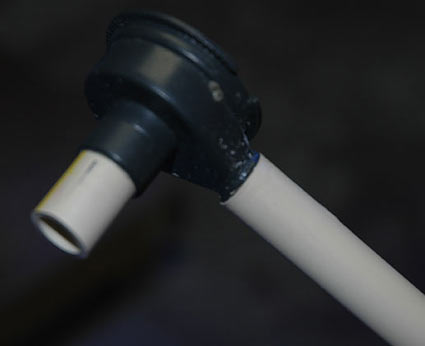
Glue the Tee that was tapped earlier. The Tee goes on the output side of the maxijet, and pay attention to which direction it is facing, as pictured below. 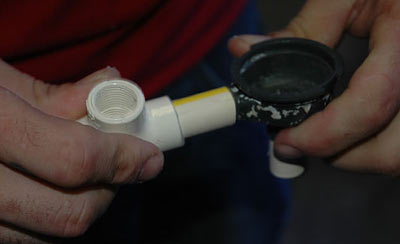
Next cut a piece of 1/2" CPVC long enough to connect this new section to the bottom elbow of the reactor. Then glue the intake of the maxijet to the 4" PVC pipe, and hold for at least 20 seconds. 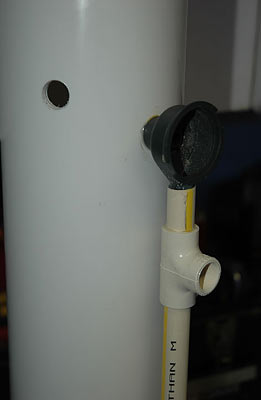
All the pipes that go inside the body has been cut flush so hands do not get cut up or whatever in there. I used a Dremel for that. 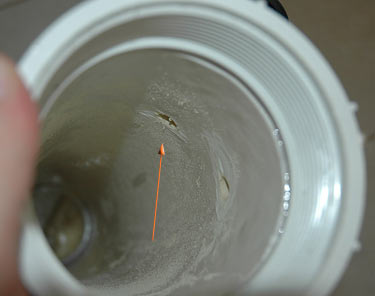
Making The LidCut a piece of scrap acrylic slightly larger than the top flange. Drill and fasten two 1/4" screws, using the flange as your template. 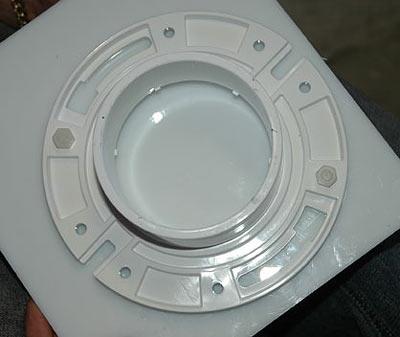
Route off the excess acrylic, using the router's bearing to trace the outline of the flange to create a nice circle. Drill holes for the remaining screws. Now tap the top lid. This will be the degassing vent. 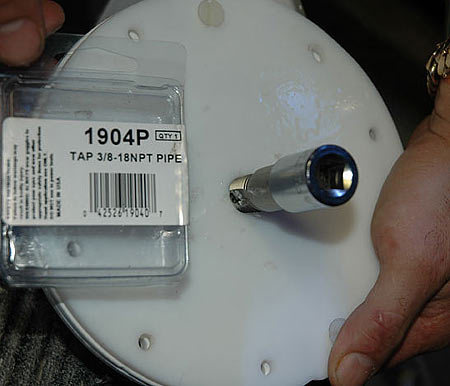
Insert the gasket material between the flange and lid and cut it out using a sharp utility knife. Cut the inside circle out as well, creating a ring as pictured below. 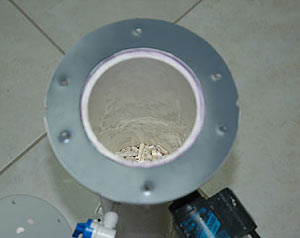
Now that the gasket is cut, go ahead and glue the flange onto the top of the reactor. Using teflon tape, screw in the John Guest fittings into all three tapped areas. 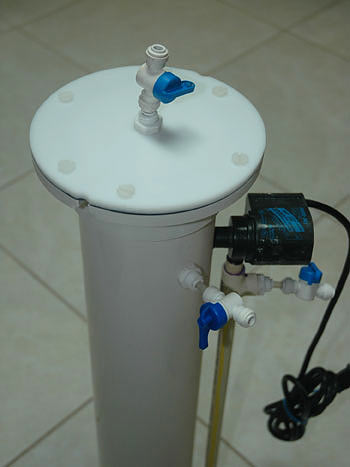
And finally, here's the finished product. 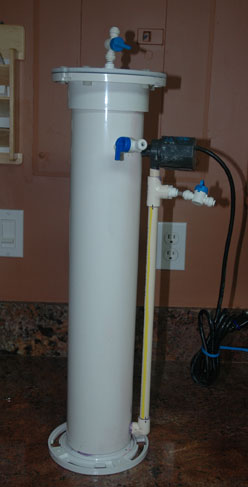
Supplying Water To The ReactorYou can feed the unit by using a Tee off your main pump's return plumbing, which is what I did. This creates a bit of pressure inside the reactor and it becomes easier to adjust the effluent in the early stages. Others feed the unit with a powerhead or by simply feeding from the tank’s overflow. If you decide to utilize the gravity feed (overflow) method, make sure your sump can handle the additional water level in case the power goes off. How To ProceedTo determine how much sulfur media you need, you should multiply your total system gallons x .006. For example: 120 gallon system x .006 = .72 liters of media or about ¾ of a liter. This is recommended for systems with nitrate levels of 50 ppm or less. If you’re over that number you can either buy more media (not recommended) or perform a water change (recommended) to bring nitrate levels down to an acceptable range. Trying to lower nitrates in a system with 50 ppm or above nitrate levels can be long and frustrating. For those with really large aquarium systems I recommend you use Seachem’s Matrix (not the carbon) in addition to the sulfur as this seems to work quite well in providing lots of space for the colonizing bacteria. I have used as much as 1.5 liters of Seachem’s Matrix per liter of sulfur with great results. The new reactor that you've built should be fully cured (by at least one day or longer). Install the shower grate in the base, then the blue pad, then the sulfur. Put another blue pad on top of the sulfur. If you choose to use aragonite media, add it on top of that blue pad. Let the water run through the reactor from 12-24 hours to get rid of air pockets and saturate the media. After the initial break-in period, adjust it to one drop per second until your nitrates measure zero out of the effluent. Adjustments after that should be done in increments of 10% and always wait three days to let the unit catch up. Retest and if nitrates are zero adjust again in the same manner until you reach the desired flow described below. Let the unit catch up before making any further adjustments. 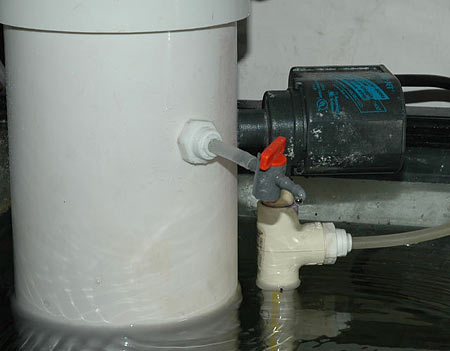
Final recommended flow through your reactor should be 3-4 liters per hour per liter of sulfur media as long as the effluent reads zero nitrates. Marc Langouet advises that you can run as much as 5 liters per hour per liter of media in the reactor with no issues. I recommend you stay within the conservative range. I measure the effluent’s flow with one of these graduated cylinders from USplastic.com 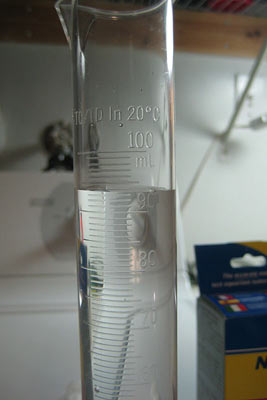
Test results: Within mere days, the reactor's benefit was visible apparent. In the first picture below, the nitrate was very high, but after just a few days of 0 nitrate effluent (middle image), the tank's nitrate level had already dropped.
Other reactorsBefore we wrap up this article with some commonly asked questions, here are a couple of reactors others made:
There are variations in how the reactors are built because we, as hobbyists, have to use what we have at our disposal. The guidelines in this article will lead you in the right direction, and the DIY Denitrifier discussion thread contains ideas which may be easier to implement. FAQ’s regarding Sulfur Reactors:How long does the media last? About 3 years according to the manufacturer. Is it hard to adjust? Not harder than a calcium reactor. The only daily adjustment you have to make is to degass the system from the top valve. About 5 seconds. What is the effluent's pH? The pH out of the effluent in my unit reads 7.5 I smell rotten eggs out of the effluent? The bacteria are not getting enough food (nitrates). At this point the unit needs higher flow or some of the media needs to be removed. Can I store the media for later use? Yes, wash the media thoroughly with RO/DI water and store in a sealed container for future use. Do I have to use aragonite on top of the sulfur media? No, but it helps to buffer the pH a bit and it buffers your tank at the same time. Don’t count on this to replace your calcium supplement anytime soon. Do I still need to do those dreadful water changes? Yes, water changes help dilute some of the more toxic compounds in your water and replace all the lost and absorbed trace elements in your aquarium. Do I need a recirculation pump? Yes, all figures are based on this. Recirculating reactors are much more efficient and are better at preventing media channeling. It also prevents air pockets within the media that kills the anaerobic bacteria which we're trying to culture. Can I use a bigger recirculation pump? Yes, you will have to throttle it back with a valve to prevent the media from fluidizing and becoming mush in there. Does Hydrogen Sulfide accumulate when using one of these denitrators? In most cases, no harmful concentrations of H2S will occur. If you are overly concerned about this there are two way to combat it: What are the cons of running a sulfur reactor? Your Alkalinity levels will drop faster than without using a sulfur reactor. It is imperative that you keep an eye on this parameter. ReferencesHydrogen Sulfide and the Reef Aquarium by Randy Holmes-Farley Sulfate/sulfide by The Skeptical Aquarist JGI: Thiobacillus denitrificans Sulfur Biogeochemistry by Jan P. Amend, Katrina J. Edwards, Timothy W. Lyons Chemistry and The Aquarium By Randy Holmes-farley Reef Aquarist: A sulfur reactor could help reduce nitrate by Charles Delbeek, M. Sc. The Autotrophic Denitratation On Sulfur - What's The Status? by Marc Langouet Nitrates elimination by autotrophicdenitratation on sulfur by Christophe Soler A Reactor Anti-phosphate Anti-nitrates Adding Calcium Without Pump by Pierre Zmiro If you have any questions or comments about this article, please visit this thread in the Do It Yourself forum on Reef Central. | |||||
|
| |||||
|
|