|
Travis Heidbrink’s (Travis) Reef Aquarium
Introduction
First of all I would like to thank Reef Central for the opportunity to let my dream come true. I remember back in 2001 when I first came across Reef Central. The first thing I looked at was the Tank Of The Month (TOTM) articles. I was just amazed at how beautiful they were. My dream became to have a tank of that caliber and possibly some day have my own tank featured as TOTM. What an honor this is for me.
System Profile
System Water Volume: ~484 gallons
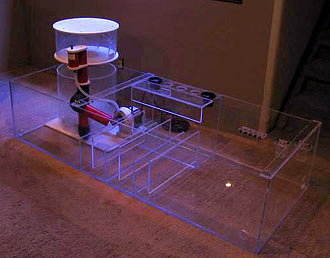
Main Tank: 280 gallons (72" x 30" x 30") custom made by Envision Acrylics
Sump: 129 gallons (69" x 27" x 16") custom made by Reef Mania
Refugium: 75 gallons (48" x 18" x 20") All Glass Aquarium
Skimmer: Royal Exclusive Bubble King 400 internal
Return Pump: Iwaki 100
Return Pump (refugium): Blueline 40
Water Movement: (2) Sequence 6000 pumps and (2) OceansMotions HD 4-way devices
Lighting (display): (3) 400w Sunlight Supply ballasts, (3) 400w XM 20000K, (3) LumenMax II reflectors, (2) 160w VHO actinic
Lighting (refugium): 250w ARO Pro Series ballast, 250w XM 10000K, 'spider' reflector
Cooling: (4) muffin fans in canopy, (3) turbo fans over sump/refugium, (1) Fantech 150 cfm duct fan, 10000 BTU portable air conditioner, ¾ hp Custom Sea Life chiller
Calcium Reactor: My Reef Creations CR-6 dual
Misc: Phosban in Two Little Fishies fluidized filter, Jacobi carbon in Merlin fluidized filter, 5 stage RO/DI
The Tank Crash of 2003
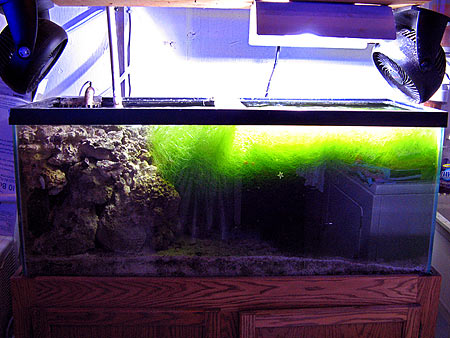
I returned home from work one day and went to look at my tank and my heart dropped to the floor. The tank was pure white and so thick you could not see ½” into the tank. Long story short, I had been using a ball valve on my overflow drain to keep it quiet (NEVER DO THIS!!!!). Either calcium buildup or a foreign object caused enough restriction that it slowed the water flow to the point where the tank began to slowly overflow. My auto-top off at the time was a float switch in the sump that was hooked to my kalkwasser reactor. There was no fail safe in place. By the time I had got home, my tank had lost around 25-30 gallons of water, all of which was replaced with supersaturated milky kalkwasser. The end result was a complete loss of all of my sps corals. Most of the fish, clams, and softies survived.This image was taken just before that sad day.
A New Tank Is Born
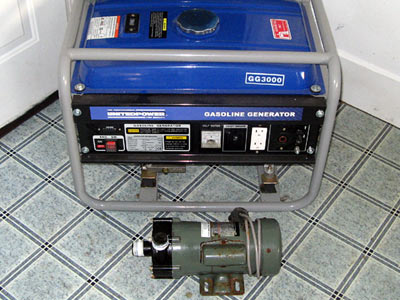
Shortly after the crash, I decided I wanted to start over fresh. I wanted to design a system with every fail-safe I could think of. Hence, my 280-gallon tank was born. The tank itself took almost 1 year from when I started planning to when it was set up and cycled. At first, I went a little overboard and put every bell and whistle I could think of on the tank. But after only a year or so, I realized that all of the bells and whistles were creating more possible points of failure. I ended up going with the “keep it simple” method. I now run a minimal amount of equipment with several fail-safes in place. Some of my current fail-safes are: 32 GFCI outlets in the fish room all wired so if any single outlet trips then no other outlet on that circuit will trip, auto-top off system with an extra float switch to shut it off if the sump water level rises too high, 3500w generator, and a spare return pump.
 |
My other goal of this tank was to keep all equipment hidden and out of sight when people are viewing the display tank. This brought me to the decision to go with an in-wall tank. This allowed me to keep all my equipment out of sight of guests. It also has the added benefit of noise reduction, and the ability to have a separate climate zone for the tank where heating/cooling can be addressed easier as well as humidity, which is a major concern when you get into larger systems.
Water Movement
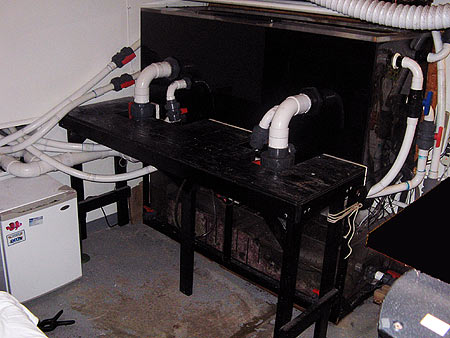
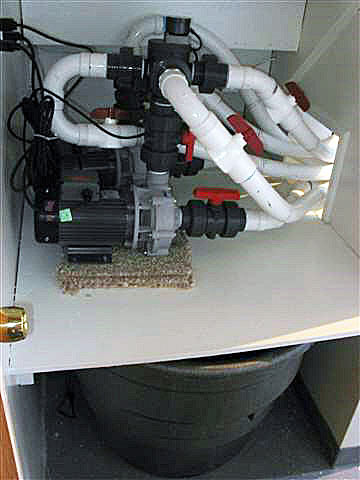
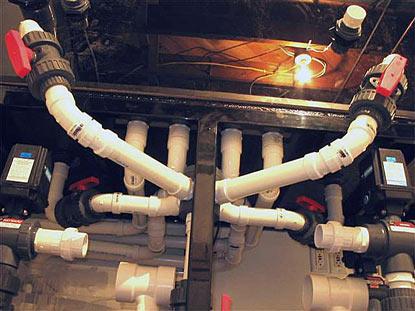
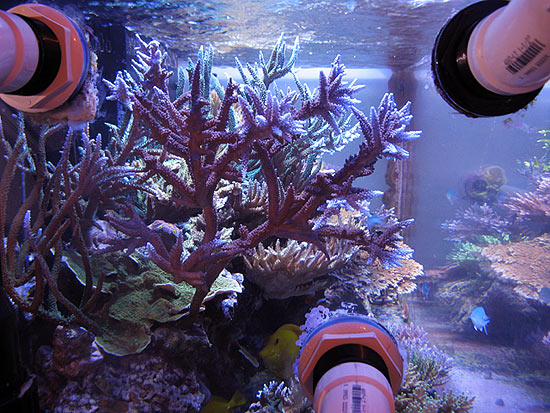
I decided I didn’t want any powerheads in the tank. Instead, I was going to turn the tank into “swiss cheese” and use external pumps on closed loops to provide the water flow. For this reason, I had the tank builder (James at Envision Acrylics) make me a very overbuilt tank. I could have gotten by with ¾” acrylic but I went with 1” all around and 1 ¼” for the front. The reason for the 1 ¼” front is I wanted to be guaranteed a tank that would not have any bowing of the front viewing pane. Flow is provided to the tank through three different loops. The first loop is the return loop where the Iwaki 100 pushes water to my chiller unit (located outside for efficiency reasons) and back to the tank. The second loop is a closed loop run by a Sequence 6000 pushing water through an OceansMotions HD 4-way that alternates the water flow to four different bulkheads located on the sides of the tank. The last loop is another closed loop run by another Sequence 6000 and OceansMotions HD 4-way. This loop provides water flow to two different spray bars and two different outlets on the bottom of the tank. Since the tank is barebottom, this loop keeps detritus from collecting on the tank bottom. To make the cleaning action of the spray bar loop as efficient as possible I initially elevated all of my rock off of the bottom using eggcrate and pvc legs. I ended up having a difficult time keeping nuisance hair algae off of the eggcrate and then reaquascaped using acrylic rods to not only hold the rock structures together, but also to elevate the rock off of the bottom. This works very well and if you are looking at the tank from straight on, you do not notice the acrylic rod legs as I made the cutout in the wall to hide the bottom four inches of the tank.
 |
 |
 |
 |
 |
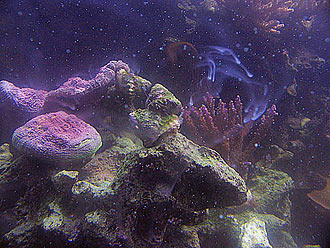 |
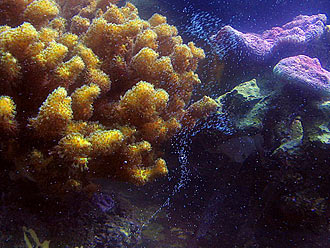
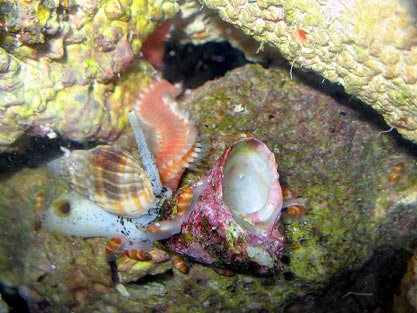
| Snail spawning caught on camera - eggs (left) & sperm (right) |
Filtration
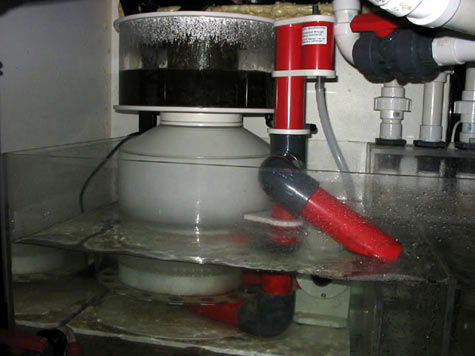
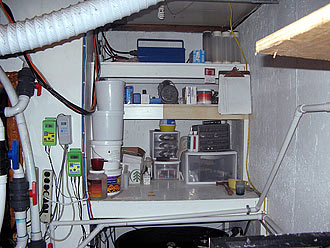
Because my goal for this tank was to be strictly sps, I wanted to design a system that would be very efficient at nutrient removal and be able to run long term without having to worry about “old tank syndrome” (a.k.a. an accumulation of nutrients that occurs over a long period of time until a saturation point is reached and those nutrients then begin to be released back into the water). The tank is barebottom with a very oversized skimmer (Bubble King 400). I also have an extra large sump, which causes the water to slow down and travel a long distance before going back through the return pump. This allows detritus to settle out in the sump where I can easily remove it from the system by siphoning it out during water changes. I also run a 75-gallon refugium with chaetomorpha algae and a four inch DSB. Depending on how much I am feeding my tank, it is not uncommon for me to harvest a five gallon bucket full of chaetomorpha every two weeks. For chemical filtration I run a very small amount of Phosban in a fluidized filter. I don’t actually measure how much I add, it usually comes out to about three to four inches of media in the filter. I change this out every other month or sooner if I notice my phosphate (PO4) levels rise. I also run Jacobi Aquasorb2000 carbon in a fluidized reactor changed out monthly. Jacobi is the best carbon I have seen and was recommended by Eric Borneman. It is very small in size (close to catalytic carbon for RO/DI filters) and fluidizes very well. The only problem is it is next to impossible to get a hold of unless you are a research facility or you order it by the semi truck load.
 |
 |
 |
 |
 |
 |
Lighting
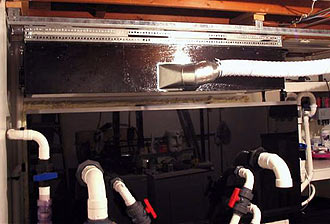
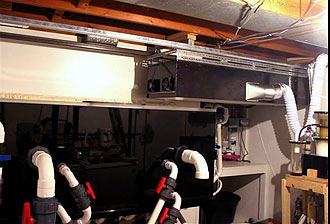
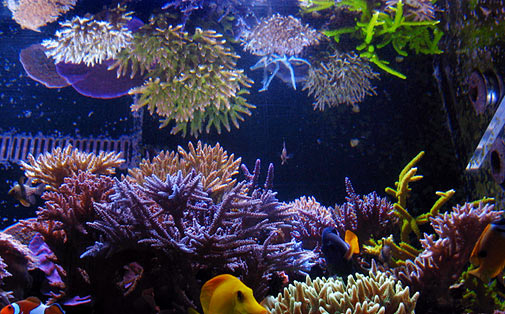
When designing the lighting for the tank, I wanted the ability to be able to easily move the lights out of the way to access the tank. I built a light box out of plywood and mounted garage door rollers on it, which are mounted in a garage door rail system above the tank. This makes it very easy to move the lights out of the way for accessing the tank. When designing the light system, I also took cooling into consideration. I made the light box with a slot that I could slide a sheet of acrylic or glass in to help keep the heat contained inside the box where it could be ventilated outside of the fish room. I first tried acrylic for this and found that it warped very quickly due to the heat of the lights. I found that glass works much better. The light box has two muffin fans on each end that blow cool air into the box. In the middle of the box there is a four inch duct connected to a 150cfm duct fan that pulls the warm air outside the house. Ducting the warm air outside also has the added benefit of pulling the humid air outside from the fish room and pulling in drier air from the house. I originally started the tank with three 400w 20000K bulbs and two 250w 10000K bulbs. I didn’t like the amount of heat this setup produced or the amount of electricity it consumed. I then downgraded the lighting to three 250w 10000K and two 160w VHO actinic. I was very pleased with this setup and got great growth and color. I ran the tank with this setup for two and a half years while I focused on growing frags out into colonies, but I am a blue light person at heart. I prefer a blue tank for the color of the tank itself and the colors it brings out in the corals. After I was happy with how the tank grew in, I switched the lighting to three 400w 20000K and kept the two 160w actinic. I prefer how the tank looks under this setup and the majority of the corals have better color. Growth is not as strong, but now that the tank has grown in well, I am not all that concerned about how fast the corals are growing.
 |
 |
 |
 |
Heating and Cooling
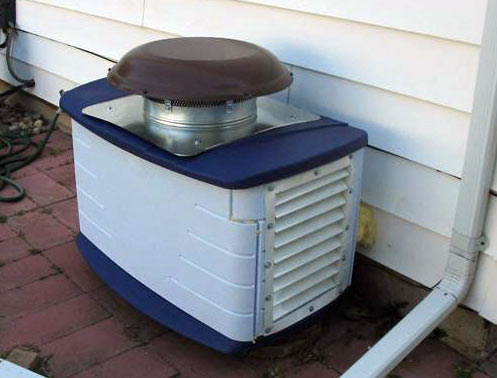
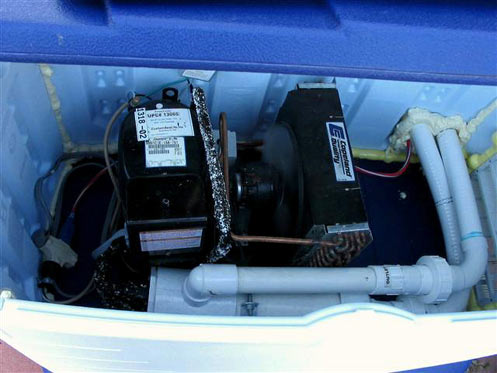
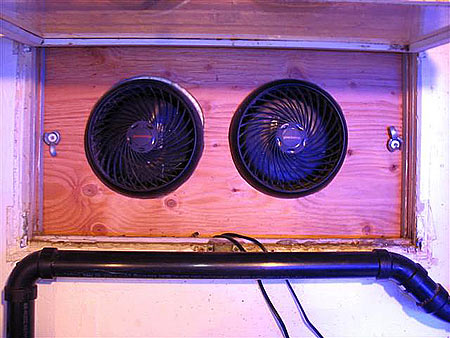
With an SPS tank with metal halide lighting, heating is not usually much of a concern. I do run two 350w titanium heaters but they rarely ever turn on even with our cold South Dakota winters where it can get down to 20 degrees below 0° F. The main concern with this system is cooling. It is not just the lights that add heat to the tank. The large Iwaki and Sequence pumps are also notorious for adding heat. During the fall, winter, and spring I am able to address the issue of cooling easily and energy efficiently. This is accomplished by the duct fan pulling warm air from the lights outside, two Honeywell Turbo fans blowing directly at the water in the sump, one Honeywell Turbo fan blowing across the refugium, and two Honeywell Turbo fans mounted in the basement window in the fish room that I set to either pull air outside, push air inside, or both push and pull air all depending on the season and average outside temperatures. Cooling in the summer gets a little more expensive. When the house is closed up and the air conditioner is running, I have to turn the sump and refugium fans off to keep the humidity levels down. In turn, the chiller becomes solely responsible for keeping the tank cool. The chiller is oversized at ¾ HP but can still run for the majority of the day on those extra warm summer days. I learned my lesson with the chiller on my previous tank when I ran it in the same room as the tank, which was the living room. Chillers put off a lot of heat, which ends up creating a downward spiral cycle because when the tank needs to be cooled, the chiller is dumping hot air into the room. On this tank, I made a weatherproof enclosure for the chiller so it could be placed outside the house. I made it out of a simple Rubbermaid pool storage cabinet, and a large 1500cfm temperature controlled attic fan, which prevents hot air from building up inside the enclosure. As a last resort, I also have a 10000 BTU portable air conditioner in the tank room that I run if it is really warm. To help with the electric bill during the hottest months of summer, I run the tank lights in the middle of the night. During the summer, the house is usually cooler at night and it is cooler outside making the chiller run more efficiently. Because of this, I don’t get to see the tank as much in the summer, but I really don’t mind because summer is when my wife and I are usually doing things outside anyways.
 |
 |
 |
Maintenance
I designed the system so it would be as easy as possible to do maintenance. I found in the past that the more difficult it was to do maintenance tasks, the less likely they were to get done on time. For water changes I have a 100 gallon tub that I use to mix water. I keep this tub full with saltwater at all times just in case of an emergency. To do a water change, I open two valves that drain the sump directly into the floor drain. Then I hook up a hose to the pump in the water change tub and fill the sump back up. It takes me about 15 minutes to do a 100 gallon water change (add another 5 minutes if I choose to siphon detritus out of the sump) and is very little work. In the past, I changed water one or two times each month. Now that the tank has matured and is pretty self-maintaining, I will change the water once every one to three months. I change my RO/DI cartridges every six months, clean all pumps every 18 months, and change bulbs every 12 months. I try to feed my fish daily, but depending on my schedule and other hobbies it will sometimes only get done every two to three days. For fish food, I use my own fish food that I make with different frozen seafood items from the Asian food market and grocery store. Calcium and alkalinity are maintained with a calcium reactor. Currently, I am going through about four pounds of media a month and have to refill my 10 lb. CO2 tank every three to four months. Currently, I am not dosing anything to the tank. On occasion, I will try a supplement here and there but the only supplements I have found that have had a noticeable positive impact on my corals are very expensive and I have a hard time justifying the benefits they provide due to the cost.
Water Parameters
Specific gravity: 35 ppt (1.026sg)
pH: 7.9 to 8.3
Calcium: 420 - 450 ppm
Alkalinity: 9 dKH
Magnesium: 1200 ppm
Nitrate: undetectable
Phosphate: .03ppm
Temperature: 78° F - 80° F |
|
Livestock
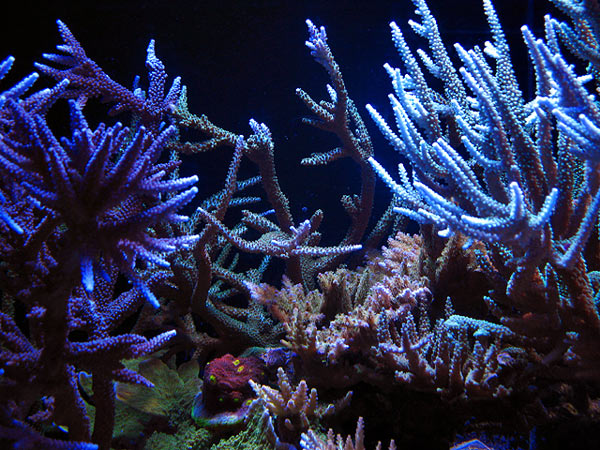
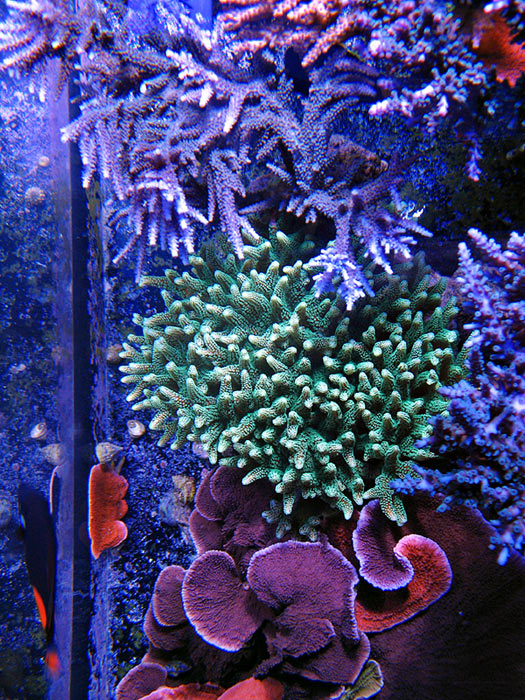
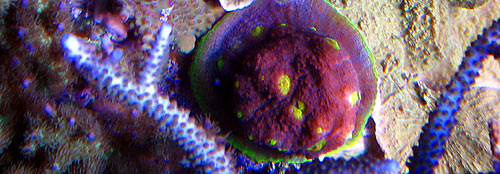
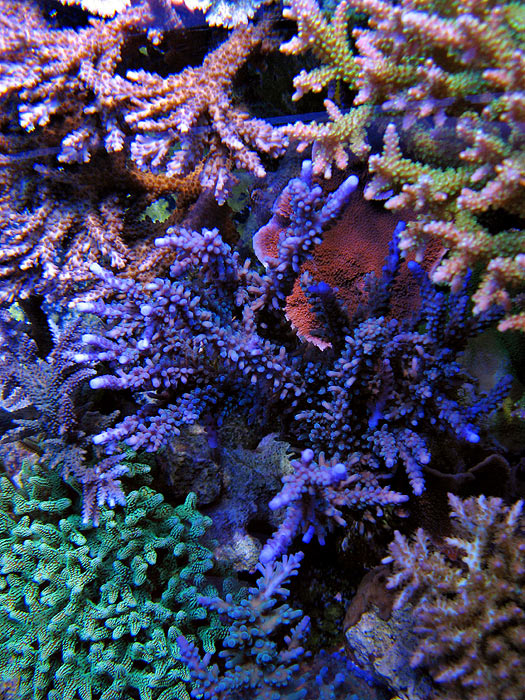
The tank was designed with an sps reef in mind. All of the corals in the tank are sps corals, with the exception of two chalice corals. I consider my fish bio-load to be on the moderate-low end of the spectrum. My current fish load consists of five blue-green chromis, eight pajama cardinals, one lawnmower blenny, one percula clown, one achilles tang, one purple tang, two yellow tangs, and one foxface.
Lessons Learned
If I had to choose one lesson to share with everyone that I have learned in my eight years of reefkeeping, it would without a doubt be QUARANTINE your new livestock arrivals and treat them for pests and diseases before putting them in your display. I cannot stress this enough. I have dealt with every pest possible. I have dealt with all of the common fish diseases as well as Montipora eating nudibranchs, red bugs, and the dreaded AEFW’s (acropora eating flatworms). When I realized I was infested with AEFWs, my tank was already pretty mature and most of my colonies were decent sized. I ended up having to tear the tank down and place all of the corals in a quarantine system for four weeks while I treated them weekly with Levamisole. The treatments were harsh and I lost 25-30% of my colonies. But the end result is worth it. I am still amazed to this day how well sps corals can do when pests are not bothering them. This all happened over two years ago and I have not added another coral to my tank since. I am actually ok with this because at this point, there is no room to add more corals to the tank.
 |
 |
"The Naked Reefer"
I knew that melev would not be able to sleep if I didn’t share this story with all of you. Those that have already heard the story will never let me forget it. When I purchased my Bubble King skimmer, I thought I was not going to have enough clearance under the tank to fit it in the sump. I was only short about ¾”. The problem was fixable but it was not going to be an easy task. Right where the skimmer was going to sit, there was a closed loop intake that went into the middle of the bottom of the tank. I would be able to gain enough extra space if I swapped out the elbow fitting going into that bulkhead. Boy was I ever nervous about doing it. The bulkhead is 1.5” and I would have to completely unscrew the pvc fitting that was currently in it and then screw in a smaller fitting. This is all with 280 gallons of water trying to force its way through the bulkhead in the process. Due to my aquascaping there was no way I could have gotten to the bulkhead inside the tank to try to plug it with something. I knew this was going to be crazy but I wanted the new skimmer bad enough to give me the incentive to do it. I wanted the smallest number of distractions possible while I did it. One thing that annoys me is wet clothes (and I knew I was going to get drenched) so I decided to do it in the nude. Well, I was almost all nude, but of course I had to have my goggles on! Anyways, it was pretty crazy. That water came out with a force I could not imagine. It splashed everywhere, including on some electrical outlets that subsequently produced a nice display fireworks. To top the story off, when I slid the skimmer into its new home I realized that my measurements were off and I never had to redo the plumbing in that spot in the first place!

Editor's Note: Not a real picture of Nekkid Travis |
Future Plans
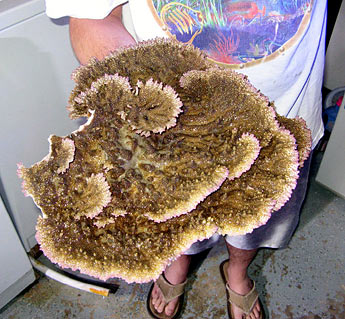
I have nothing big planned for the tank. As the tank grows in, I continue to remove colonies to allow room for other colonies to grow larger. My personal preference is a tank with fewer large mature colonies over a tank filled with lots of bonsai sized colonies. The opportunity for TOTM came shortly after I had removed several very large colonies. Before removing these colonies back in February, I feel my tank looked the best it has ever looked as far as how the corals had grown in. Unfortunately, the discussion to feature my tank as TOTM came right after this, so I was not able to get a good full tank shot for this article when my tank was looking the most grown in. In February, I had removed a pocillopora colony that was 12” around, a monti cap that was 12” around, and a huge plating monti that took up close to a quarter of the tank. In the past couple months I have also removed a large digitata, a large tort, 2 large efflos, and a large stag. At this point, I should be good for another year or so before I need to start removing colonies again.
 |
Thanks
I would like to thank Reef Central, the administrators and moderators that work so hard behind the scenes for providing a quality forum that is informative and friendly. I would like to thank my wife Kryssie for allowing me to pursue this hobby and have this tank in our home. I would also like to thank Jeff “Ball” Shelton for all his help, both with photography tips and picture editing for this article.
Feel free to comment
or ask questions about my tank in the Tank of the Month thread on Reef Central.
If you'd like
to nominate a tank for Tank of the Month, click here or use the button to the right. |
 |
|

