|
Marc Froese's (Fudge)
Reef Aquarium
Introduction
I walked into a small marine section of a pet store pushing my newborn daughter in a stroller 16 years ago, but I don’t think I ever truly left. I can honestly say that the satisfaction, knowledge, enjoyment and friends that I’ve gained along this journey have made it worthwhile. I've had so many marine systems along the way that I don’t think I could fit them all into this article. But, I can show you my latest system, even if it isn’t the last!
Aquarium
This tank was built using plywood and epoxies. It measures 100" x 42" x 30" and has an 6" x 12" x 100" end-to-end overflow. The actual tank contains a total volume of about 565 gallons; the system's total volume is approximately 1000 gallons. It’s an in-wall tank with its face and only one end viewable. It is still young, having been filled with water for a little over two years, and more than a year of construction was involved with all aspects of the project prior to that. During the fiberglass stages of the project, tabs were also mounted on the tank's walls and bottom to support parts of the structure and PVC framework. This allowed me to create the open aquascape that I had hoped to see.
|
Left: Plywood tank construction; Right: tabs mounted on the tank's walls for aquascape support; Below: gel coat applied to plywood frame. |
|
Photos of the PVC structures and rockwork when the tank was initially set up. |
Circulation
Water movement in this tank has been changed several times since its setup, with the original flow consisting of two Sequence 5800 pumps on closed-loops with Oceans Motions wavemakers. While I did like this arrangement, it was a little awkward working around all the associated plumbing, and the pumps produced extra heat and electricity that didnt really need to be there. As you can see from the original pics below, there was a significant amount of plumbing.
The latest and most efficient scenario for me has ended up being four Tunze 6100s, two attached to Wavy-Sea wavemaking devices and one attached to a Sea Swirl (photos below). A VorTech powerhead, as well as a prop-modified MaxiJet and two Tunze wave boxes, round out the rest of the circulation system. The system’s main pump is a Dart, which also diverts a small amount of flow into the "mini-sump." Total tank turnover is about 18,000 gph or 32 times/hour not including the two Tunze wave boxes.
A Hands-on Approach
I have built a good portion of the equipment involved in this setup, partly to have exactly what I wanted, but also because I truly believe that half of my hobby actually resides on the backside of the tank. The DIY projects have been numerous and include: the mini sump (photos below), the main sump, both prior and current skimmers, reactors (both kalkwasser and CO2), the canopy, the stand, the tank, several rock structures, the coral fragment tank (photos below) and various water reservoirs.
One of the most involved projects, and one that's never quite absolutely completed, is the skimmer. It has been changed numerous times in the last two years, starting with an old DIY skimmer that was originally changed to a dual-Beckett, and then some various testing with DIY injectors.
This included constructing injectors that I could see when they became plugged (photo left). This design also sucked the water out of the injector housing and kept it cleaner. Triple injectors were later employed,
as well as some testing with a four Beckett injector version.
The latest iteration was the most labor intense, but the most fun to create.
A mold was built to the largest possible size I could comfortably fit into the skimmer area in the fish room, resulting in a size of 105 gallons, and was constructed of fiberglass and epoxies.
Two Dart GG needlewheel pumps are used for recirculating, and the impellars and housings were modified to accept guttergaurd, which served as a sort of mesh used to create finer bubbles.
A 100 liter/minute air pump is used to inject air to both pumps.
It also houses a do-it-yourself self-cleaning squeegee type head to help me with the maintenance chores.
|
Testing three versions of injection: (left) two Becketts, (center) three Becketts, and (right) four Becketts. |
|
Modified impellar heads (left & center) and a close-up of the self-cleaning skimmer area. |
Another DIY project was the mini sump. It was made to avoid peering into the sump to read or change the calcium effluent or kalkwasser rates. It also allows having all the probes in one centralized area and becomes a convenient section for the doser to dispense any additives and for easily monitoring their levels. It is fed by a single supply, tee`d from the main system's feed line. As water enters the mini sump, it splits into two raceways and baffle zones. This was done to minimize precipitation between additives and, in the case of a power outage, allows the probes to always stay submerged.
Filtration and Equipment
Approximately 370 lbs. of rock performs the biofiltration. Particulate removal is handled by filter socks used only during water changes and detritus "blow-off" sessions. Ultraviolet sterilization and ozone are both used only if I notice anything that I don’t like. The calcium reactor is a large 5-stage Marinetech unit. A semi-DIY kalkwasser stirrer is used to provide about three gallons per day of evaporation top-off, and is fed by a Grotech doser from a freshwater reservoir (photo right); the doser is also used to deliver calcium chloride, and was just upgraded from a smaller Deltec in order to provide more kalkwasser production. Most of the system’s monitoring is done with a ProfiLux Plus II controller.
Lighting
The lighting and canopy, also do-it-yourself, consist of a retractable aluminum canopy that can slide into my adjacent shop, allowing me to work on the tank or the canopy itself, such as when changing bulbs. Supplemental lighting is provided above the canopy so that once it's retracted, I can still see to work on the tank. The canopy has been fitted with three 400-watt 14,000K Aquaconnect bulbs, three 250-watt double-ended 20,000K Giesemann bulbs, four 55-watt power compact actinics and four 4' 54-watt T-5s with actinic and ATI Pro Color bulbs. The canopy has an upper and lower layer of sheet aluminum, with the lighting sandwiched in between. This allows me to directly vent to the outside the heat that the lights generate. I’m very happy with how well this has worked out, and doing this has allowed me to avoid using a chiller.
Lighting photoperiods are governed with a Profilux controller (photo below), and the photoperiod begins with the fluorescents (power compacts and T-5s) turning on at 8 am. The two outside 400-watt halides come on at 10 am, followed by the two outside 250-watt halides and the center 400-watt coming on at 11:30 am. At noon the center 250-watt halide turns on.
At 8 pm the lights ramp down in the opposite order beginning with the first two outside, the final halides off at 9:30 pm and the fluorescents turning off at 11 pm.
Additives
After only two years, there is already a very high calcium demand in the system. I try to keep up with this by using a large calcium reactor, dosing with kalkwasser top-off and by additionally dosing calcium chloride. Any other necessary additives are provided only by water changes.
Maintenance
Weekly water changes are done using Instant Ocean salt, and I usually change about 60 gallons at a time. About once per month, this chore also includes siphoning the sand bed and replacing a portion of the sand that is lost. Carbon filtration is used periodically. The skimmer cup is drained once each day, and I usually “wet skim” about 3 liters of skimmate per day, so it fills the cup pretty fast. The tank is fed a variety of foods, which sometimes change daily, including nori, pellets and frozen Mysis.
Humidity and Ventilation
A thousand gallons of 80° water in a 12’ x 9’ room makes for a lot of humidity, but this is taken care of with the use of an 8" Elicent inline fan on a dehumidistat that’s vented outside (photo below). This also has an inline dimmer-type switch that allows me to dial it in as the season demands. The canopy’s heat and humidity are extracted with a separate 4" Fantech inline fan. Two 5” fresh air intakes at the base of the fish room’s wall allow me to enclose the room without stealing all the heat from the house in the winter. The canopy’s inline fan has a "dryer tee" to allow heat to be redirected from the canopy back into the room in the winter while using the 8" fan to deal solely with the humidity. This combination has performed better than I had hoped for in our British Columbia climate, stabilizing the room's and tank's temperature without using chillers or air conditioners.
Livestock
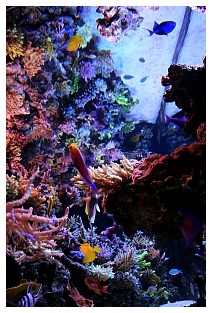
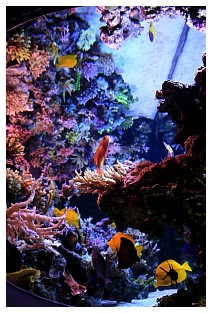
The fish load at this point is about half of what I would optimally like to see in the tank, but now includes:
- 5 Yellow tangs
- 4 Scopas tangs
- 1 Powder blue tang
- 1 Mystery wrasse
- 1 Flame hawkfish
- 1 Pixie hawkfish
- 1 Mandarin dragonette
- 1 Scooter blenny
- 2 Purple firefish
- 2 mated Bangaii cardinals
- 1 Lyretail blenny
- 2 Lyretail anthias
- 1 Rabbitfish
- 2 Niger triggerfish
|
|
Invertebrates are minimal in the system, mostly due to my triggerfish, and there are also about 15 Astraea snails. Additionally, I have two clams, one T. crocea and one T. maxima.
Corals:
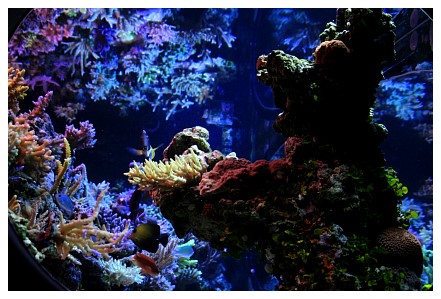
There are about 170 pieces of SPS in the system, representing about 140 species.
Acknowledgements
So many people have influenced my designs and thoughts for this system and its inhabitants that I couldn’t begin to thank them all. But the ones who hover foremost in my thoughts are my dad, for handing down to me both his insatiable thirst to build all things, and the patience to do so. I’d like to thank my partner in crime and former Tank of the Month recipient, Jamie Cross, for showing me what maintenance and tank husbandry truly involve, even if this included coming over and doing it himself if I was slacking. Special thanks to my daughter, my most coveted DIY project of all, for taking the time out of her busy teenaged schedule to pose for a couple of shots. I extend thanks also to my friends, Mike at Hidden Reef, and Dan at Conkayde Marine, for supplying me with a never ending selection of corals to stuff into my tank. And last, but not least, thanks go out to my friends at Reef Central and Canreef and, of course, to Skipper for surprising me with the honors of Tank of the Month and allowing me to share my little chunk of the reef with you all.
 |
 |
 |
Feel free to comment
or ask questions about my tank in the Tank of the Month thread on Reef Central.
|
If you'd like
to nominate a tank for Tank of the Month, click here
or use the button to the right. |
 |
|

