|
Conrad Chua's (Achilles) Reef Aquarium
Introduction:
What a great honor it is for me to have
my reef tank featured here in Reefkeeping Magazine
at Reef Central, together with the other awe-inspiring Tanks
of the Month that I have always envied from afar! Speaking
of afar, I hail from the beautiful tropical island of Singapore,
where cosmopolitan lifestyles are hectic, where a car costs
as much as a house, where visiting 'The Great Outdoors' necessitates
a plane trip out of our concrete island city, and urban fun
is usually defined as a trip to the malls or cinemas. It is
no wonder that aquarium-keeping is a popular way we locals
keep ourselves sane!
Background:
I started in the hobby with freshwater
tanks, keeping everything from cichlids to planted tanks.
Having a close affinity for the marine environment, (I love
marine documentaries, snorkeling, scuba diving, underwater
photography, and offshore fishing, and I worked for a cruise
company and was in the Navy), it was no surprise that I took
up the reefkeeping hobby. I started with a marine tank in
the year 2000 when I got the keys to my new home after marrying
my lovely wife, Serene. We still remember our first tank fondly,
as we both took a week to recover from bodily aches after
struggling to carry the old dirty 118-gallon monster home
ourselves! (Well, it was free and we were broke then!) I still
wince in embarrassment when I see photos of my first marine
tank. It was poorly aquascaped and lit with just two flourescent
tubes, not to mention being sparsely stocked with soft corals,
sponges and fishes that kept dying. I wonder now, with the
same wonder I have when I see my current tank, how I spent
so many hours looking at my marine tank back then!
Visits to the local fish shops resulted
in me buying more and more stuff that didn't work. The hole
in my wallet got bigger and bigger with no corresponding improvement
in my tank, which led me to suspect that something was amiss.
The big smiles I received from the local fish store employees
every time I walked in didn't help! Thank heavens, I got on
the Web and found Reef Central! It was here that fellow hobbyists,
who freely share their experiences and knowledge, have instilled
in me the concepts of responsible reefkeeping and have taught
me the importance of knowledge gathering, with its correct
application being directly proportional to the success of
the reef.
Design Concept:
I endeavored to better my reefkeeping abilities,
and to a certain degree, I was successful. I kept mostly large-polyped
stony corals back then. My old tank prospered by leaps and
bounds, and it was beautiful enough to get the thumbs-up from
most RC reefkeepers and numerous visitors to my home. The
old tank, however, was badly scratched, very narrow (only
1.5' wide), had leaky seals and took up valuable space in
the hallway. The droning chiller under the stand that constantly
blew hot air at us was a major irritant. After many months
of research, I re-evaluated my tank and decided that I wanted
to upgrade to a bigger, better reef-ready tank with all the
modern reefkeeping methods and setup tips that I had learned.
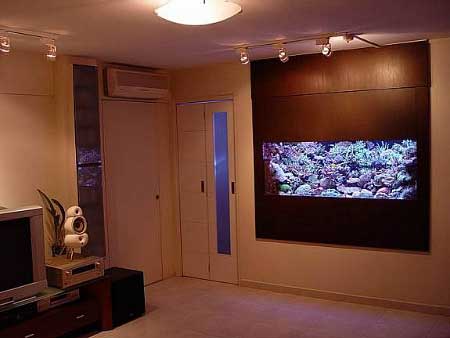 |
I decided on an in-wall design concept
for the new tank, with a façade that framed the glass
sides and covered both the deep sand bed and the top edge
of the water's surface, creating a built-in plasma TV effect.
For easy access during feeding and maintenance routines, I
incorporated a swing door over the tank into the façade,
which I painted a dark wenge color, to better integrate with
my home's interior design. The new tank would sit in the spare
room behind the wall and, because space was no longer an issue,
I decided on a three-foot width, which excited me with all
its landscaping possibilities as I was constantly frustrated
with the old tank's narrow width. The other positives were
that I could now hide all of the equipment from view, and
the light, noise and heat would no longer spill into the hallway.
Because the tank is designed to be viewed
only from the front, I invested in expensive Starphire glass
for the front pane. To this day, I have no regrets, as I believe
that this helps to show the true colors of my corals, clams
and other reef inhabitants without imparting the greenish
tinge of ordinary borosilicate glass.
On September 17, 2002, my new tank was
finally completed and I transferred all the existing live
rock, livestock and water from my then two-year-old tank into
the new one, which is effectively twice the size of the old
tank. I kept mostly large-polyped stony corals during that
third year and battled cyanobacteria, hair algae and Bryopsis
algae during the maturation phase of my new DSB. Two mishaps
later, after the tank overheated when I was out of town, causing
the partial loss of most of my LPS corals, I decided to begin
keeping SPS corals, but only after installing a thermal protection
system to safeguard the livestock against any future mishaps.
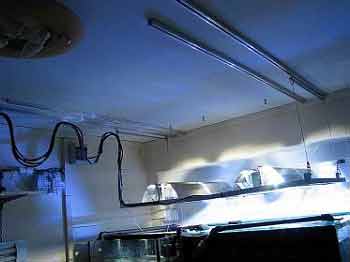
Top view over the right side of the tank (I pushed away the
light hood
for this shot, so mostly blue light illuminated the tank).
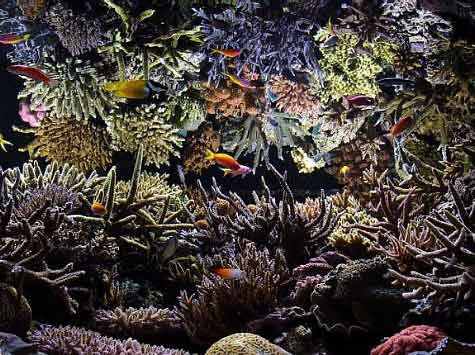
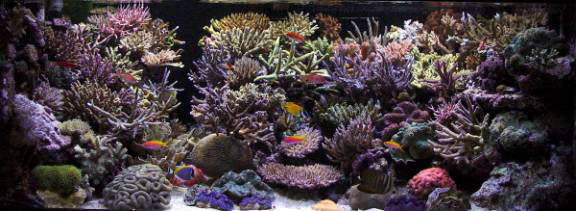
My dream tank is now an SPS-dominated coral
reef tank that took many months to fill with life, and today
it's the proud centerpiece of my home!
Full front view (click to enlarge).
For a short video of the
reef, click
here. Viewers from Asia, Australia, Japan, and Hong Kong
can download from this mirror
site for faster viewing. The video and pop-up window may
take a few minutes to load depending on your connection speed.
The QuickTime plug-in is necessary to view this video. To
download the plug-in click on the image below: Here
|
Aquarium
Profile:
|
• Main
Tank: approximately 297 gallons
|
|
• Sump
Tank: estimated 25 gallons
|
|
• Refugium
Tank: estimated 51 gallons
|
|
• Custom,
in-wall design
|
|
• Workroom
located behind the tank
|
|
Aquascaping:
Before setting up the tank, I spent a lot
of time looking at actual reefscapes from diving magazines,
photos from Jen Veron's Corals of the World reference
books, as well as harvesting from the memories of my own diving
experiences for inspiration to create a natural-looking reefscape
for the tank. I began by separating the rock structures into
two parts, creating the illusion of a swim-through area between
two reef walls. I filled the 'sea floor' between the crevice
created between the walls with plating Montipora spp.
corals and various gorgonians. This natural effect is accentuated
by fishes that swim through the back cave channel, then appear
suddenly in the 'canyon,' only to disappear and reappear again
somewhere else!
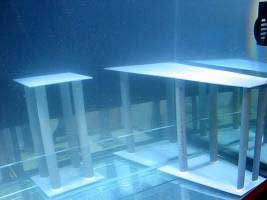
I maximized the sandbed's biological filtration
efficiency by leaving it approximately seventy percent uncovered.
I achieved this by constructing grey PVC reef racks, which
are basically just two PVC sheets welded together to form
the base and the shelf with PVC pipes as the legs. This not
only creates a very strong structure for aquascaping, but
its low-profile means the reef structure contains many caves,
and leaves unobstructed swimming space for my fishes throughout
the whole back and sides of the tank in the areas behind the
rocks. I purposely avoided using white eggcrate typically
used for reef racks as it is flimsy, sharp-edged, harder to
camouflage and takes up more space, and reduces the swimming
space available for the fish.
 |
 |
I wanted my reef to appear as natural looking
as possible so I endeavored to hide as many foreign-looking
elements as I could. I therefore built the overflow box externally,
which not only freed up space inside the tank but also meant
that my reefscape would not be interrupted by an artificial-looking
internal glass box structure. I chose black as the background
color as it provided a needed sense of depth. I siliconed
a black acrylic sheet to the back wall, and I purposely made
it shorter so it stopped one inch away from the sandbed, in
order to facilitate viewing from the rear. Unfortunately,
coralline algae completely foiled my intentions by quickly
covering the rear viewing panel!
 |
A view from the rear of the tank when it was first set
up. From this perspective we clearly see the external
overflow compartment with Durso standpipes, the closed-loop
inlet at the center of the tank, the two return outlets
with flap-type check valves, and the black acrylic background
siliconed inside the tank with the 'viewing strip.'
|
The use of the PVC reef racks allowed the
live rock from my old tank to completly fill the new tank.
I didn't want too many rocks anyway as I envisioned the SPS
corals filling up the empty spaces instead.
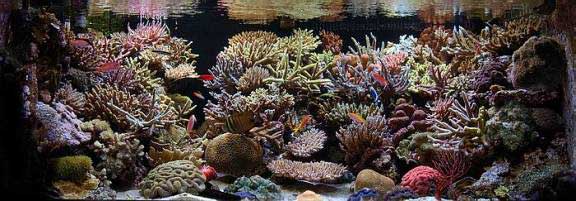
Today, my reefscape is not too far from
what I originally envisioned… a representation of a vibrant,
natural-looking coral reef.
A front view showing the water surface's reflection (click
to enlarge).
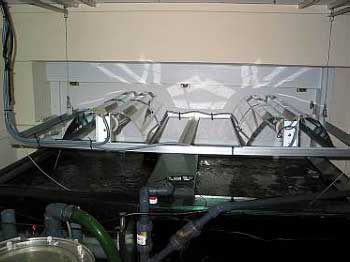
Top view over the left side of the tank (I pushed away the
light hood
for this shot, so mostly blue light illuminated the tank).
Biological Filtration:
I am using a deep sand bed, which gradually
slopes from six inches at the back down to four inches at
the front of the tank. I was able to achieve a consistent
six-inch depth for roughly one-third of the substrate volume
by installing a glass divider, which prevents the natural
settling processes that, over time, would have caused it to
appear level. The DSB performs most of the biological filtration
for the tank as I did not want a lot of live rock in the tank.
The two resident sea cucumbers perform a great service by
constantly turning over the sand bed's surface.
|
Water
Parameters:
|
·
Temperature: 26 - 27°C
|
|
·
pH: 7.88 - 8.26 (Pinpoint pH meter)
|
|
·
NO2 and NO3:
Not detected
|
|
·
PO4: Not detected
|
|
· Calcium:
410 - 430 mg/l
|
|
· dKH:
8 - 10
|
|
· Specific
gravity: 1.024
|
|
Mechanical Filtration:
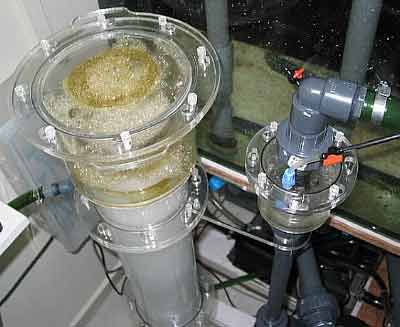
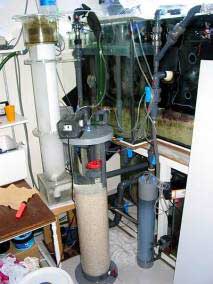
I am using a do-it-yourself Beckett skimmer
that stands one meter tall and has a six-inch reactor body
that produces a hefty, sludgy skimmate.
My DIY Beckett skimmer.
Future plans include upgrading to a double-headed
Beckett version with an eight-inch reactor body. As I intend
to keep more Anthias in my tank, the bioload will undoubtedly
increase due to their requirement of frequent daily feedings.
Chemical Filtration:
I use a mixture of Contraphos™
and Rowaphos™ in a do-it-yourself
fluidized reactor, with Reefez™
granular activated carbon in another reactor.
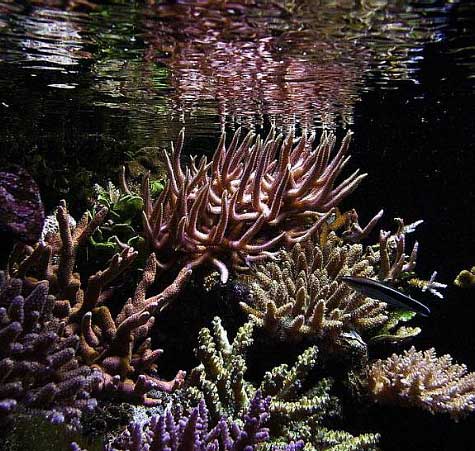
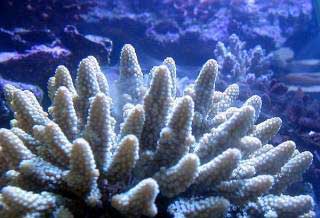
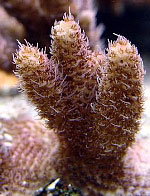
This light pink Seriatopora hystrix grew from a brown
one-inch frag to its
current size in a few months!
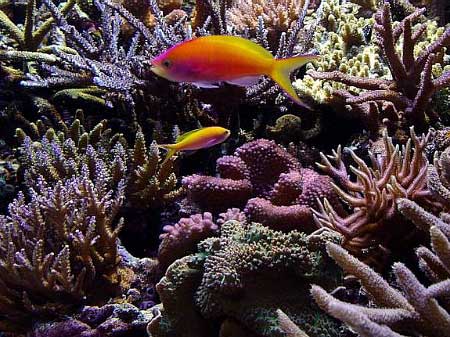
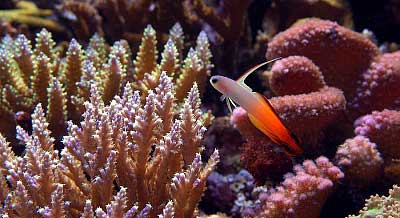
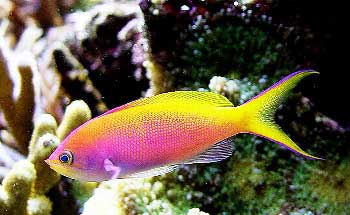
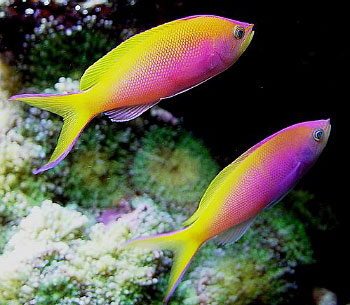
Bartlett Anthias
Circulation:
Insofar as I wanted to create a natural-looking
reef with all 'alien' elements (such as circulation returns
and wave making devices) out of sight, I used an external
overflow box, a closed loop, and carefully hid most of the
in-tank equipment with creative rock and coral placements.
Behind this Hydnophora sp. coral is… a Tunze Stream!
For water circulation inside the tank,
I upgraded from Reeftecs™ to my
current Tunze Streams (a 6080 and a TS12 model) and will probably
add a few more Streams as the reef grows and needs supplemental
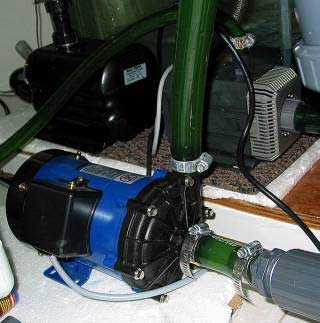
circulation. I use an Iwaki MX-70 pump as the main circulation
return pump, which also drives the Beckett skimmer.
An Iwaki MX-70 pump drives the Beckett skimmer and main returns.
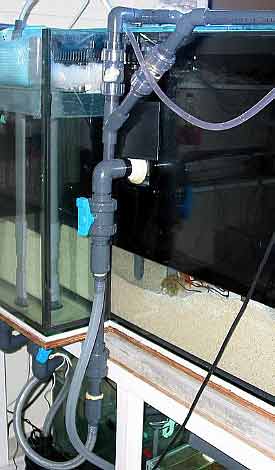
A closed-loop, connected to an Eheim pump
and a 1.25 hp Titanium™ chiller,
ensures that the tank remains chilled, even if the main return
pump fails for some unexpected reason or if the sump is taken
offline for servicing or cleaning.
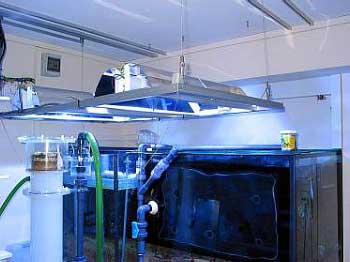
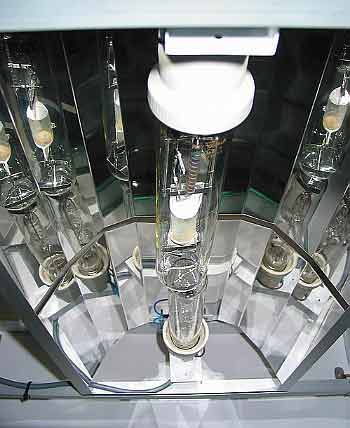
Lighting:
|
Lighting:
|
•
|
2
x 400 watts Iwasaki 6500K single-ended metal halide
bulbs |
|
•
|
2
x 400 watts Ushio 20K single-ended metal halide
bulbs powered by Blueline e-ballasts |
|
•
|
Reflectors: DIY Spiderlight-type mirror-finished
stainless steel |
|
|
Photoperiod:
| The
lights are on timers which come on at 4PM
and go off at 1AM daily. The 20K bulbs are
the first to come on and the last to go off.
|
|
|
When I decided to begin keeping SPS corals,
I wanted intense lighting! I sold my Aquamedic Aquasunlight
150 watt x 2 double-ended metal halide pendant and upgraded
to a total of 1600 watts of metal halide lighting. I chose
6500K and 20K color temperature metal halide bulbs with the
idea of combining the best of both their respective attributes:
the reputed fast growth rates from the Iwasakis and the wonderful
coral coloration provided by the 20K bulbs. I built a rail
system for my lightweight DIY light rack (made up of aluminum
'L-bars' riveted together) to mount the four reflectors. I
can easily push this whole light system completely away from
the top of the tank for easy maintenance. The Iwasaki bulbs
are side-by-side at the back of the tank and the Ushio blue
bulbs are side-by-side along the front. Together, they blend
well and give an intense, natural white look with no visible
banding due to the placement of the reflectors.
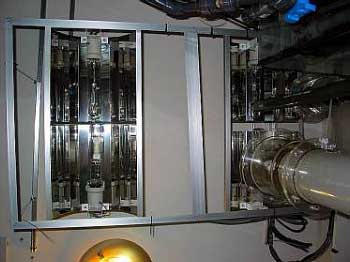
A photo showing the bulb placement described above.
Lessons Learned:
Unfortunately, two major overheating episodes
occurred within the past few years when I either stupidly
forgot to switch on the chiller pump, or the metal halides
stayed on continually due to timers which were not designed
for such a heavy load. After being out of town for a few days,
coming home to an overheated tank containing bleached, stressed
or dead corals left me determined to get rid of 'Mr. Murphy'
and his Law of 'whatever can go wrong WILL go wrong!' I have
since installed a thermal protection system consisting of
a thermal probe in my main tank designed to cut power to the
metal halides once the tank temperature reaches 29°C.
I would much rather come home to a dark tank than to a boiling
tank with 'cooked' livestock. Using high quality contactors
and timers helps ensure that no more overheating episodes
will ever happen due to cheap timers sticking.
Husbandry and Maintenance:
Water changes of approximately twenty-percent
are performed every two months. Sometimes, when I extend the
water change interval, I dose some QFI trace elements or magnesium,
iodine and strontium to supplement what my calcium reactor
can't provide. I don't use filter floss, nor do I use bioballs
in the sump, so maintenance is minimal. I clean the skimmer
collection cup only once every week, and wipe the salt creep
off the center brace and the metal halide reflectors every
month. Calcium and alkalinity levels are maintained with a
do-it-yourself calcium reactor, based on a popular German
design. It stands almost four feet high and contains roughly
26kg of CaribSea A.R.M. media.
|
My DIY Beckett skimmer, DIY calcium reactor and kalkreactor.
|
 |
For the occasional boost of calcium and
alkalinity levels, I now use Reefez™
Calcium Plus and Alkalinity Plus. An automatic T.U.B.B.Y.
water top-off device maintains the salinity level , and this
seems to be an effective and safe way of dosing kalkwasser
when used in conjunction with the kalkreactor. Additionally,
water top-offs with kalkwasser are performed nightly to help
boost the pH.
"What's going on?"
My Sunset Anthias.
Feeding:
The fishes feed about five times daily
on a combination of Cyclop-eeze©,
frozen Mysis and brine shrimp, Ocean Nutrition Formula
Two pellets and various other flake foods, as well as Nori
obtained from the local supermarket.
 |
|
Salmon-pink A. millepora fragment.
|
The SPS corals are fed daily or every other
day with Golden Pearls of different micron sizes and with
Liquid Life's Coralplankton™.
They get live rotifers when I have time to resume my culturing
regime or when I'm fortunate enough to receive some from fellow
hobbyists. I see substantial growth of my SPS corals and attribute
that partly to the feeding of zooplankton/phytoplankton substitutes.
I also dose either DT's live phytoplankton,
Liquid Life's Bioplankton™ or
my own home-cultured Nannochloropsis phytoplankton
to the tank. The explosive growth of sponges, tiny tubeworms,
tunicates, various 'pods' and other micro life in my tank
apparently corresponds to this provision of phytoplankton.
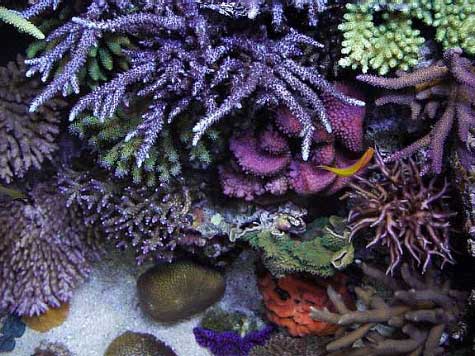
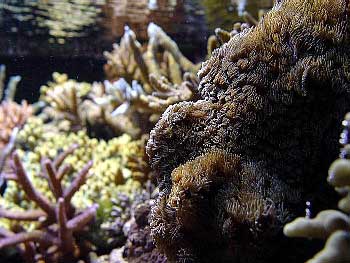
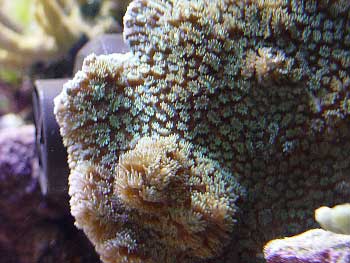
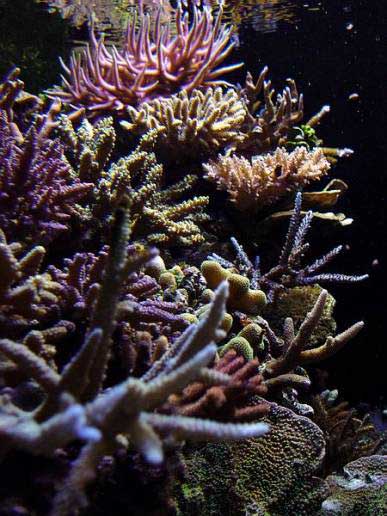
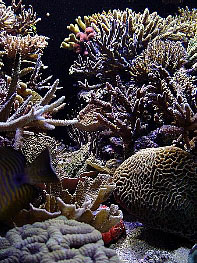
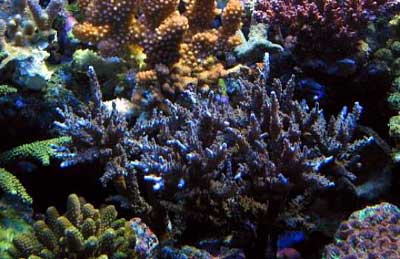
Inhabitants:
The tank houses roughly 72 small-polyped
stony colonies and fragments, consisting mostly of Acropora,
but also Pocillopora, Astreopora, Hydnophora,
Stylophora, Porites, and Montipora sp.
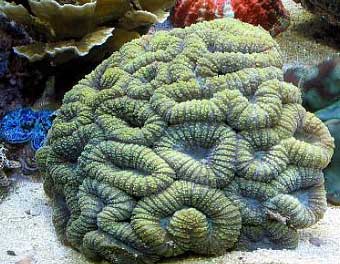
The large-polyped stony corals number around 14, and consist
mostly of various brain corals, Scolymia and Blastomussa
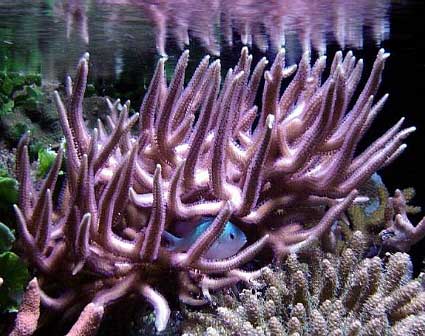
sp. Soft corals include a rapidly growing white pulsing Xenia
colony, green star polyps, several Ricordea yuma and
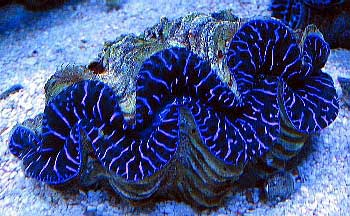
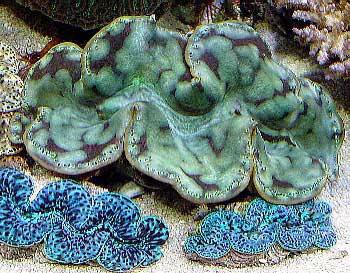
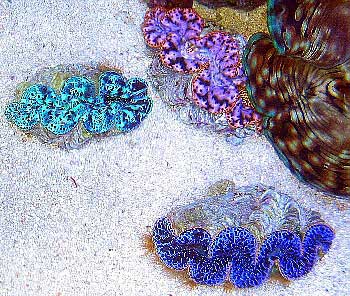
assorted gorgonians. Additionally, five T. maxima clams
and one T. derasa clam make this tank their home.
|
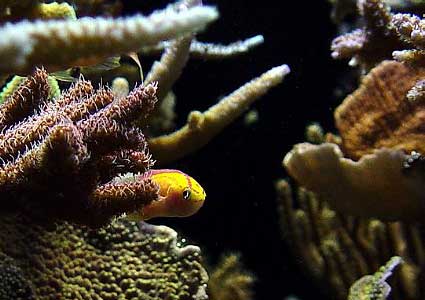
Fish:
|
|
1
Red Sea Sailfin tang
|
1
Powder-blue tang
|
|
1 Flasher wrasse
|
1
Foxface rabbitfish
|
|
5
Bartlett Anthias
|
2
Sunset Anthias
|
|
2
Dispar Anthias
|
2
Truncate Anthias
|
|
7
Blue-green Chromis
|
2
Evansi Anthias
|
|
1
Scooter blenny
|
1
Psychedelic mandarinfish
|
|
1
Cleaner wrasse
|
2
Red firefish
|
|
1
False percula clownfish
|
|
Invertebrates:
|
|
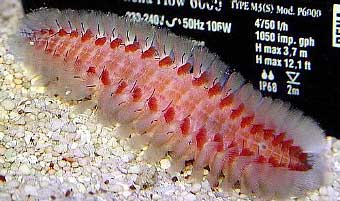
1
fireworm!
|
4
Peppermint shrimp
|
|
1 Emerald crab
|
2
Skunk cleaner shrimp
|
|
1
Sea cucumber
|
1
Tigertail Sea cucumber
|
|
Numerous
Christmas tree worms
|
Numerous
Coco worms
|
|
Numerous Acropora
crabs, mini brittlestars, Nassarius snails &
turbo snails
|
At night, the Blue-green Chromis love to sleep in the
branches of
the Seriatopora hystrix colony.
Wrap-up:
I still have much to learn about SPS keeping
and it's interesting to observe how different corals adapt
to different lighting regimes, various water flow patterns
and how they react to each other when territorial disputes
arise.
Some of my more fascinating experiences
were seeing a Pocillopora coral 'burn' an Acropora
staghorn, learning that Seriatopora hystrix could hurt
Pocillopora and that a brain coral and staghorn can
maintain a 'no man's land' between them. It was, indeed, an
eye-opening event to see my two yellow A. humilis spawn
simultaneously.
Growth
Sequence
 |
|
This blue staghorn, photographed on 9/10/03, was about
a year old after having grown from a three-inch fragment.
|
 |
|
The same blue staghorn photographed on 2/13/04.
|
 |
|
And now a month later on 3/21/04!
|
An important lesson I learned is never
to underestimate the toxicity of dead flatworms, and that
it can bleach or darken certain corals (most of the pictures
here are post-Salifert Flatworm Exit treatment with most of
the Montipora spp. corals and my pink table Acropora
having been affected).
One of my two yellow A. humilis that spawned
simultaneously in my reef tank.
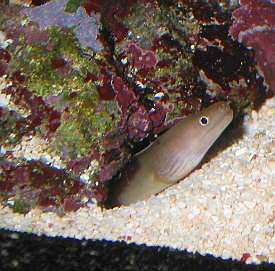
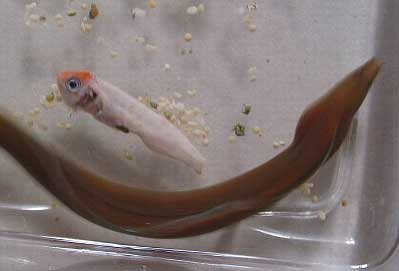
I also learned that a large Porites
coral with Christmas Tree worms can also contain hitchhikers
which can eat an Anthias a day! I spent a week of sleepless
nights trying to catch and remove a juvenile brown moray eel
hitchhiker! A fellow reefkeeper then quickly adopted it before
I relished evil thoughts of turning it into a Unagi sushi
dish!
|
The hitchhiker that killed my school of Dispar Anthias.
|
The guilty party reveals damning evidence!.
|
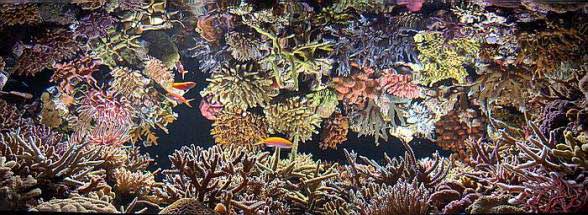
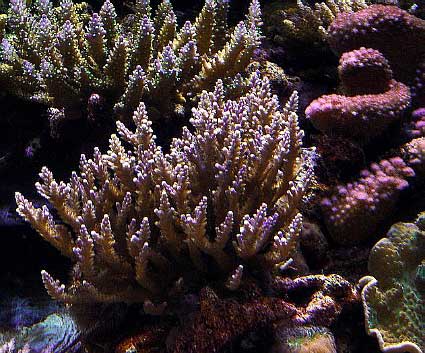
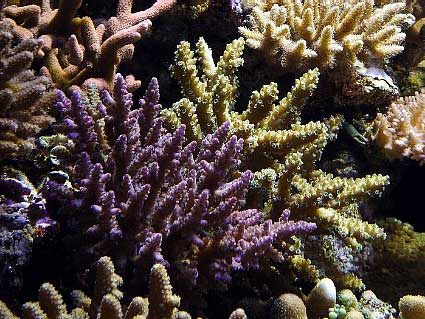
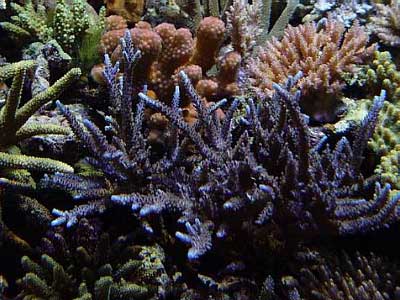
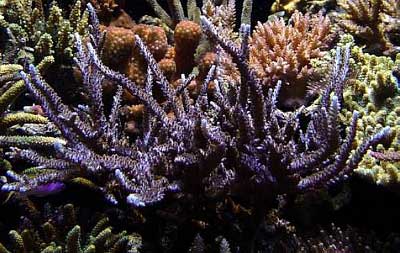
A purple-tipped A. nana with a pink Pocillopora
eydouxi on the right. Another
purple-tipped Acropora sp. is visible at the top.
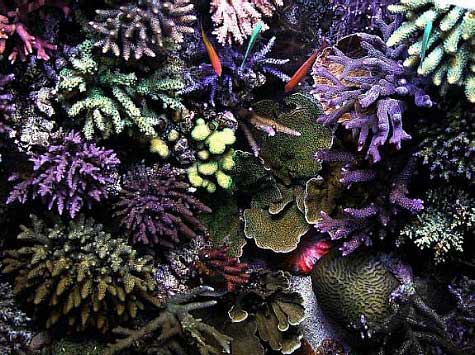
Assorted Acropora colonies with orange Montipora
digitata at the top left corner.
A top-down view over the left side of the tank. (I pushed
away the light hood for this
shot, so mostly blue light illuminated the tank).
Acknowledgements:
My thanks go out to fellow Reef Central
members who taught me almost everything I needed to know about
modern reefkeeping. I would also like to thank three local
reefers, Robe, Morgan and Tanzy, of the Singapore Reef Club
(www.sgreefclub.com)
who have unselfishly shared their personal experiences and
knowledge, and inspired me to excel in the art of SPS coral
keeping.
Achilles (Tang)
Feel free to comment or
ask questions about my tank in the Tank of the Month thread
on Reef Central.
|