|
Using insulation foam as a method to aquascape
a tank was an idea that had been stirring in my head for some
months now. Ever since I saw this thread
from Reef Central on Tanu's tank, I just couldn't help but
delve into this subject further, as I was planning to set
up a small seven gallon DIY nano tank and wanted to incorporate
this idea into it's design.
Now, with a fair amount of research under
my belt, I decided to try my hand at this stuff. For those
of you who are unfamiliar with this idea, the basic premise
is to spray/apply insulation foam to the back and/or sides
of the tank, and then push pieces of live rock, crushed coral,
or whatever would look interesting and natural as a backdrop,
into the drying foam. The foam dries, and hardens somewhat,
and creates a "living" backdrop. Additionally, it
allows the un-natural looking plumbing, overflows, etc., to
be hidden.
I decided to foam the back, and one side
of the cube. Also, I embedded a return pipe in the foam to
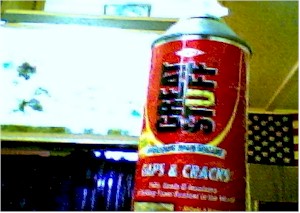
hide its ugly appearance. First, the foam I used was a rigid
polyurethane foam. This stuff can be found at Home Depot,
but I bought mine at Menard's for a little over $3 a can.
The exact foam I used is called "Great Stuff" made
by DOW. The type was just the regular, low expansion, rigid
type. There are other types for windows, etc. that expand
more, but this is not what I wanted. Here is a picture so
you know what to look for:
Next, I decided to test this stuff out
on a sample piece of acrylic to practice and to just get a
feel for working with it. Right away, I noticed a few things
about this material:
-
This stuff is very sticky; about
the consistency of a roasted marshmallow. If you have
ever felt that gooey stuff on your fingers, you know what
I'm talking about.
-
The foam will not adhere to a vertical
wall, so you have to lay the tank/surface flat and work
on applying the foam to one side at a time. Be sure to
allow maybe an inch or a half-inch for some expansion
of the foam.
-
This is a one-shot deal. Once you start
using it, you have to finish within a few hours, as it
seals itself shut. (I, of course, read this AFTER I had
casually begun my work on the test piece, and then ran
frantically to get everything ready for the real thing!)
I sprayed the foam, let it sit for about
five minutes so that it started to expand a little, then added
some small pieces of live rock. Then, I sprinkled some crushed
coral on top of that, followed by some Southdown sand to give
the surface of the foam some more texture.
Next, I began work on the actual tank.
I followed the same procedure as mentioned above, only I used
more rock and crushed coral. In hindsight, I would not have
used the sand at all, or not as much; most of it didn't really
stick to the foam once it had dried.
I masked off the overflow notches in the
back of my tank so that I would still have a working overflow
when I was done. I don't think it was all that critical though,
as the foam is still somewhat workable once completely hardened.
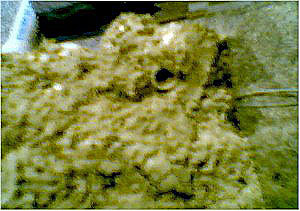
You can quite easily cut it with a knife. Here (right) is
a picture of the return pipe enclosed in foam/rock:
Once the back was sufficiently hardened,
which took about an hour, I turned the tank on its side and
repeated the procedure. Once everything was all hardened and
dry, I rinsed it out in the sink, and it was a finished product.
(I am planning to do one more rinse tomorrow to wash out any
residue that might have been left by the foam).
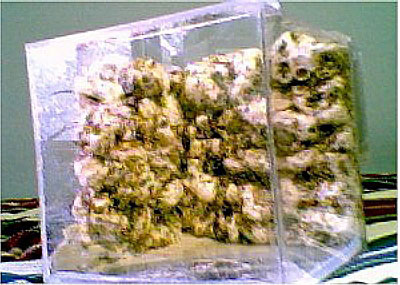
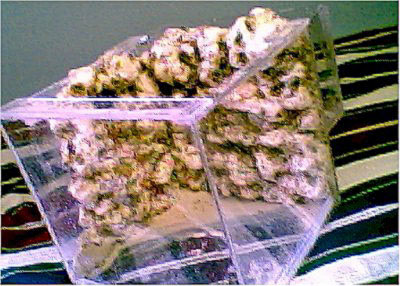
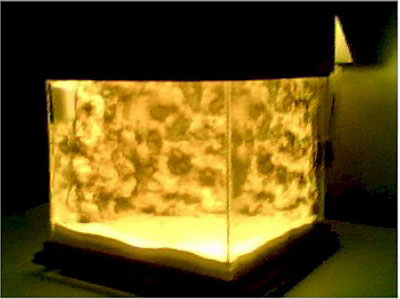
Top: finished product.
Middle/Bottom: view of aquascaping underwater (with
incandescent lighting).
Frequently Asked Questions:
Is this stuff really safe?
Remember that cool kid back in high school?
You know, the one that would always try to get you to light
up a cigarette, or take a drink? "C'mon man, everbody's
doin' it; it's not gonna hurt you…" Well, I am certainly
no chemist, so I will resort to the age-old tactic of peer
pressure.
This practice of foaming is somewhat popular
in Europe, and it's also used in the construction of public
aquariums and Koi ponds. While it is usually done on planted
freshwater tanks, there have also been several aquarists that
have used the foam in reef tanks and reported no ill effects.
I would, however, recommend at least rinsing
off the foam and waiting a few days for it to fully cure before
putting it to use. I have noticed that water slowly seeps
inside, so to ensure a proper cleaning, perhaps a soak instead
of a rinse would be more beneficial. And if you're paranoid
like me, you can always add some carbon to your filtration
regime to cover all the bases.
What if I don't like it? Am I stuck
with a "foamed" tank?
There are several ways to get around foaming
the tank walls directly. If you really want to try this while
your tank is set up, or if you want to keep the foam wall
detachable, you can simply spray the foam onto a piece of
acrylic, and then attach it to the aquarium wall with silicone,
epoxy, or whatever adhesive is most appropriate for your situation.
Personally, I just spray right onto the tank walls. There
really is little "art" involved, (at least when
I do it), just as long as you get the rocks in before the
foam cures, you'll be okay.
I also noticed with my test piece that
I was able to peel off the entire foam mass from the original
acrylic. The foam retained its shape, and the acrylic was
unscathed afterward. I can't speak for certain on glass, as
its adhesion properties may be different, but on my acrylic
tanks, I'm not in the least bit worried that the foam will
ruin my tank.
How much area will one 12 oz. can
of "Great Stuff" cover?
This will mostly depend on how thick you
want the foam to be. In a nano tank, where smaller rocks are
used, it is not necessary to spray on a very thick layer of
foam, so you could expect to get up to 2 sq/ft per can. On
the other hand, if you are going to use larger pieces of rock,
a much thicker bed of foam for the rocks to sit in will be
needed. For thicker backgrounds, expect to get 1 - 1.5 sq/ft
per can.
Remember, you are trying to embed the bulk
of the rock in the foam; take this into account when deciding
how much foam to use. If the rocks are simply set on top of
the foam and they aren't pushed in, or they don't sink in
from their own weight, the foam may partially pull away from
the rock as it cures, creating the potential for the rock
to become loose or possibly fall out of the foam completely.
This is why I don't recommend using sand or smaller pieces
of crushed coral - they can't adequately be pressed into the
foam.
|