|
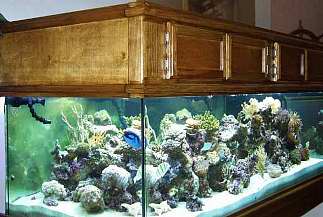
I outgrew my first reef tank, a 30-gallon
acrylic aquarium with a built-in trickle filter, in eight
months. The 90-gallon glass tank that followed was running
for two years before it, too, was outgrown. This article is
about the upgrade to my new 220-gallon glass tank. With each
of my first two tanks I learned invaluable lessons that became
more firmly engrained in a direct relationship to the amount
of time it took to clean up the mess. (I wish I had a dime
for every quart of water I've mopped off the floor.) Now,
sitting in front of my gorgeous new tank, I'm finally able
to say "I think I did it right this time." This
is not to say that everything is perfect; it simply means
I think I've done more things right than wrong. The tank has
been up and running for nine weeks now, and I'm very happy
with both the setup of the system and the improvements in
the overall environment for my animals.
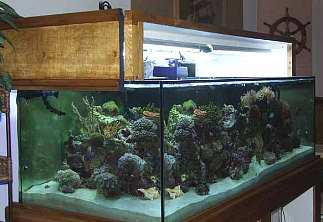
From a maintenance standpoint, the design
of the stand and canopy was critical. My husband, while never
claiming to be a carpenter, nonetheless designed and built
both the stand and canopy using my 90-gallon stand and a set
of Do-It-Yourself
plans from Reef Central as guides. He was determined to
correct some of the shortcomings of my previous stand and
he did a wonderful job, if I do say so myself. One of these
improvements was the interior finishing. The sides and bottom
of the new stand are lined with Formica (the material that
is laminated to particle board to make kitchen countertops)
and all the inside seams are caulked to make it waterproof.
The interior of the canopy was primed and painted white. As
is often the case, my previous stand was lined with unfinished
particleboard that would swell at the mere mention of the
word "water". (I believe a little time spent waterproofing
the inside of any stand and canopy prior to installation is
well worth the effort.) The design of the canopy is simply
ingenious. It was built with a removable front panel secured
by wooden dowels.
With the front panel removed, the canopy
slides backwards, or forwards, up to ten inches, allowing
complete access to the front or rear walls of the tank. I
can now do almost any type of maintenance, including removing
or placing large rocks, without having to work through the
doors in the front of the canopy or needing assistance to
remove the canopy.
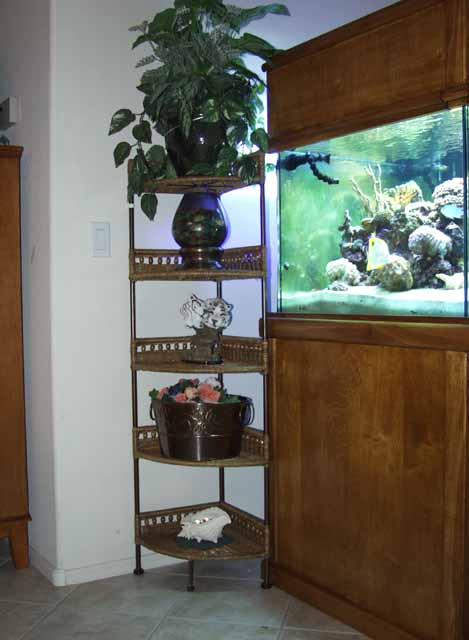
The second important maintenance improvement
was the placement of the tank twelve inches from the wall.
Some of you may be thinking, "So what? Everyone knows
that." Go ahead, snicker if you must, but my 90-gallon
tank was set so close to the wall that I could not get behind
it. (Well, you don't want to be able to see all the ugly equipment
BEHIND the tank, now do you?) This poor planning was never
so apparent as when the main circulation pump failed and had
to be replaced. Removing it required contortions that no one,
save a yoga master, should ever attempt.
|
I solved my aesthetics issue of the
large gap behind the tank with a well-placed corner
shelf that nicely hides the equipment in back. (Also
ingeniously built, the shelf is attached to the wall
on the left side and swings open like a door to allow
easy access to the back of the tank.)
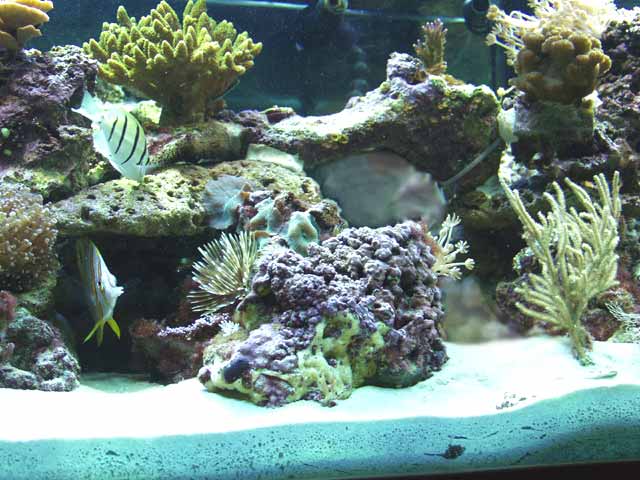
Prior to its purchase, I put some
serious thought into the dimensions of my new tank.
I chose a tank that is 72" long by 30" wide
by 24" deep for several reasons. The large footprint
allows maximum space for creative aquascaping and an
extensive sand bed area. All of the rockwork is far
enough away from the glass to allow me to use a magnet
cleaner on all the viewable surfaces without catching
the retrieval string on any delicate coral branches.
With the 24" depth I can reach the floor of the
tank with my hand by standing on a stepstool. Yes, I
know there are numerous long-handled tools available
for deeper tanks, but I still find it easier to do tasks,
such as moving a coral, by hand.
|
|
The design of the tank's circulation
and plumbing scheme was also carefully considered. The tank
was predrilled for two drains in the built-in overflow box,
as well as three holes across the back wall of the tank for
the circulation pump return lines. I use two pumps whose output
is split into two lines each. Three of the four return lines
are attached directly to the tank through bulkheads fitted
with flexible ball-socket tubing that allow me to direct the
water flow to cover the whole tank. The fourth line is connected
to a SeaSwirl oscillator mounted to the edge of the tank.
This means I am not using any power heads inside the tank.
I see this as a major coup, since not only does this eliminate
the chance of animals being injured or killed by being sucked
into a power head, but it also eliminates the extreme irritation
of suction cups that don't… suck. (Or perhaps they do
and that's the point!). In my previous tank, I had quite the
sand storm when the power head came loose and aimed directly
at the bottom. It could have been worse, though; I was lucky
the power head didn't aim straight up and pump untold gallons
of water all over my floor!
The two drains in the overflow box are
fitted with PVC standpipes drilled with holes and capped with
U-shaped fittings. The fittings were made from two 90-degree
PVC elbows glued together fitted with a short piece of PVC
pipe at the end. The standpipes keep the overflow box full
of water, so there is no sound of water crashing into the
box. The U-fittings put the intake just below the waterline,
so there is no sound from the water being sucked into the
standpipes. In fact, my new tank is much quieter than my 90-gallon
tank that always had that slightly irritating bathtub-draining
sound. Other plumbing improvements include using ball valves
in front of each pump and check valves on the return lines
into the tank. The ball valves allow easy removal of the main
circulation pumps for maintenance or repair, and the check
valves prevent the sump from overflowing in the event of a
power outage. I opted for two 1200 gallon per hour return
pumps rather than one larger pump to allow for a pump failure
without compromising the whole system.
Electrical improvements were not overlooked
in designing the new system. First, my husband installed a
shop-grade five-foot power strip on the inside back wall of
the stand. This keeps all electrical plugs off the floor and
away from any water spills. Additionally, the spacing of the
power strip is ideal for the X-10 appliance modules I use
with my Neptune Aquacontroller. The controller itself was
put on an uninterruptible power supply. Clean, consistent
power to my controller means less chance of failure.
|
|
A water spill on the
ballasts with my first tank taught me the futility
of placing them on the floor. Mounting the ballasts
to the sidewall of my previous 90-gallon stand protected
them from wetting, but resulted in an 'octopus' of
wiring and timers that was impossible to keep neat
and took up too much valuable space inside the stand.
All lighting ballasts are now securely mounted on
top of the canopy. While my husband and I still have
to build some sort of fence to hide the ballasts from
the view of anyone taller than five foot three, I
think this is a small price to pay.
|
I've also learned a thing or two from my
previous endeavors about setting up the environment inside
the tank. I believe my best discovery to date is the Orange
County silicate sand (size 60) I bought from a local sand
and gravel supplier.1 It comes in hundred pound bags and
is used, for one thing, in ashtrays in hotel lobbies. The
advantages to this sand are: it is inexpensive ($6.50 per
hundred pounds); it does not need to be washed and does not
cloud the tank; and, best of all, the sand bed critters seem
to thrive in it. (I had used the same sand in my 90-gallon
tank for over a year with great results. No clumping, good
denitrification and healthy critter counts.) I poured five
hundred pounds of sand in my tank, which made a six-inch sand
bed, added my pre-mixed saltwater, and in less than an hour
the water had cleared sufficiently to allow me to work with
the live rock.
Concerning live rock, I've conquered
my fear of the drill and masonry bit and found that it is
really quite easy to drill holes in Fiji rock. Cable ties,
pieces of solid plastic coat hangers (used as dowels) and
underwater epoxy, work wonders to secure reef structures.
I was able to build much more interesting structures with
caves and arches using far less rock, secure in the knowledge
that it will withstand the bulldozing of turbo snails or abalone.
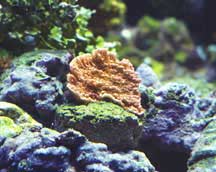
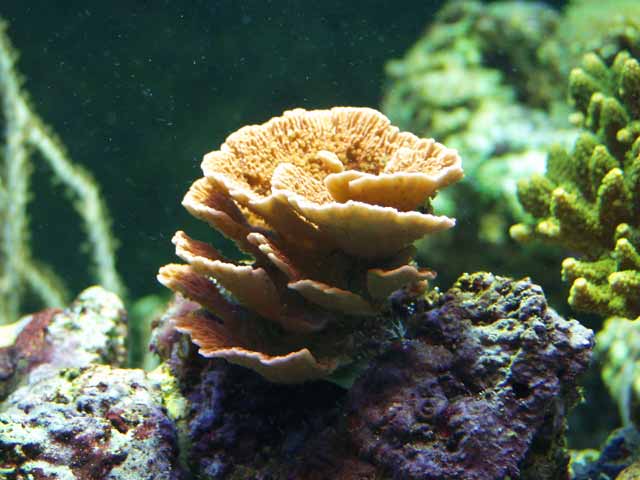
Last, but certainly not least, I have learned
to give all the animals plenty of growing space. It is truly
amazing how, in less than a year, a coral fragment the size
of a nickel became a colony the size of a softball.
I have vowed to resist the
urge to buy too many new animals to fill up all the empty
spaces in my new tank. I know my current animals will continue
to grow and will expand into the extra space in their own
good time.
Basically, I have to say I couldn't be
happier with my new tank. I know that I owe its success to
the experiences, hard lessons and spilt water from my first
two tanks. Whatever doesn't drown you makes you better, right?
|